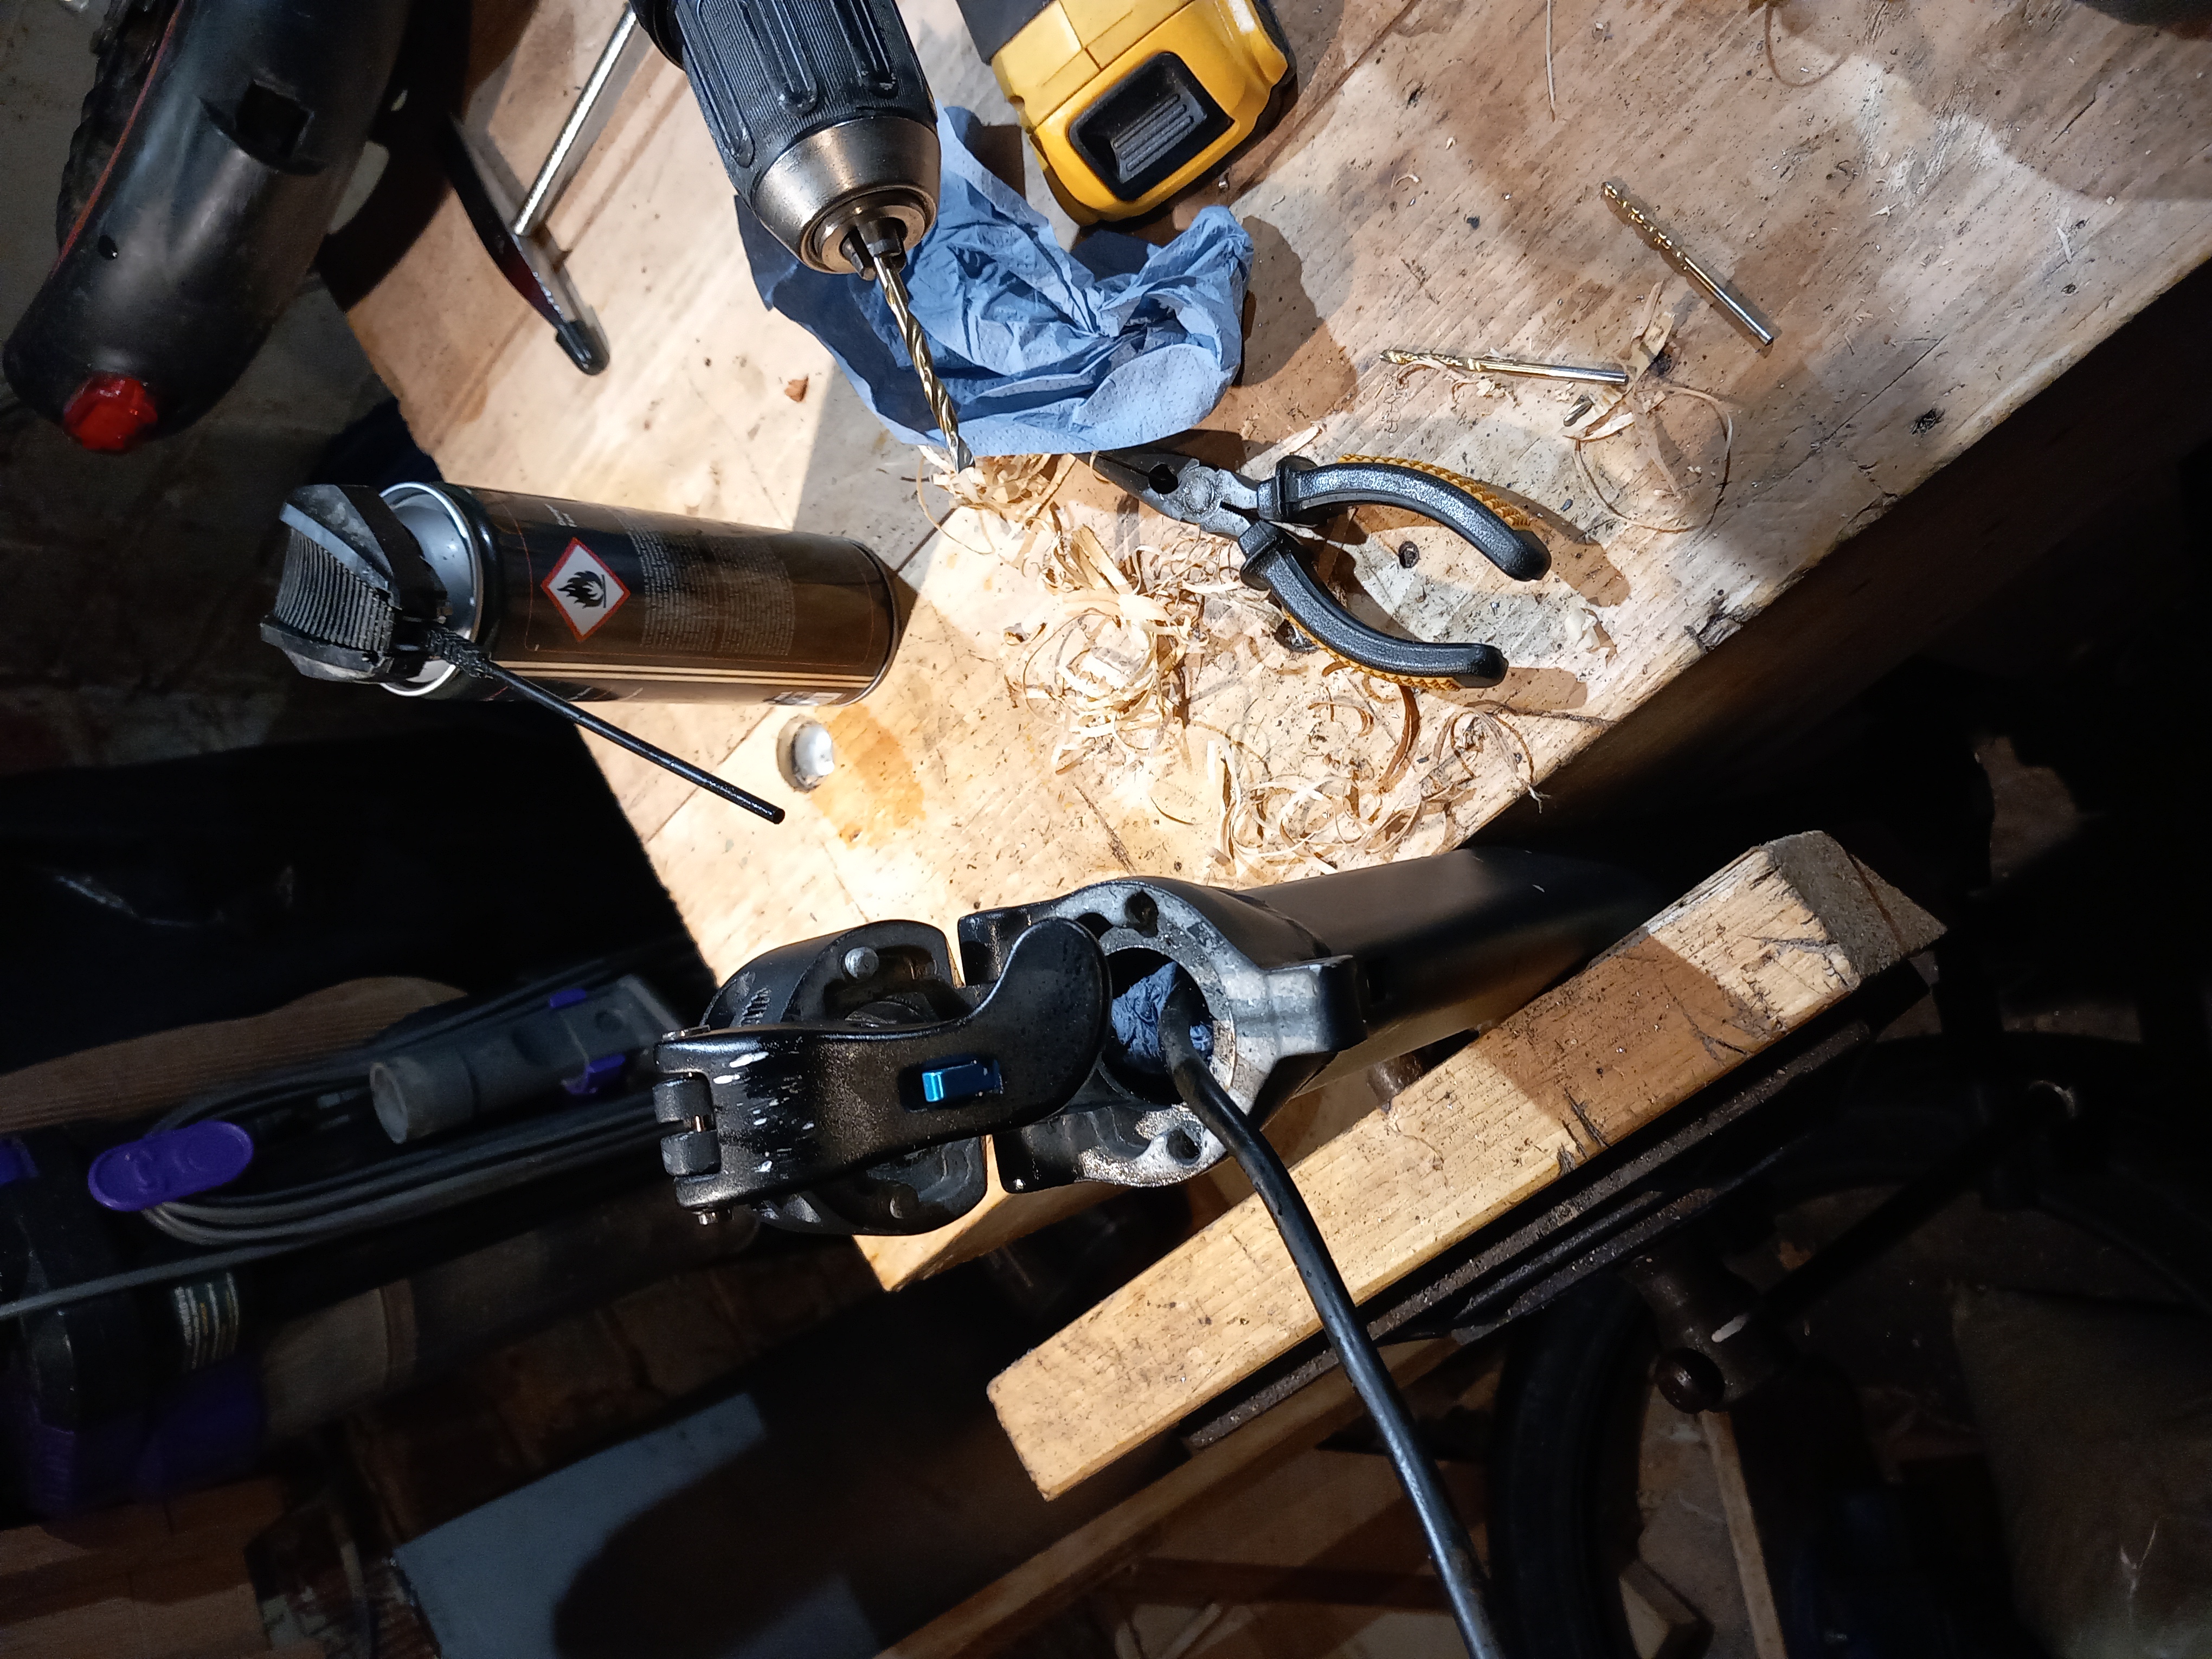
Here is one of those electric scooters, already anaethetised ready for surgery. It’s in a pretty sorry state: the front fork has sheared right off and is bent and mangled, while the steering bearing is loose and wobbles alarmingly. The thing is almost impossible to open, but can be forced.
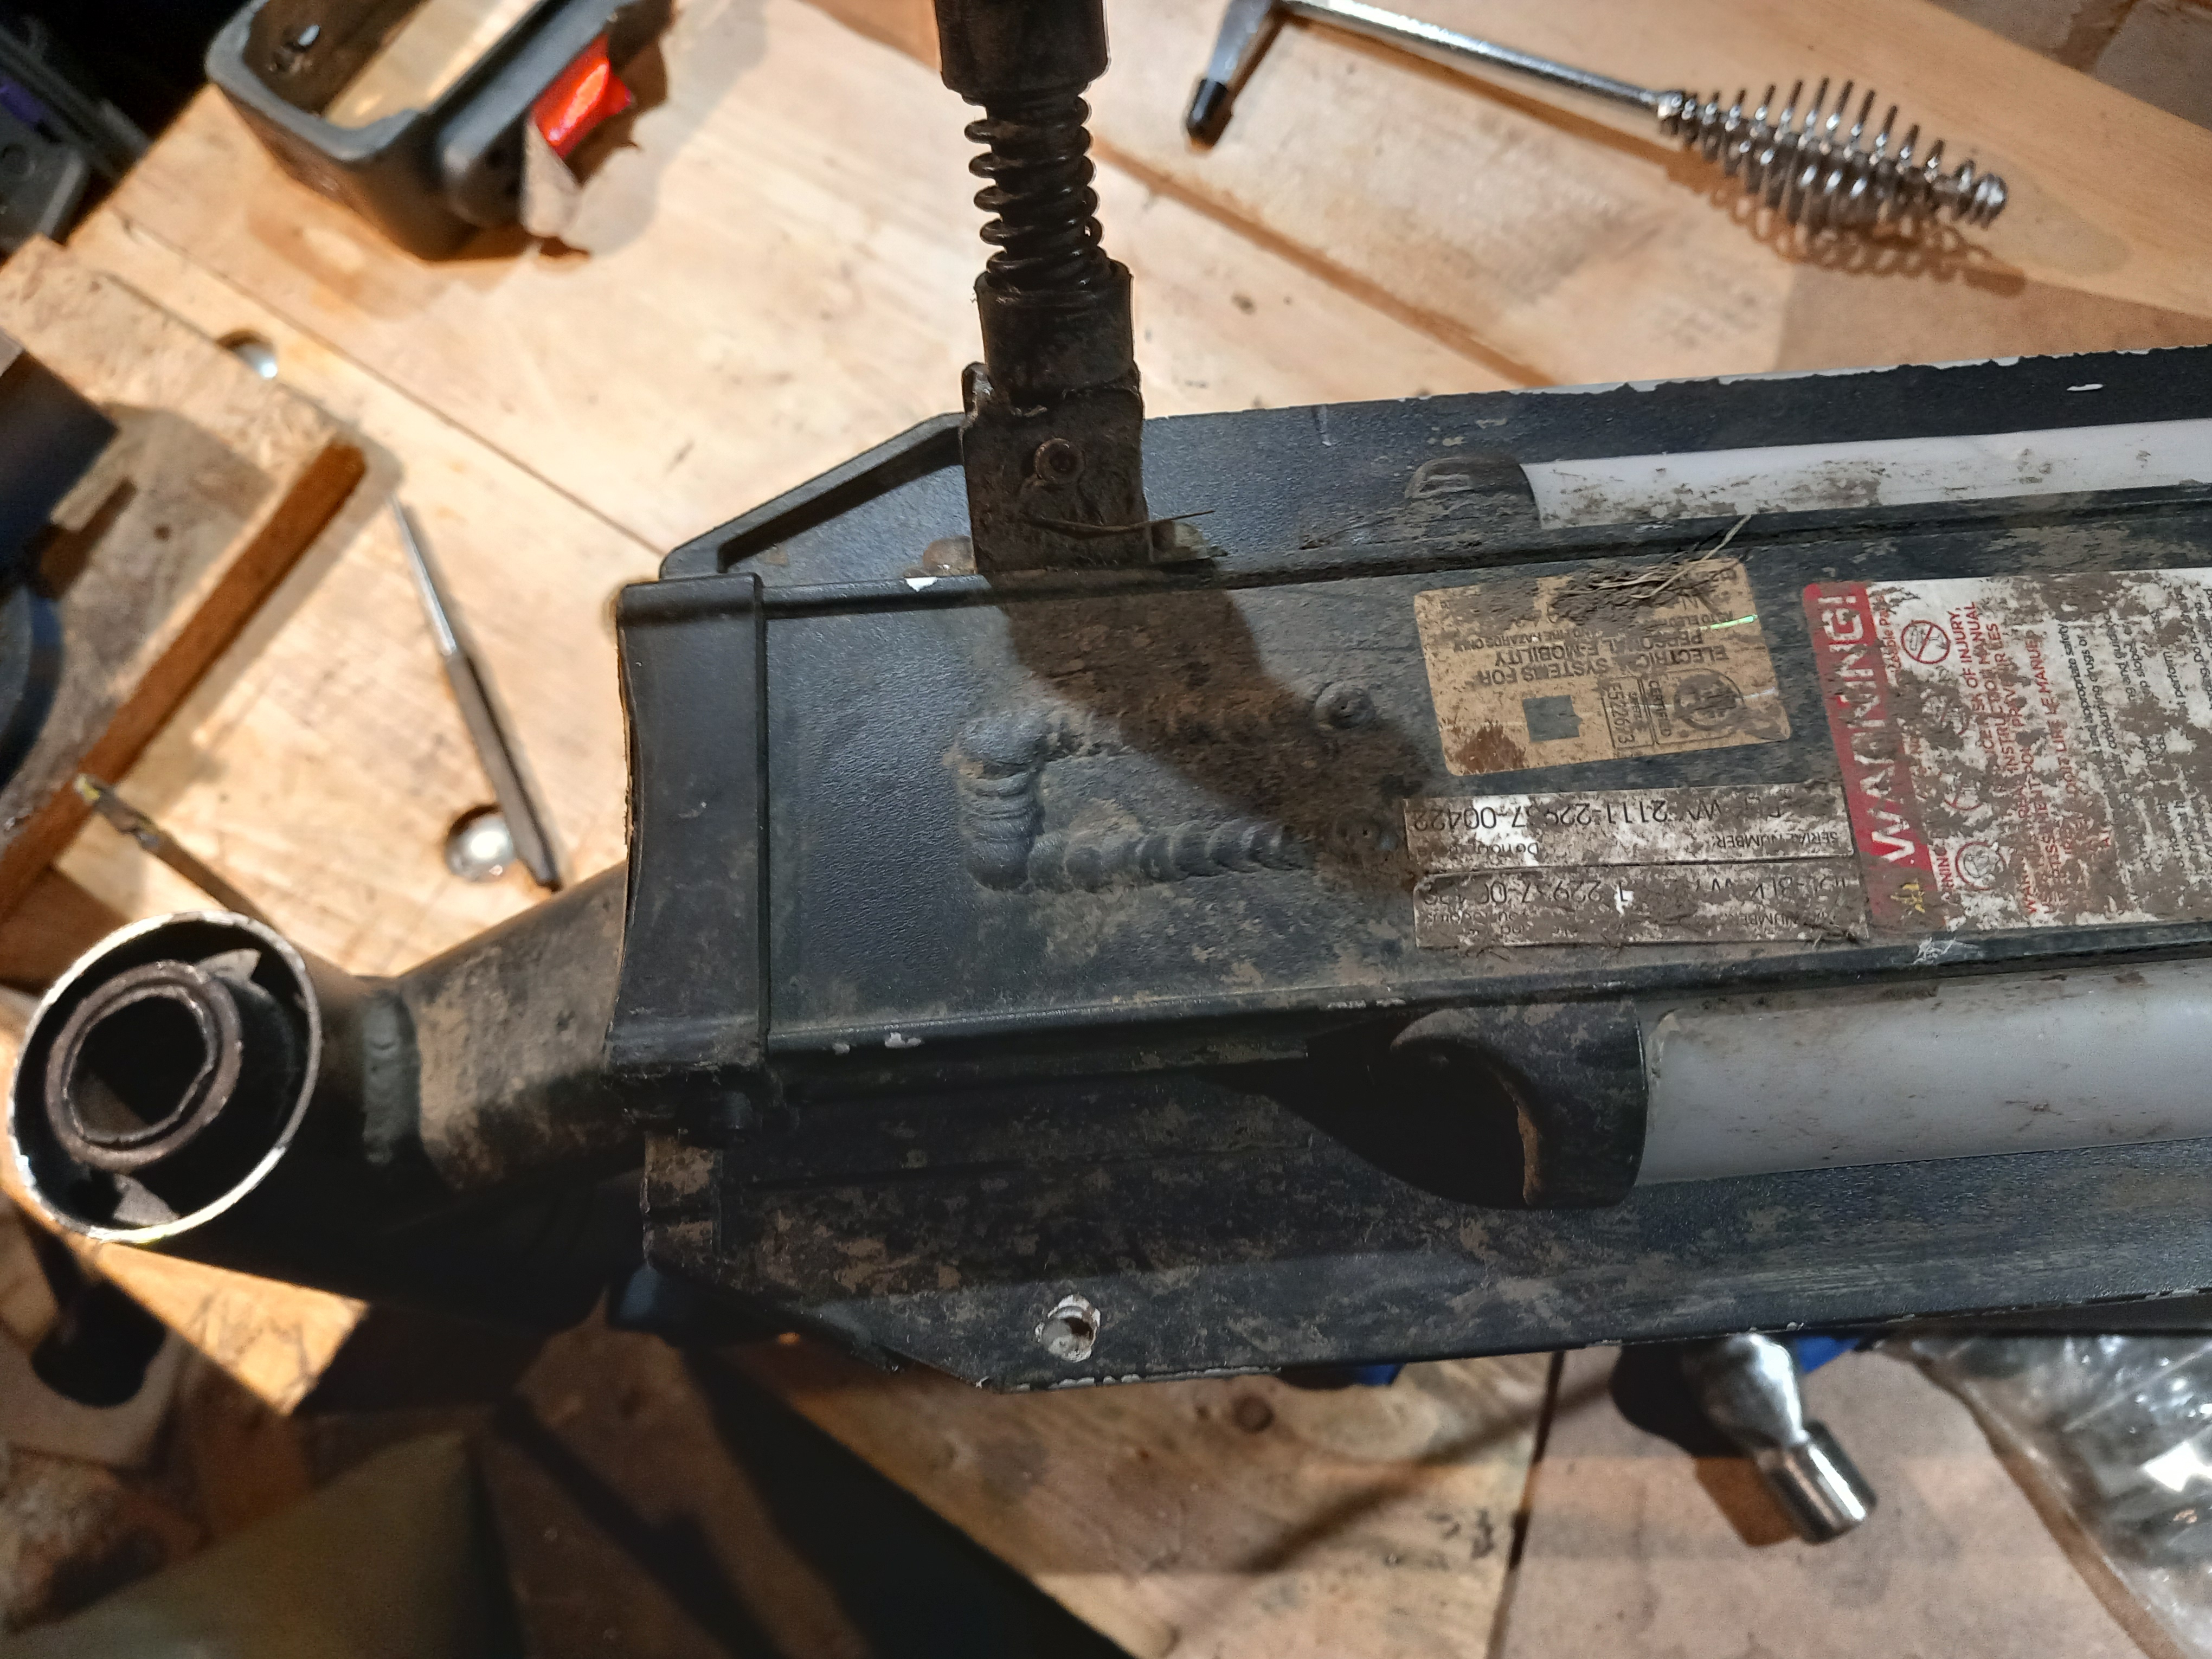
To get it into this state I had to cut the two cables which (in this particular model) are threaded through the centre of the front fork tube, one exiting out the bottom and terminating in the motor, the other exiting internally via a slot and ending up inside the footboard, where it appears to control some lights. I tried everything to avoid cutting these cables: the hub of the wheel unscrews, but it is directly connected to the motor and sits on the main bearing. I could lever it up a bit with screwdrivers but I don’t have a puller for something like that, or anything to pull from, so that was tapped back down and put together again. Then I tried the other end, but there is no connector inside the front tube before the battery, and taking the handlebars off to try to free the battery that way only earned the discovery that the handlebar assembly is pretty much impossible to fit together: they’ve crammed so much wire in it burts open as soon as you remove the screws. So it was cut:
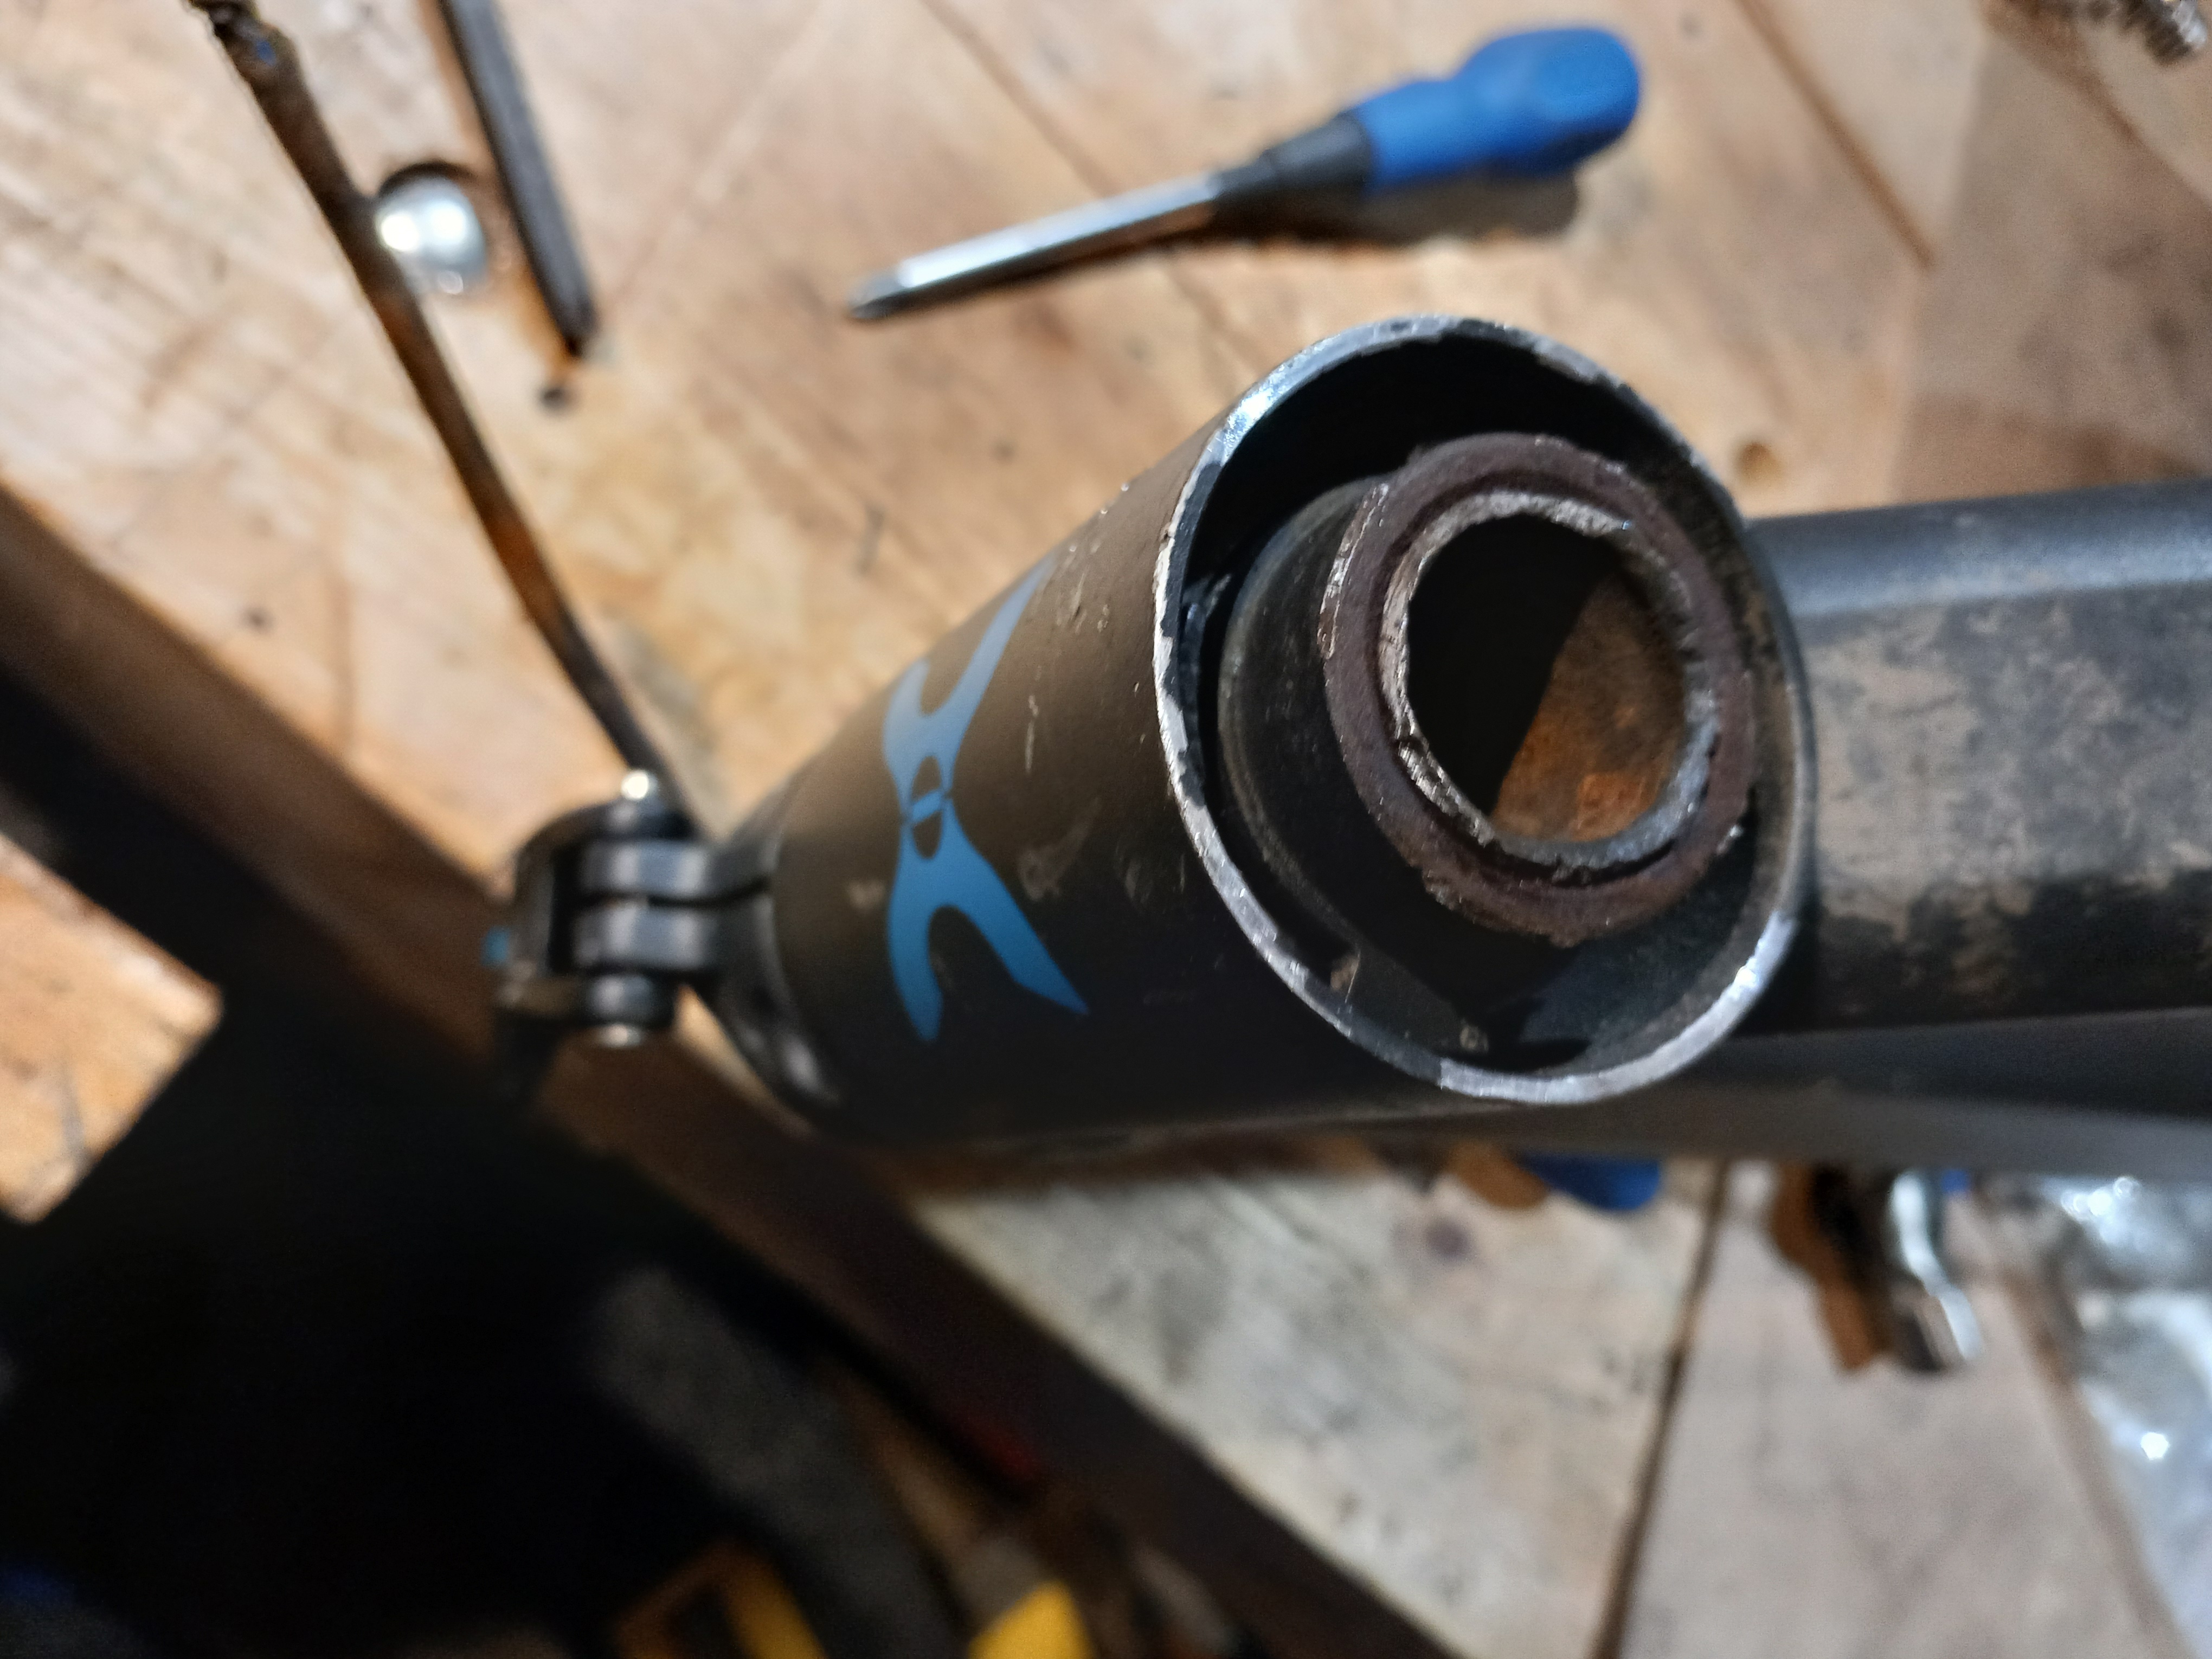
Ouch. Now I’m committed to this thing. Will the tube come out the top?
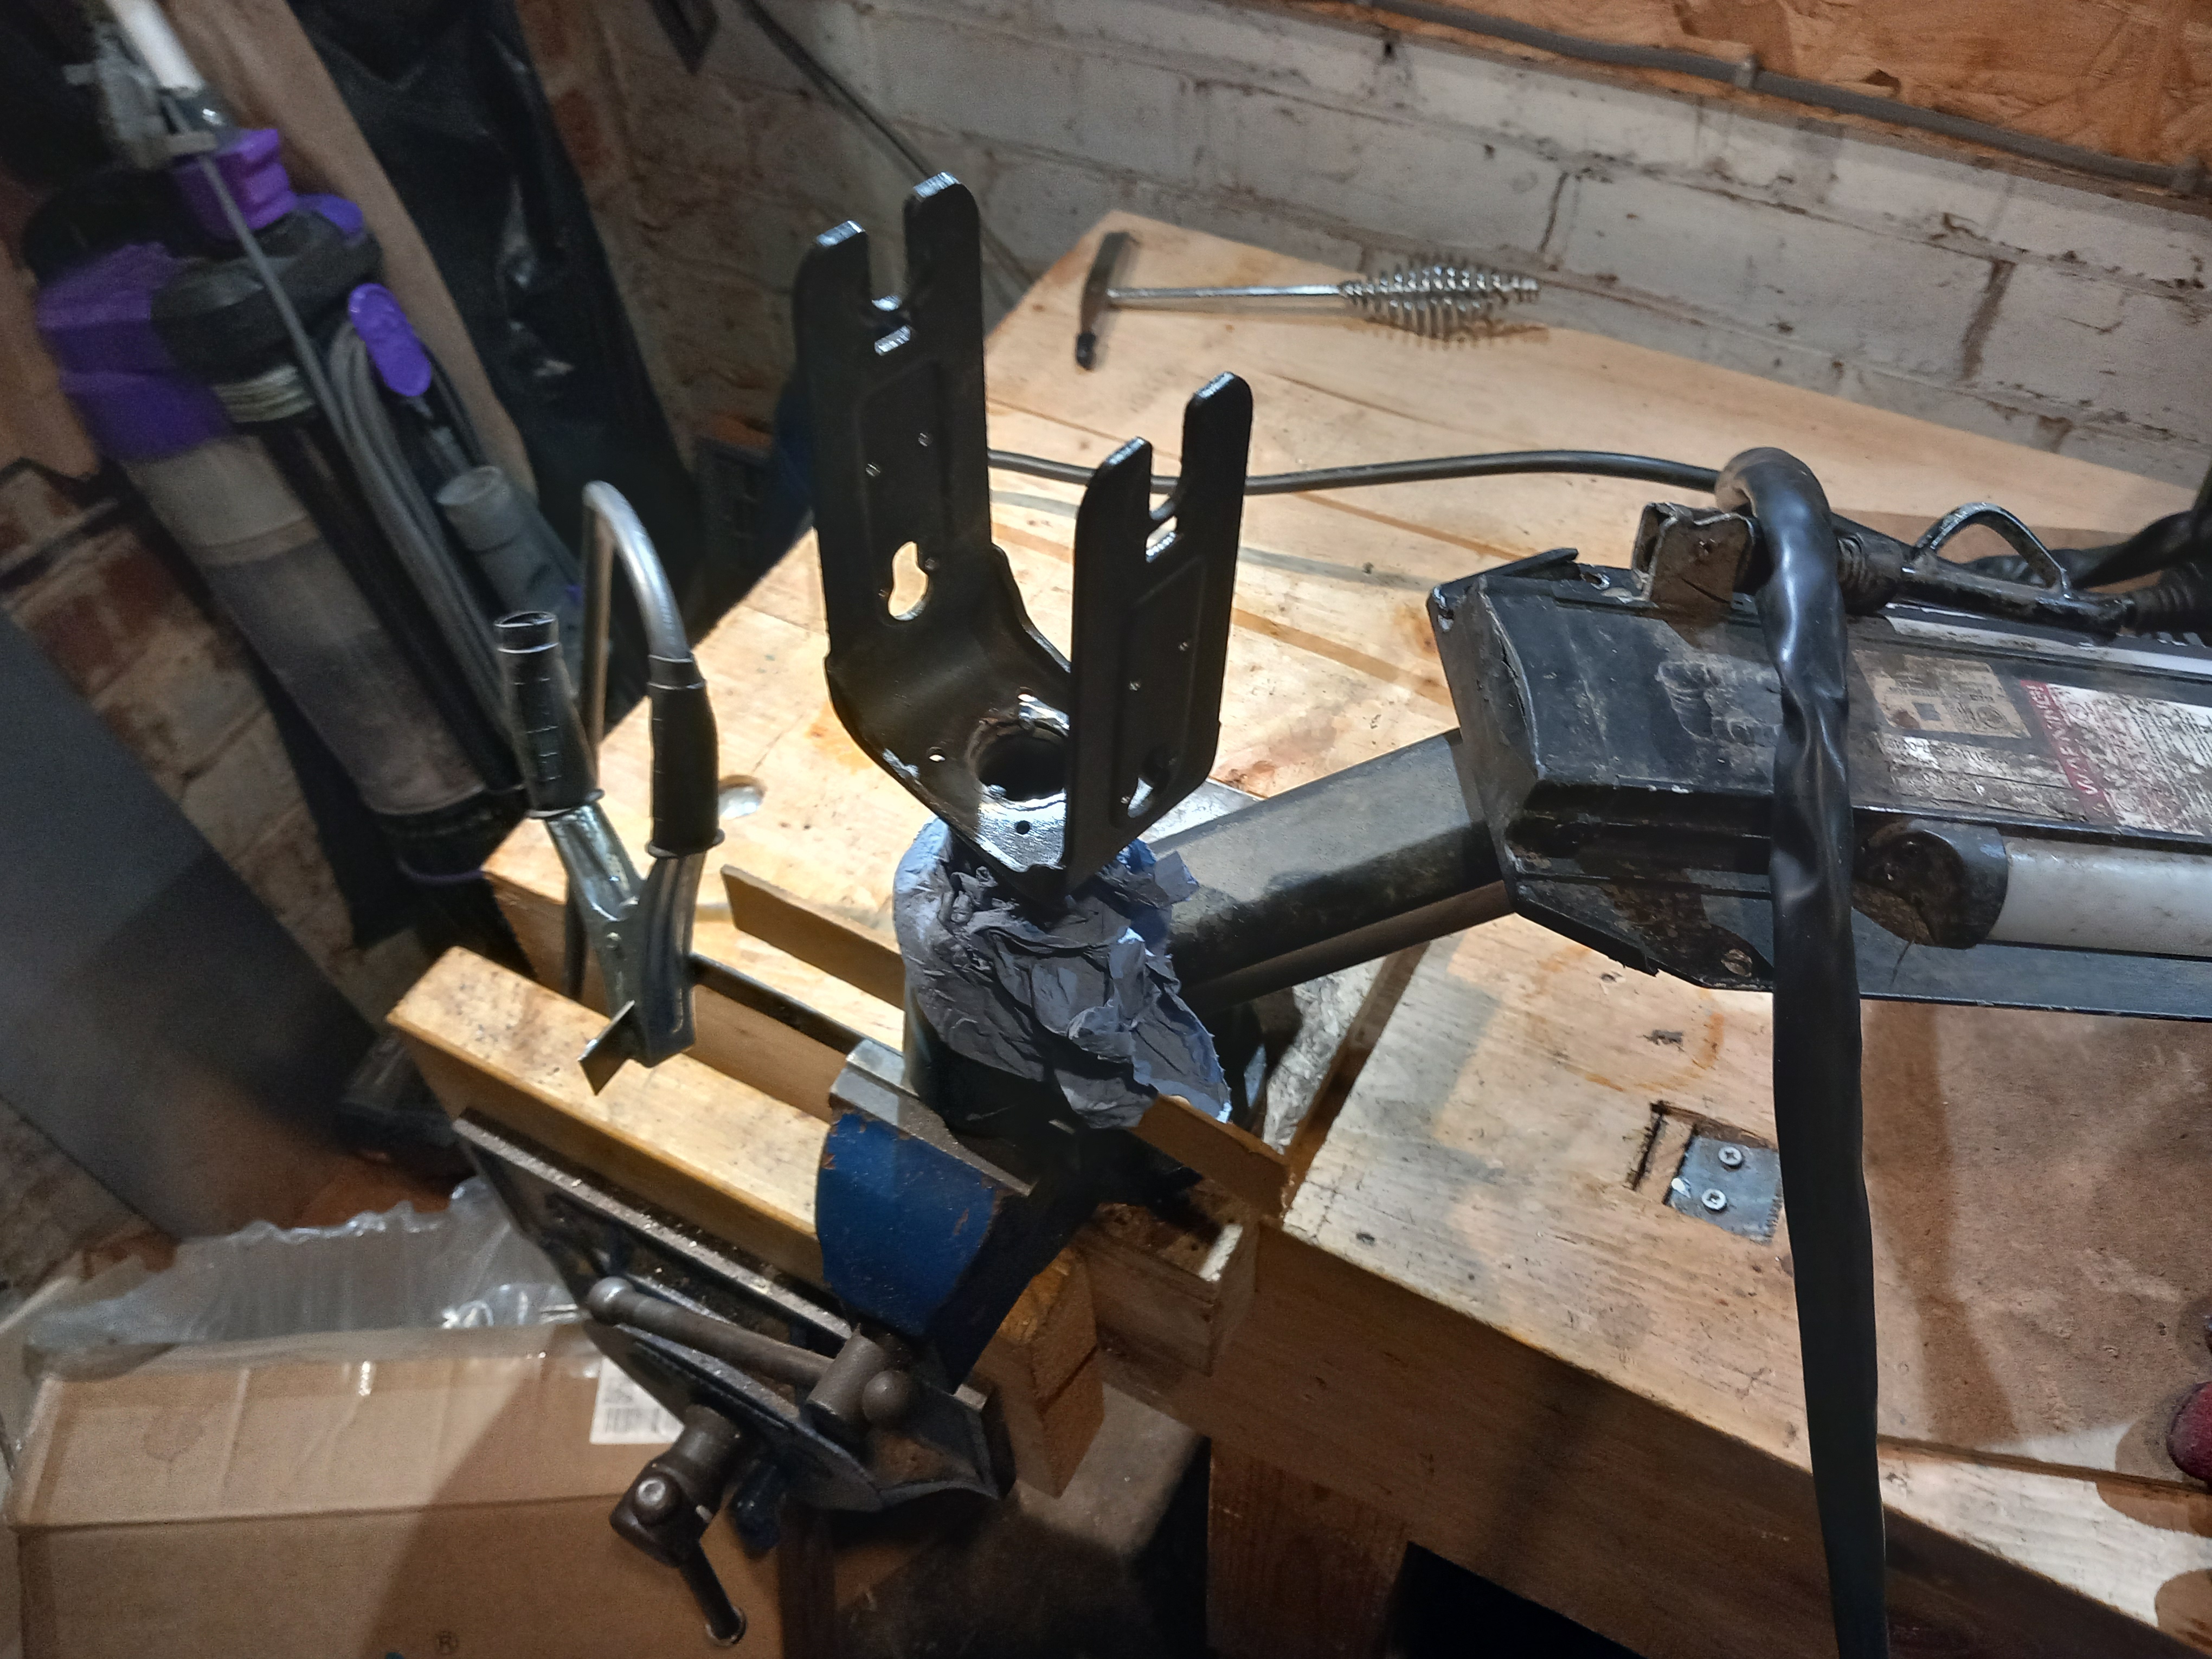
Nope. Nor the bottom. Those two nuts set the preload on the steering bearing, exactly like a bicycle. Note the fork lying on the bench with a healthy dimple in the top. I managed to beat it mostly flat again, but the back of my vice makes a pretty terrible anvil.
The first stage was to weld the fork back on, which, since I couldn’t get the bearing out, involved protecting everything I wasn’t welding with spatter spray and, erm, paper towel (the blue kind though, which I’m sure burns slower than the white kind), figuring out a ground clamp for the tacks (the scrap of sheet clamped into the vise with the rest of the scooter) and then welding up the inside and outside.
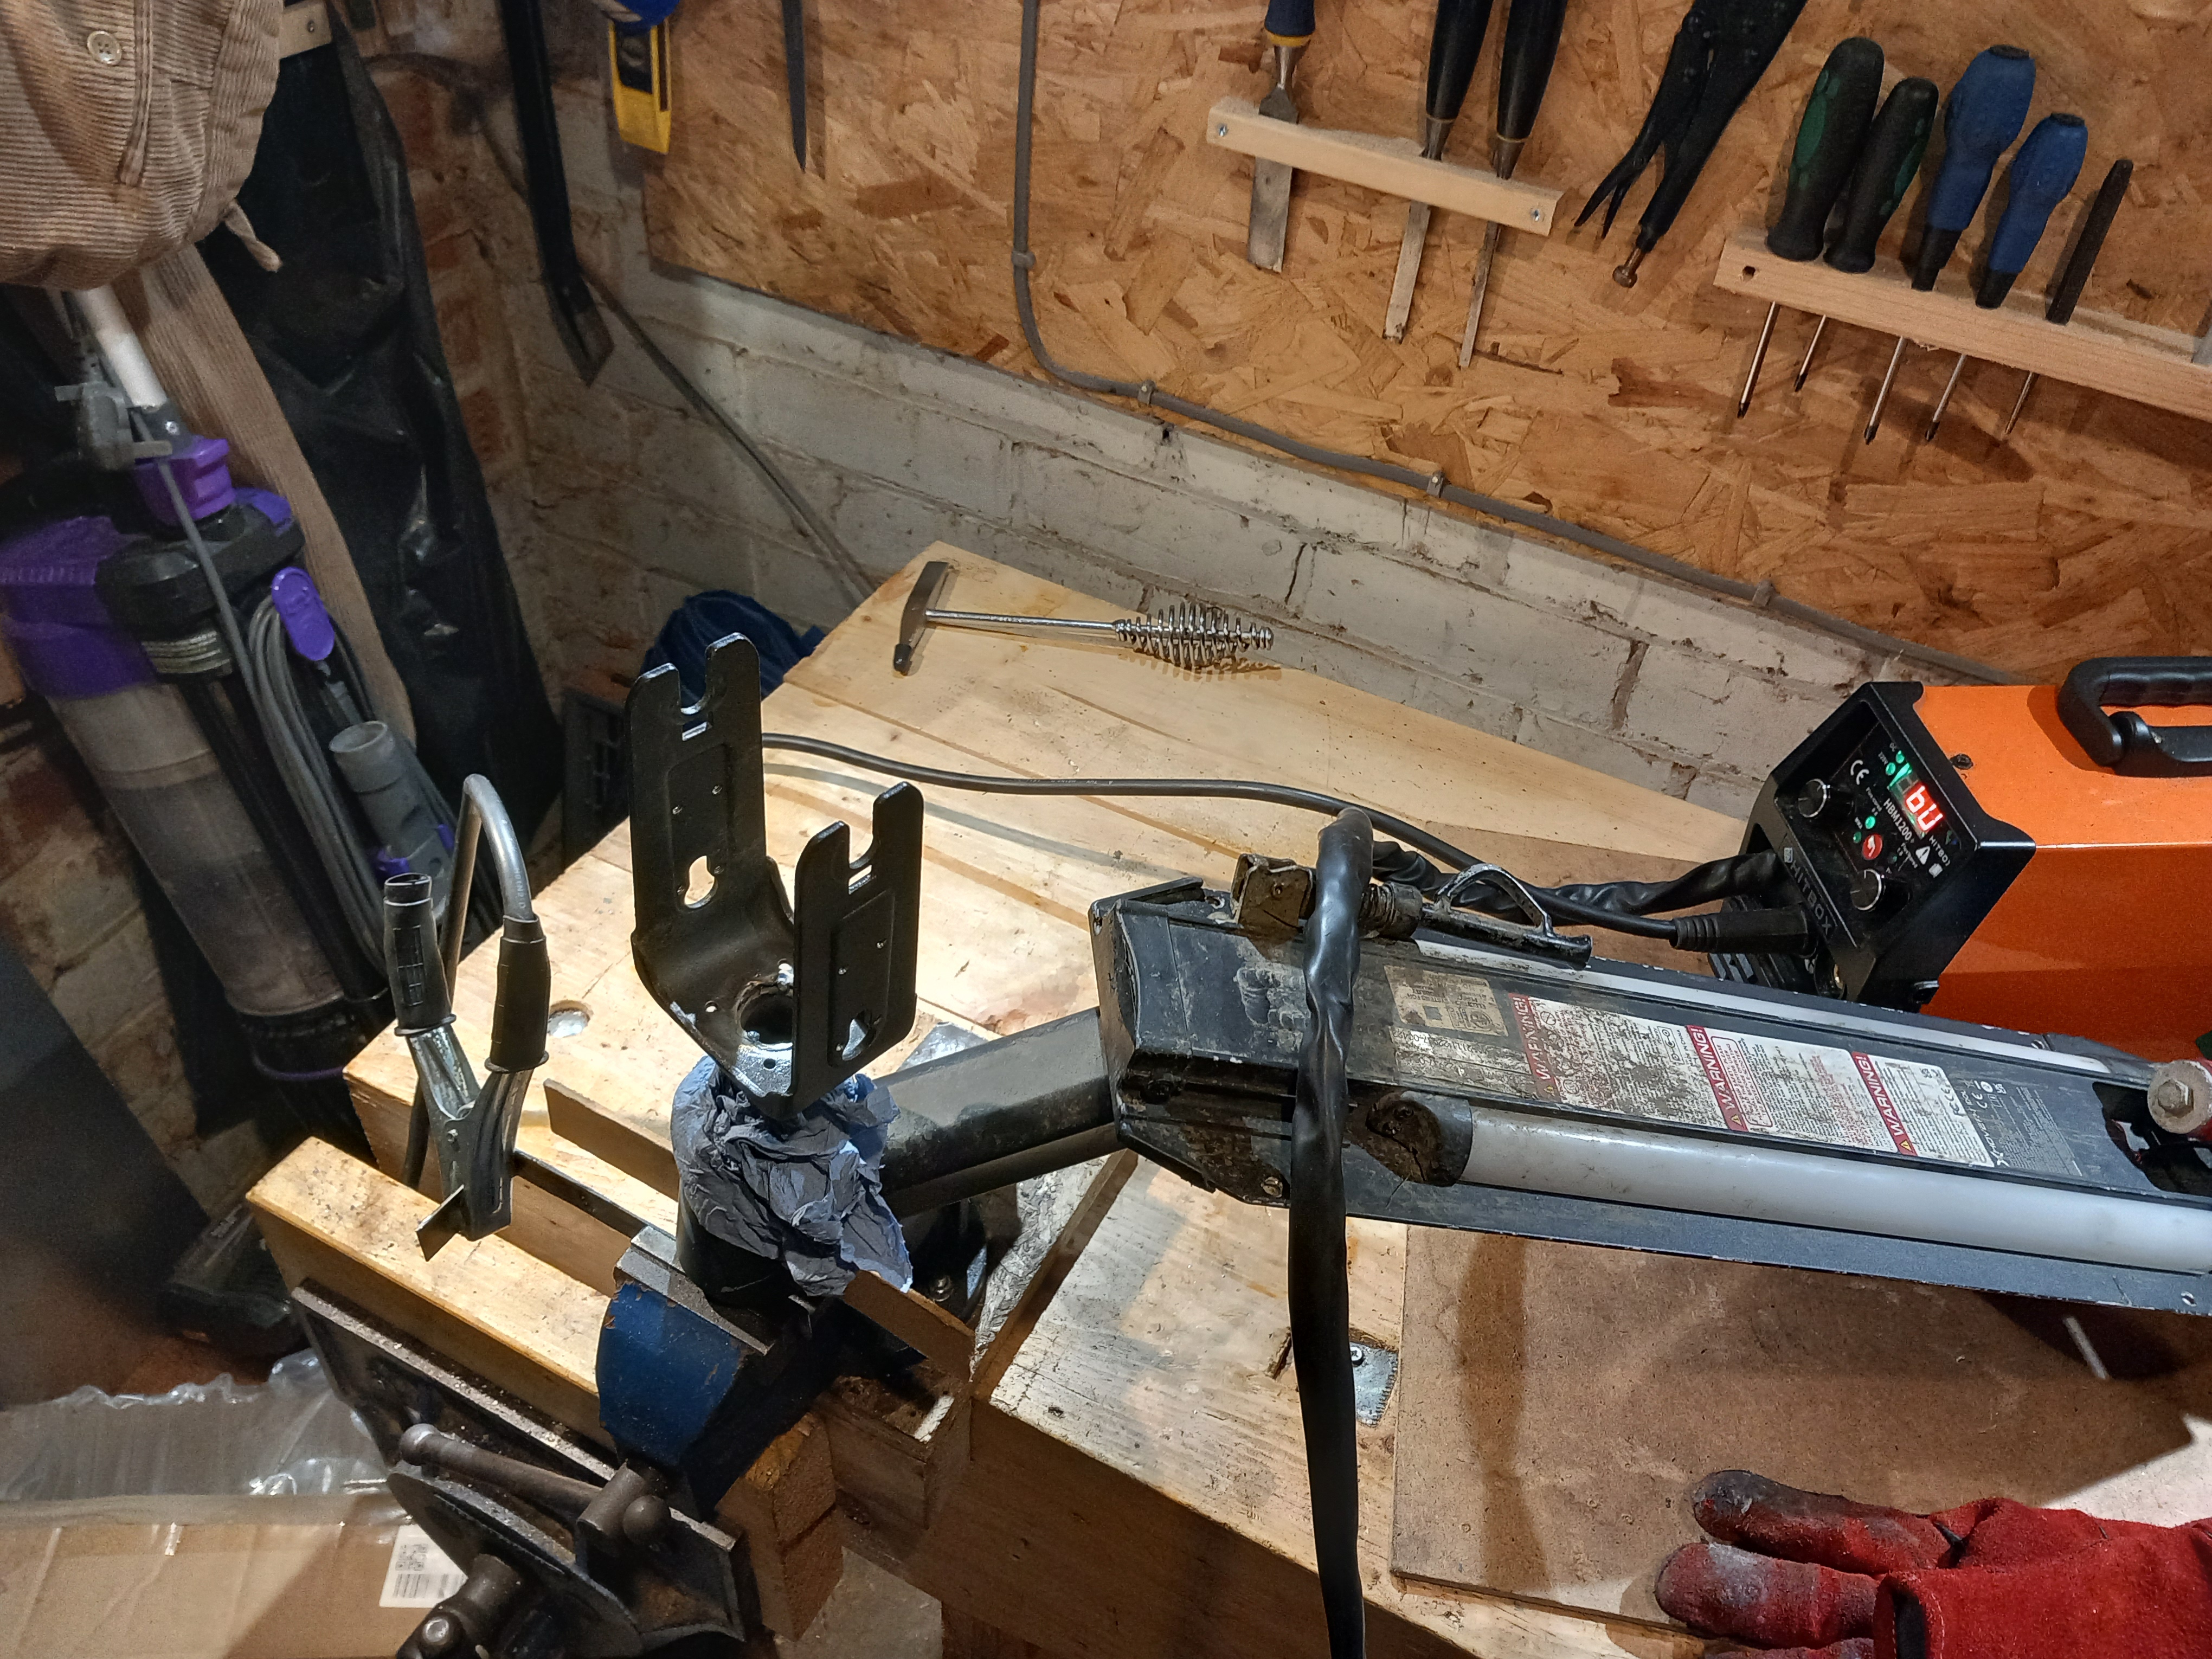

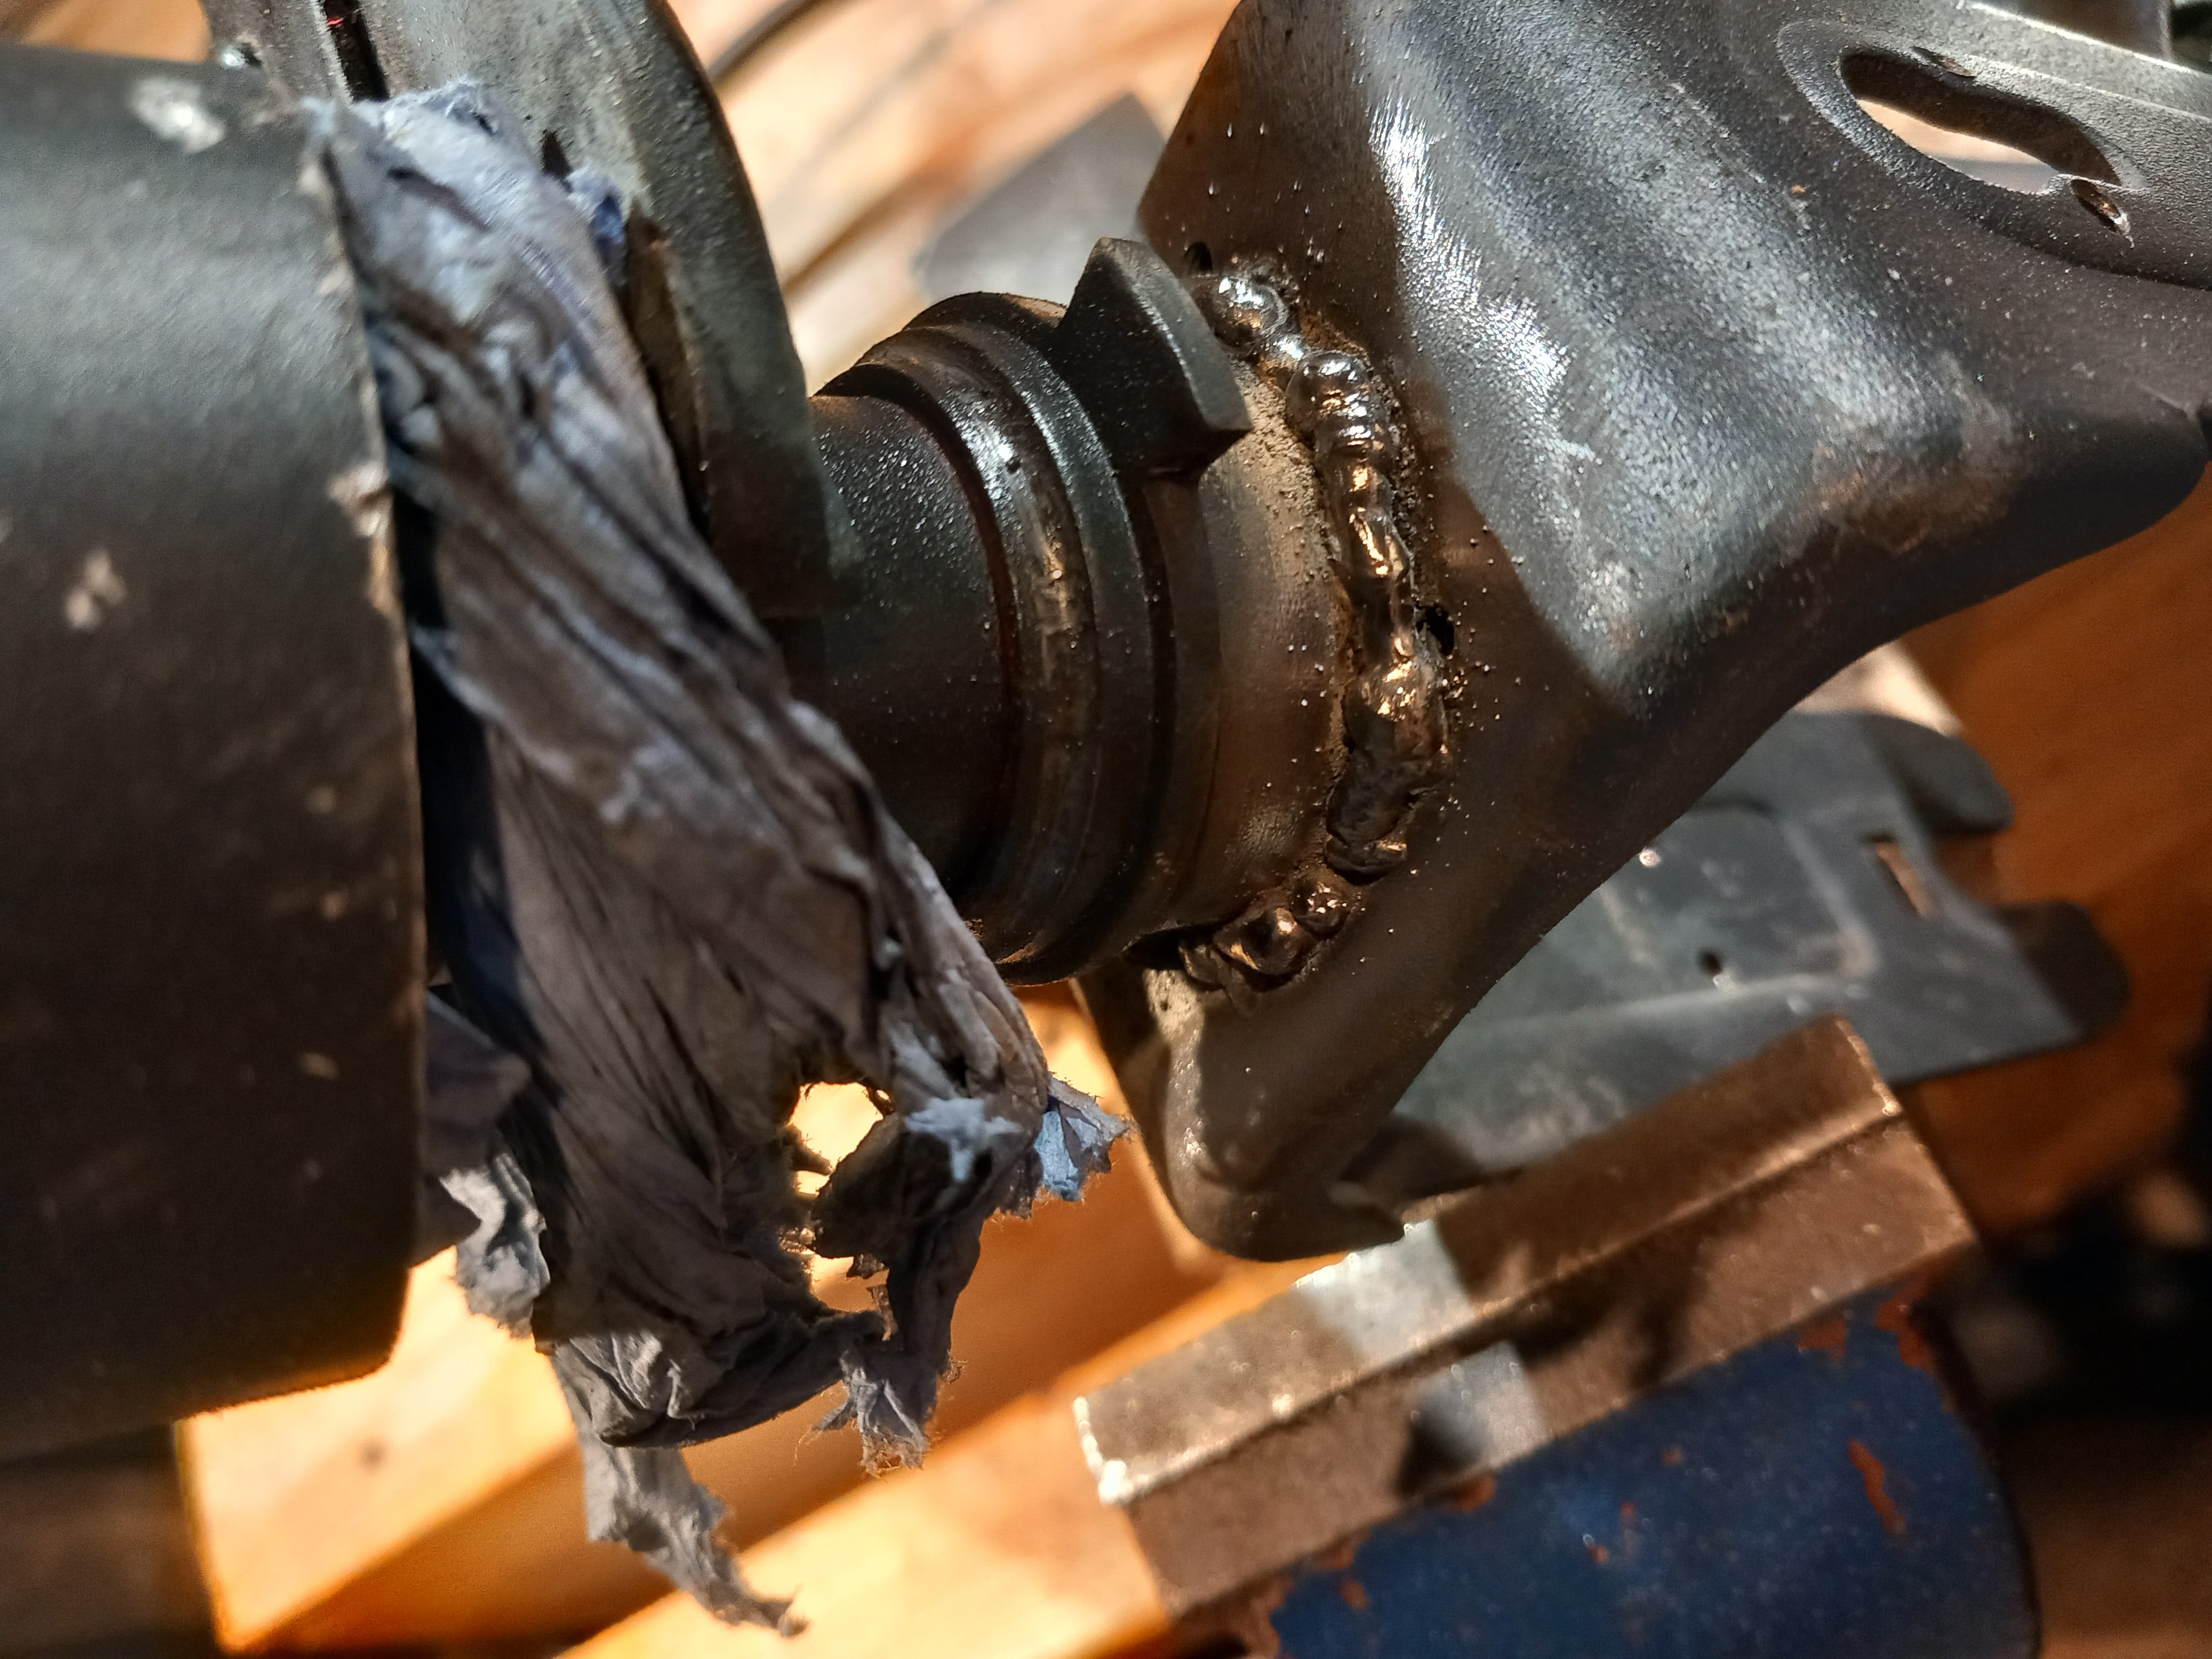

There is no excuse for the quality of these welds. I am a terrible welder, but I did get decent penetration and enough metal in there I’m confident it isn’t going anywhere. This is flux-core, which always looks a bit ugly, but still. I need to take a course.
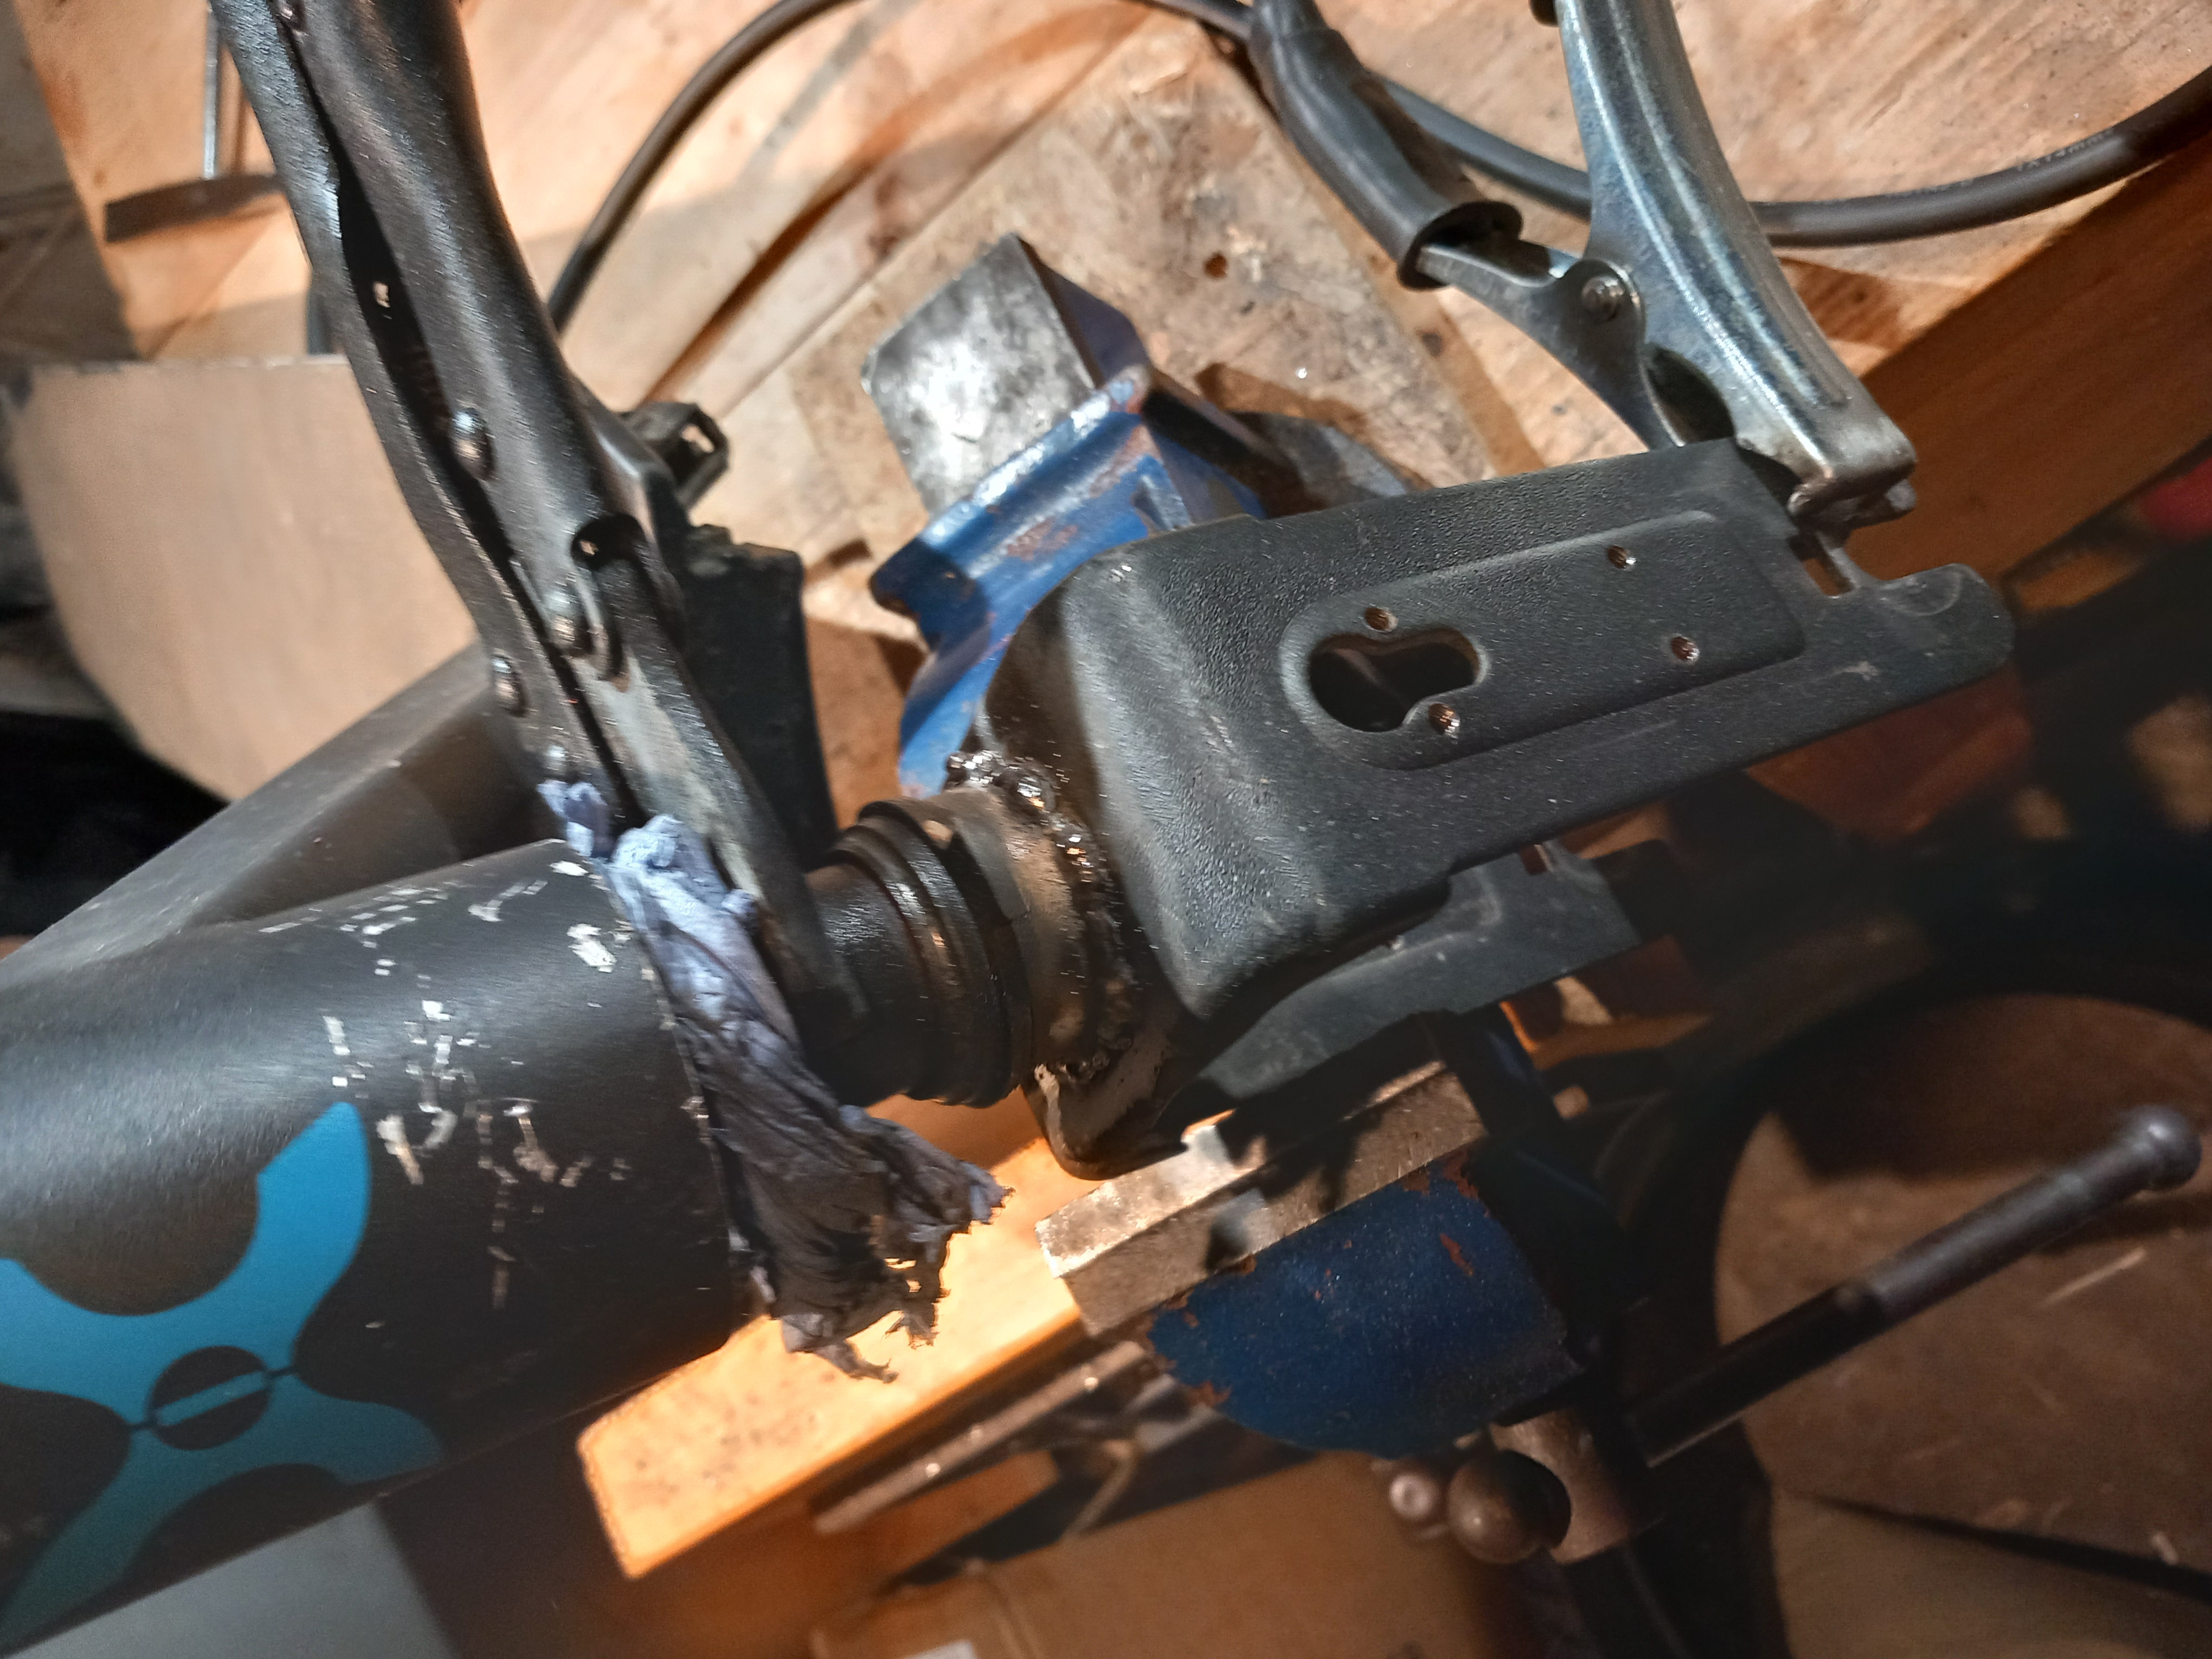
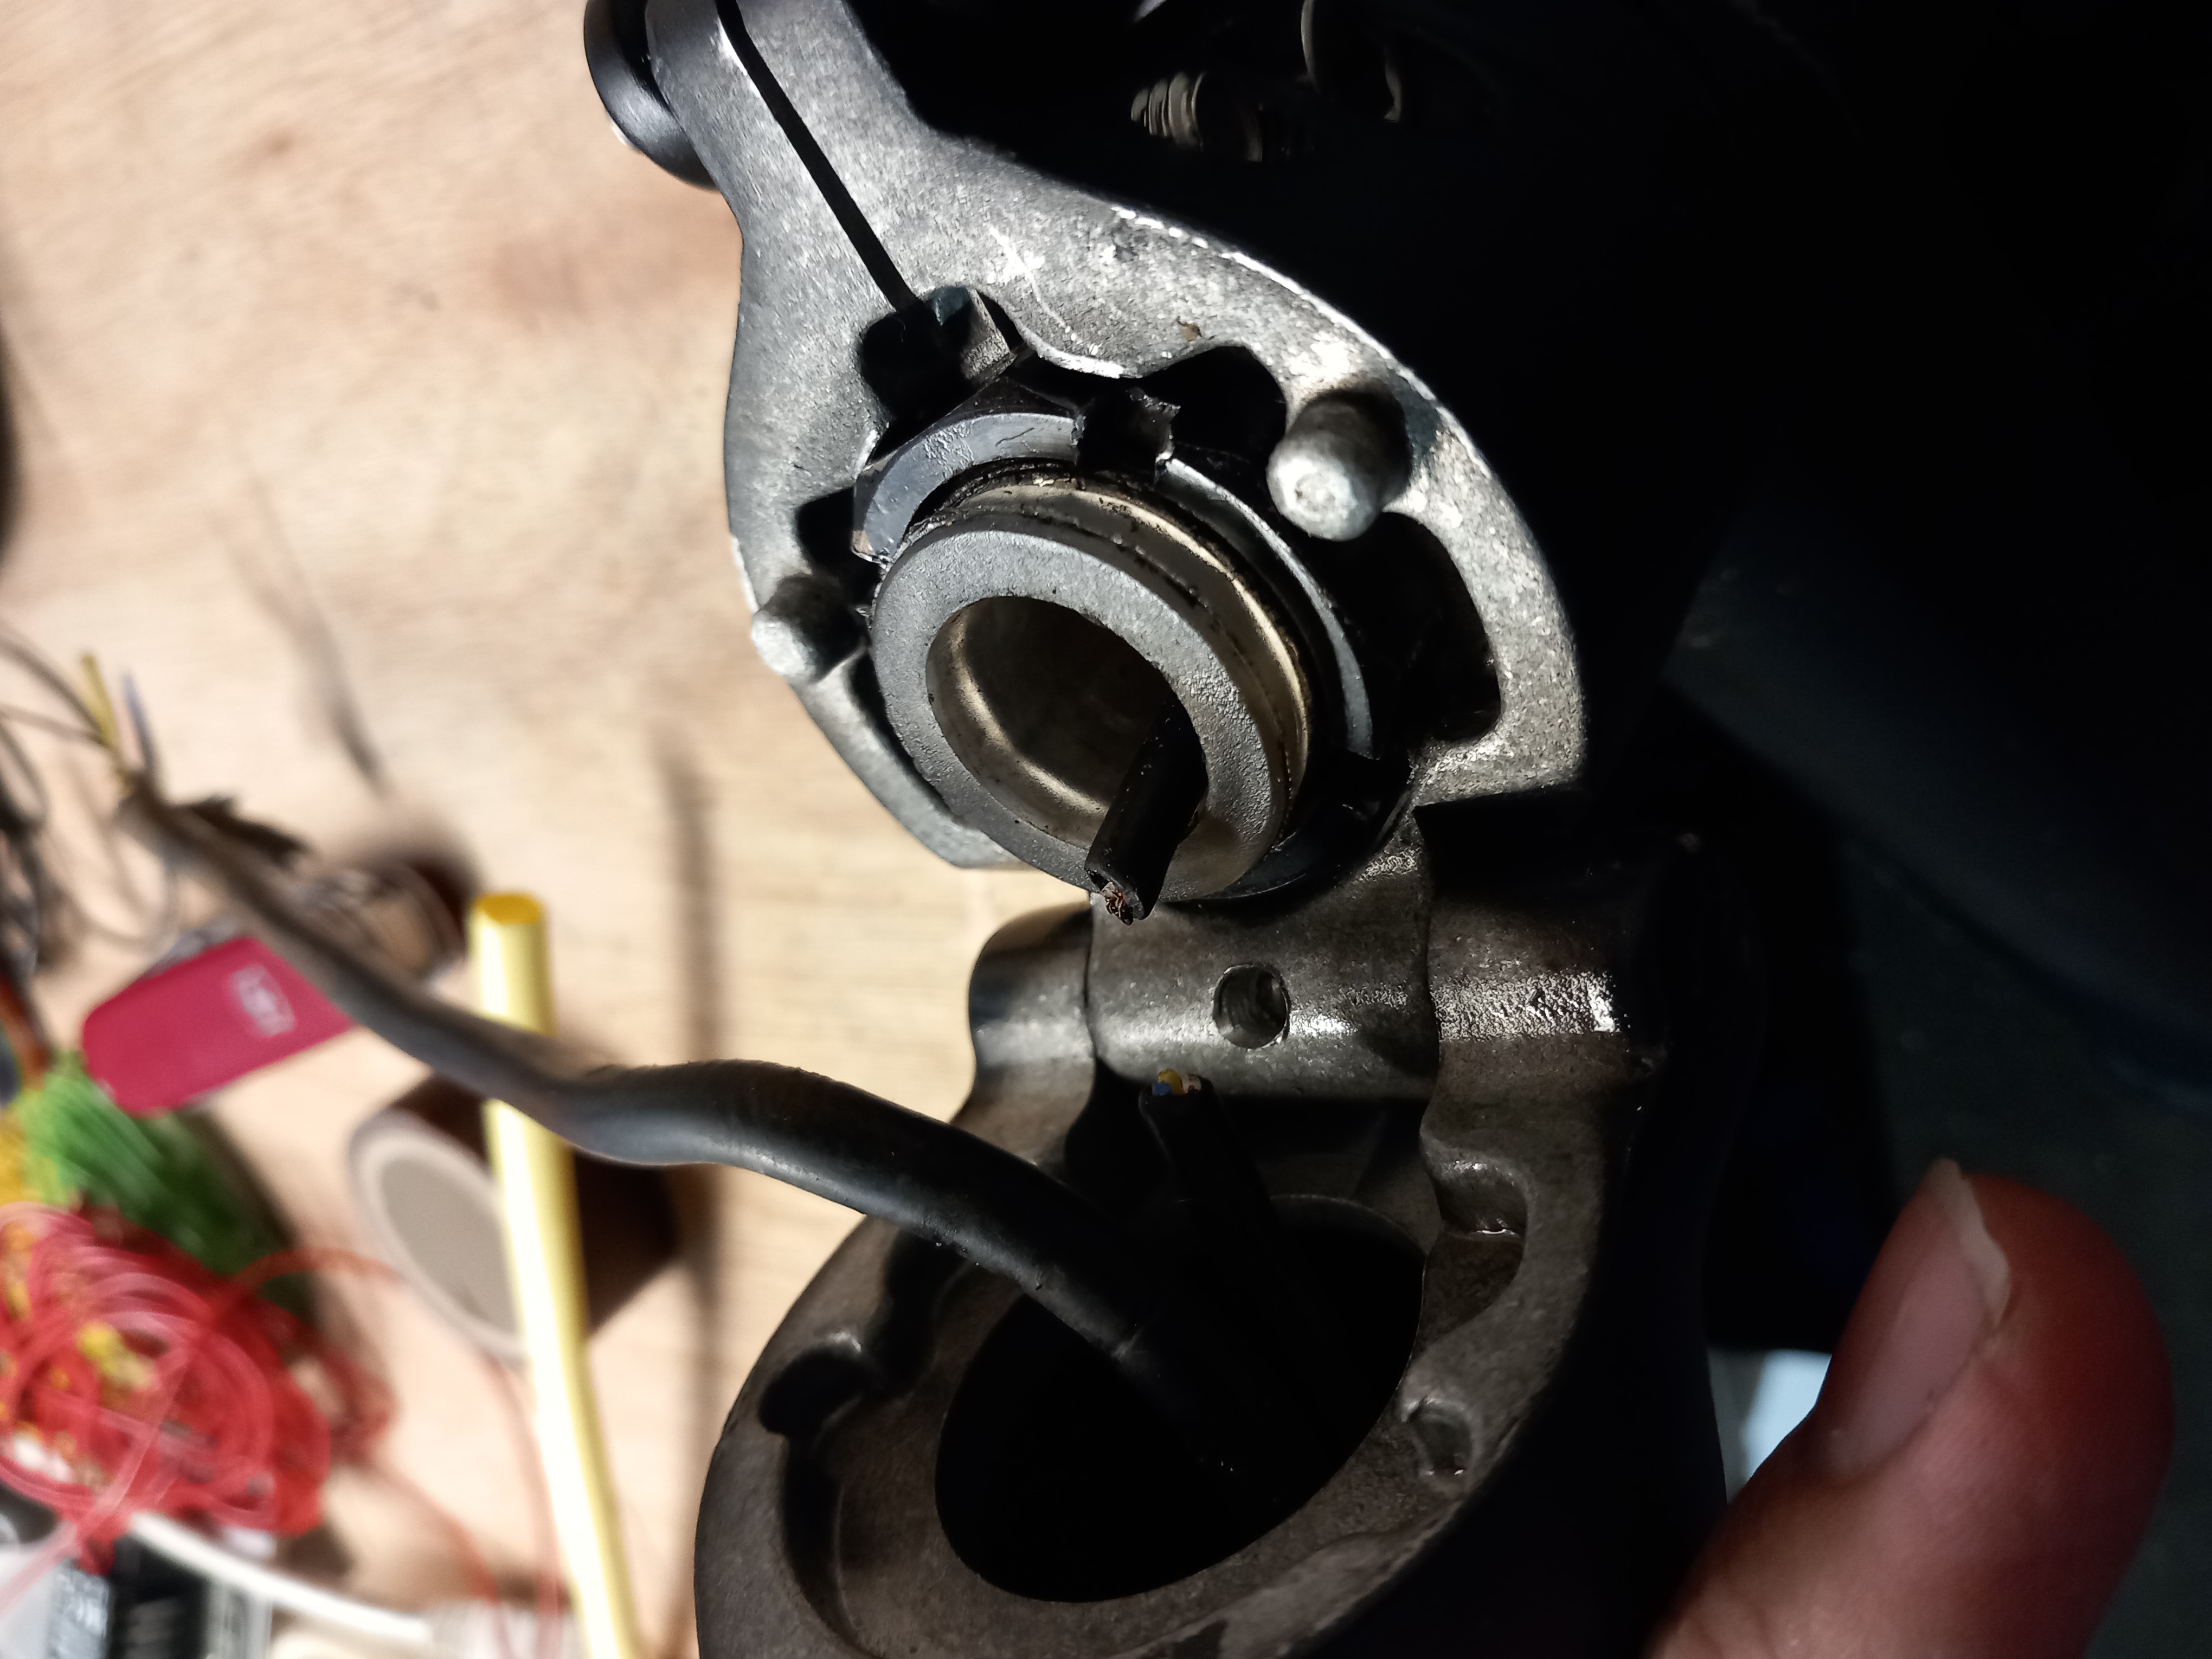
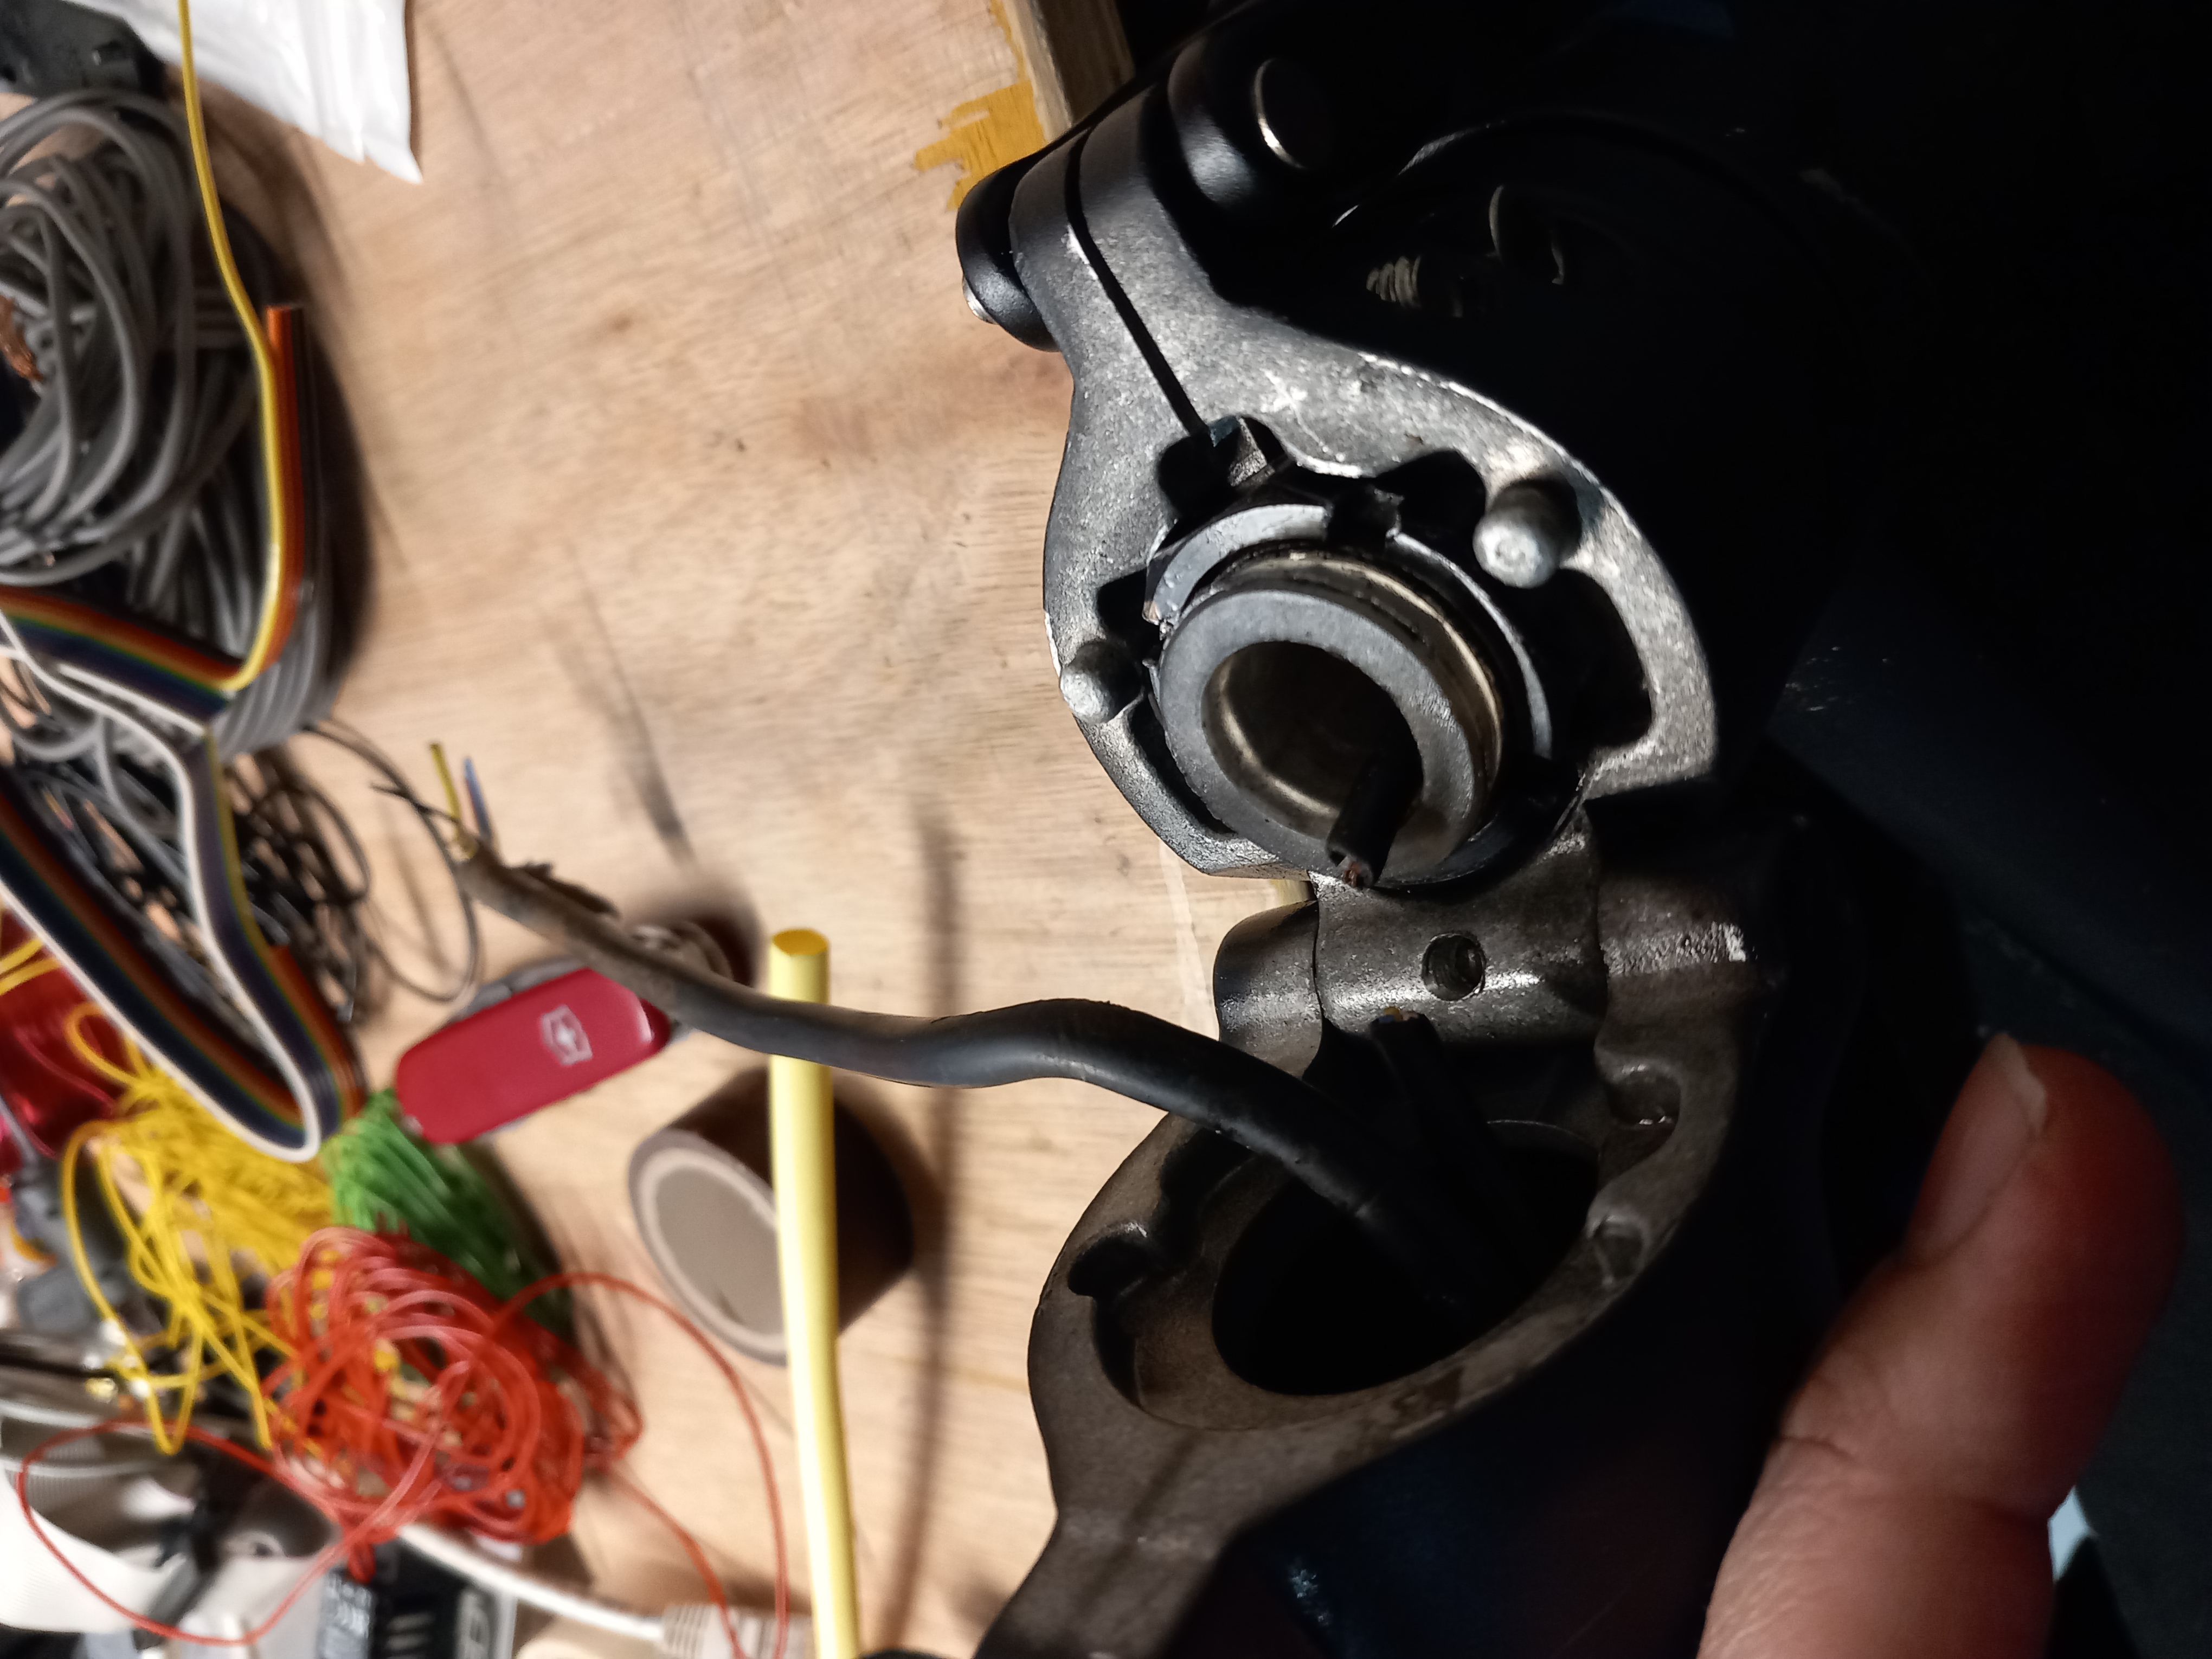
Now the bearing could be fully cleaned out, blown out with compressed air and re-packed with new grease. The bearing cups weren’t looking great, but hey, this is ultimately a toy; it just needs to work and be fun.
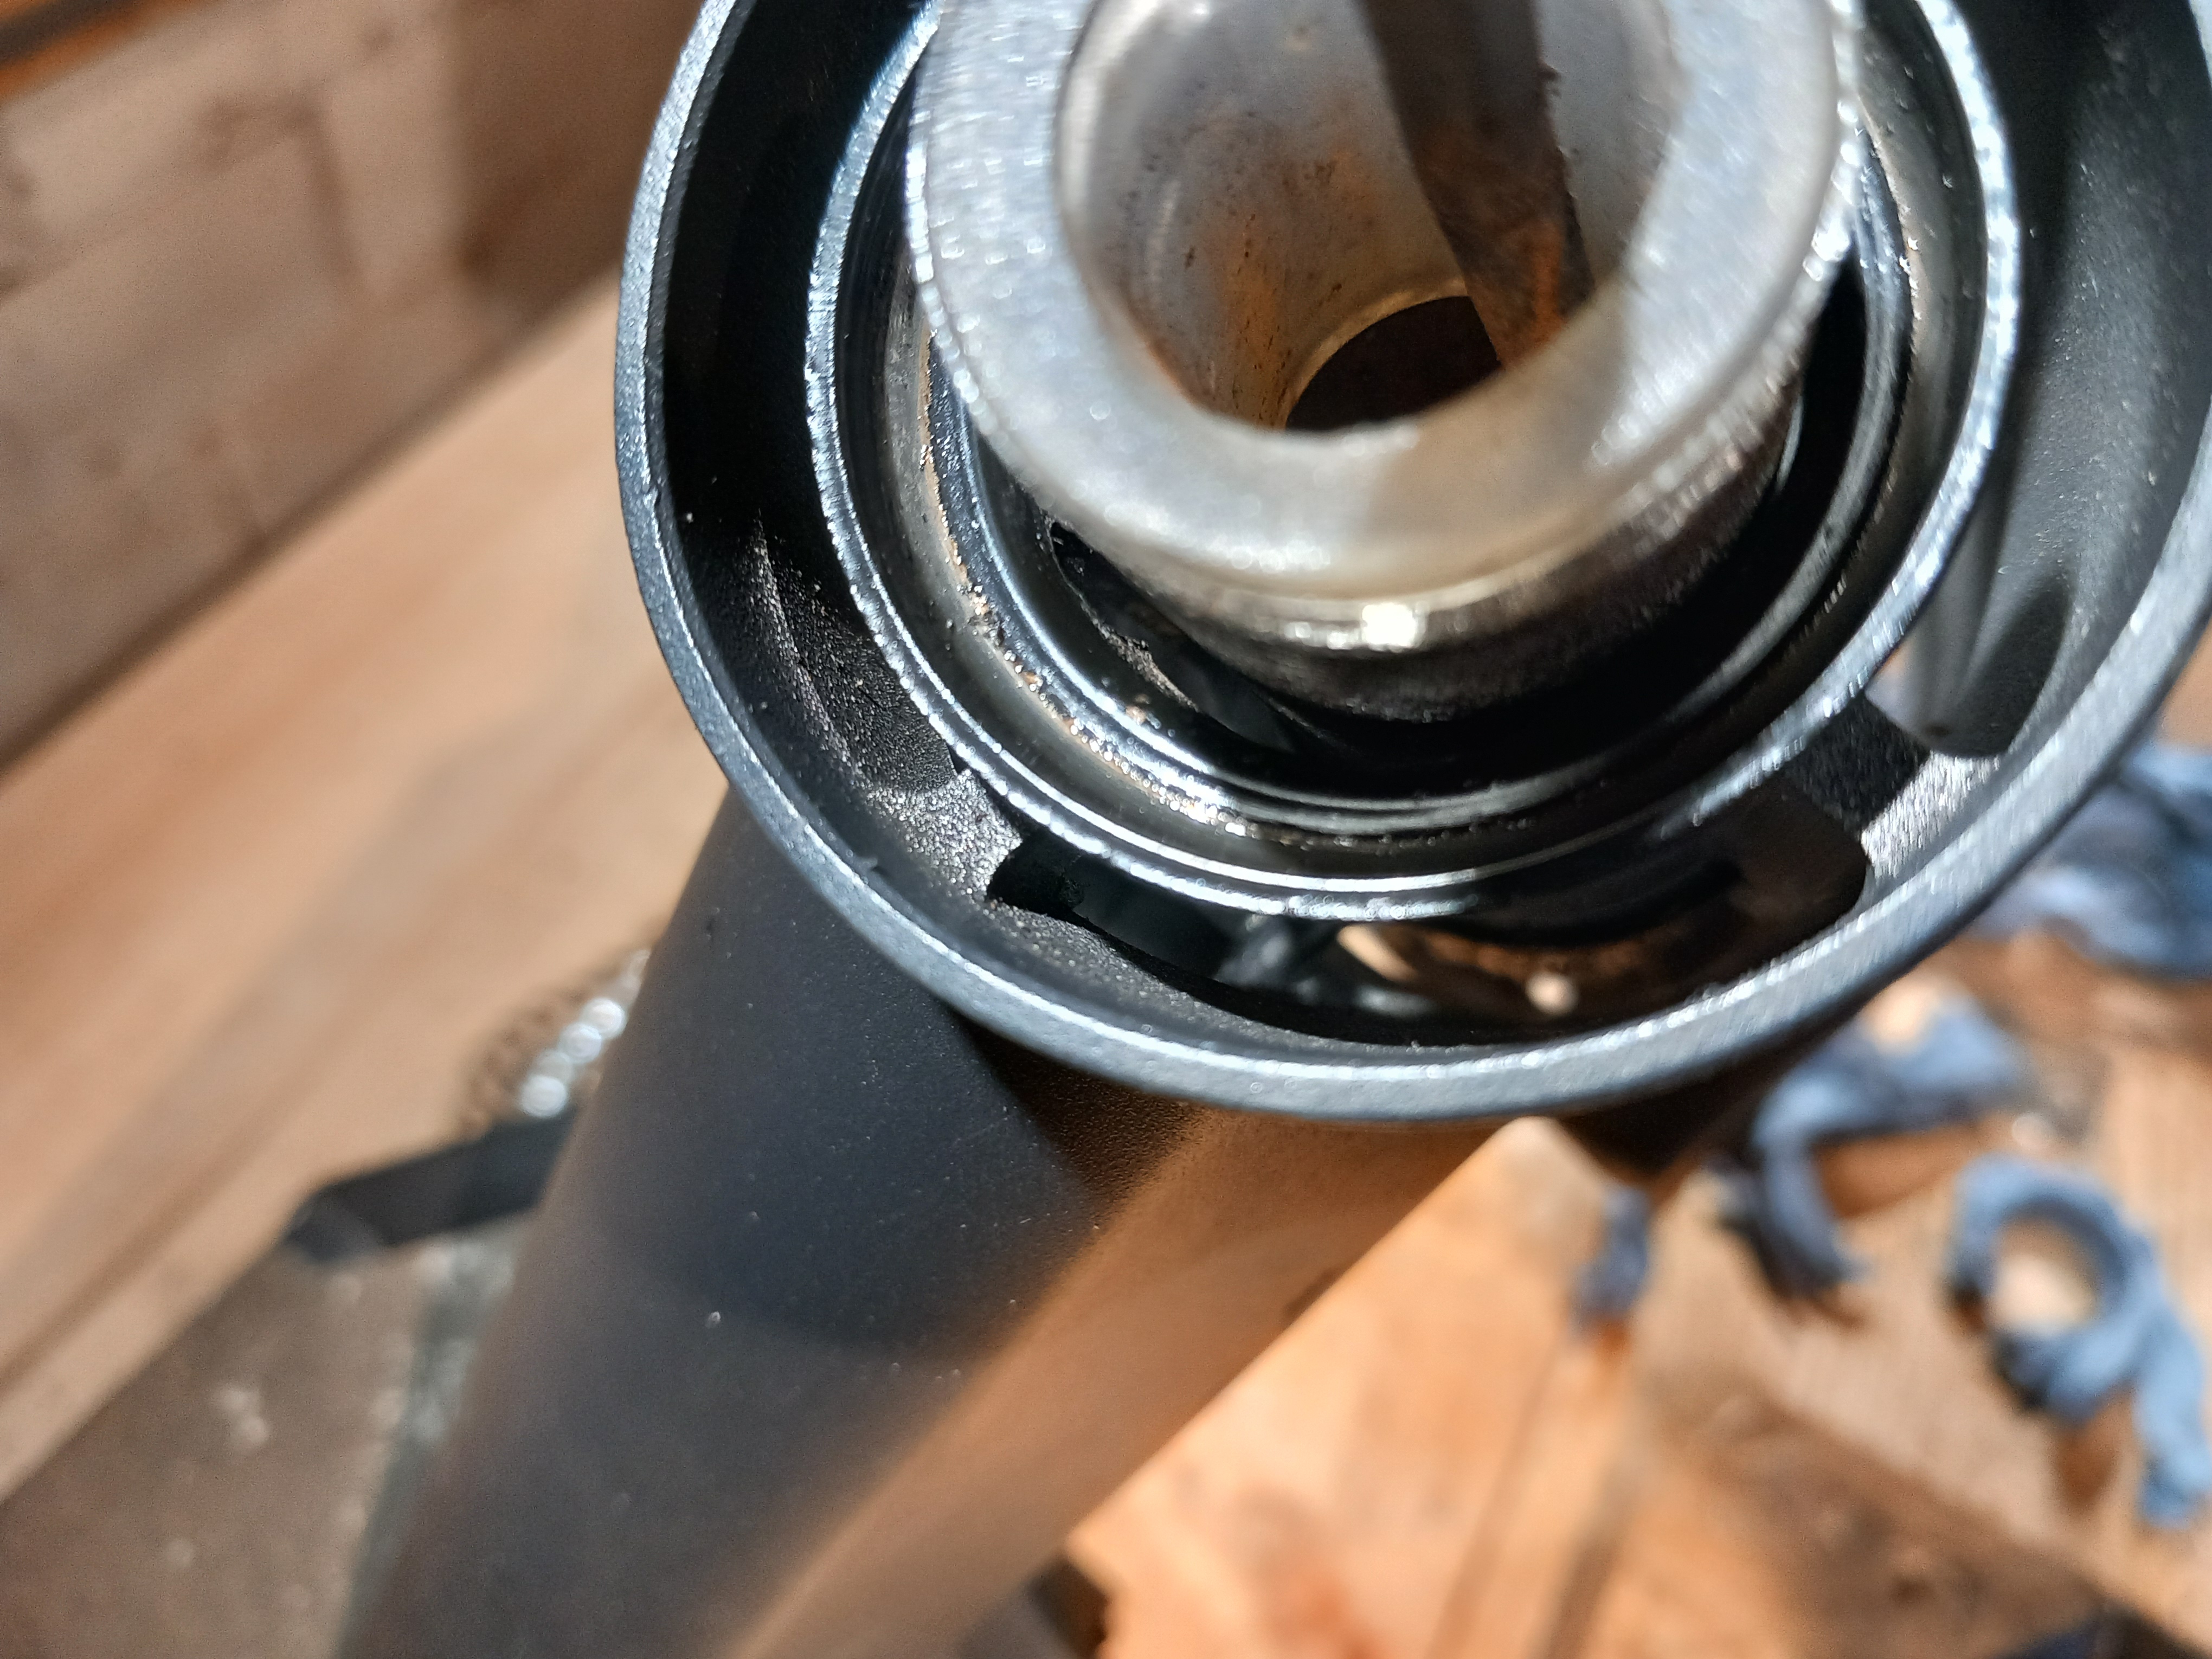
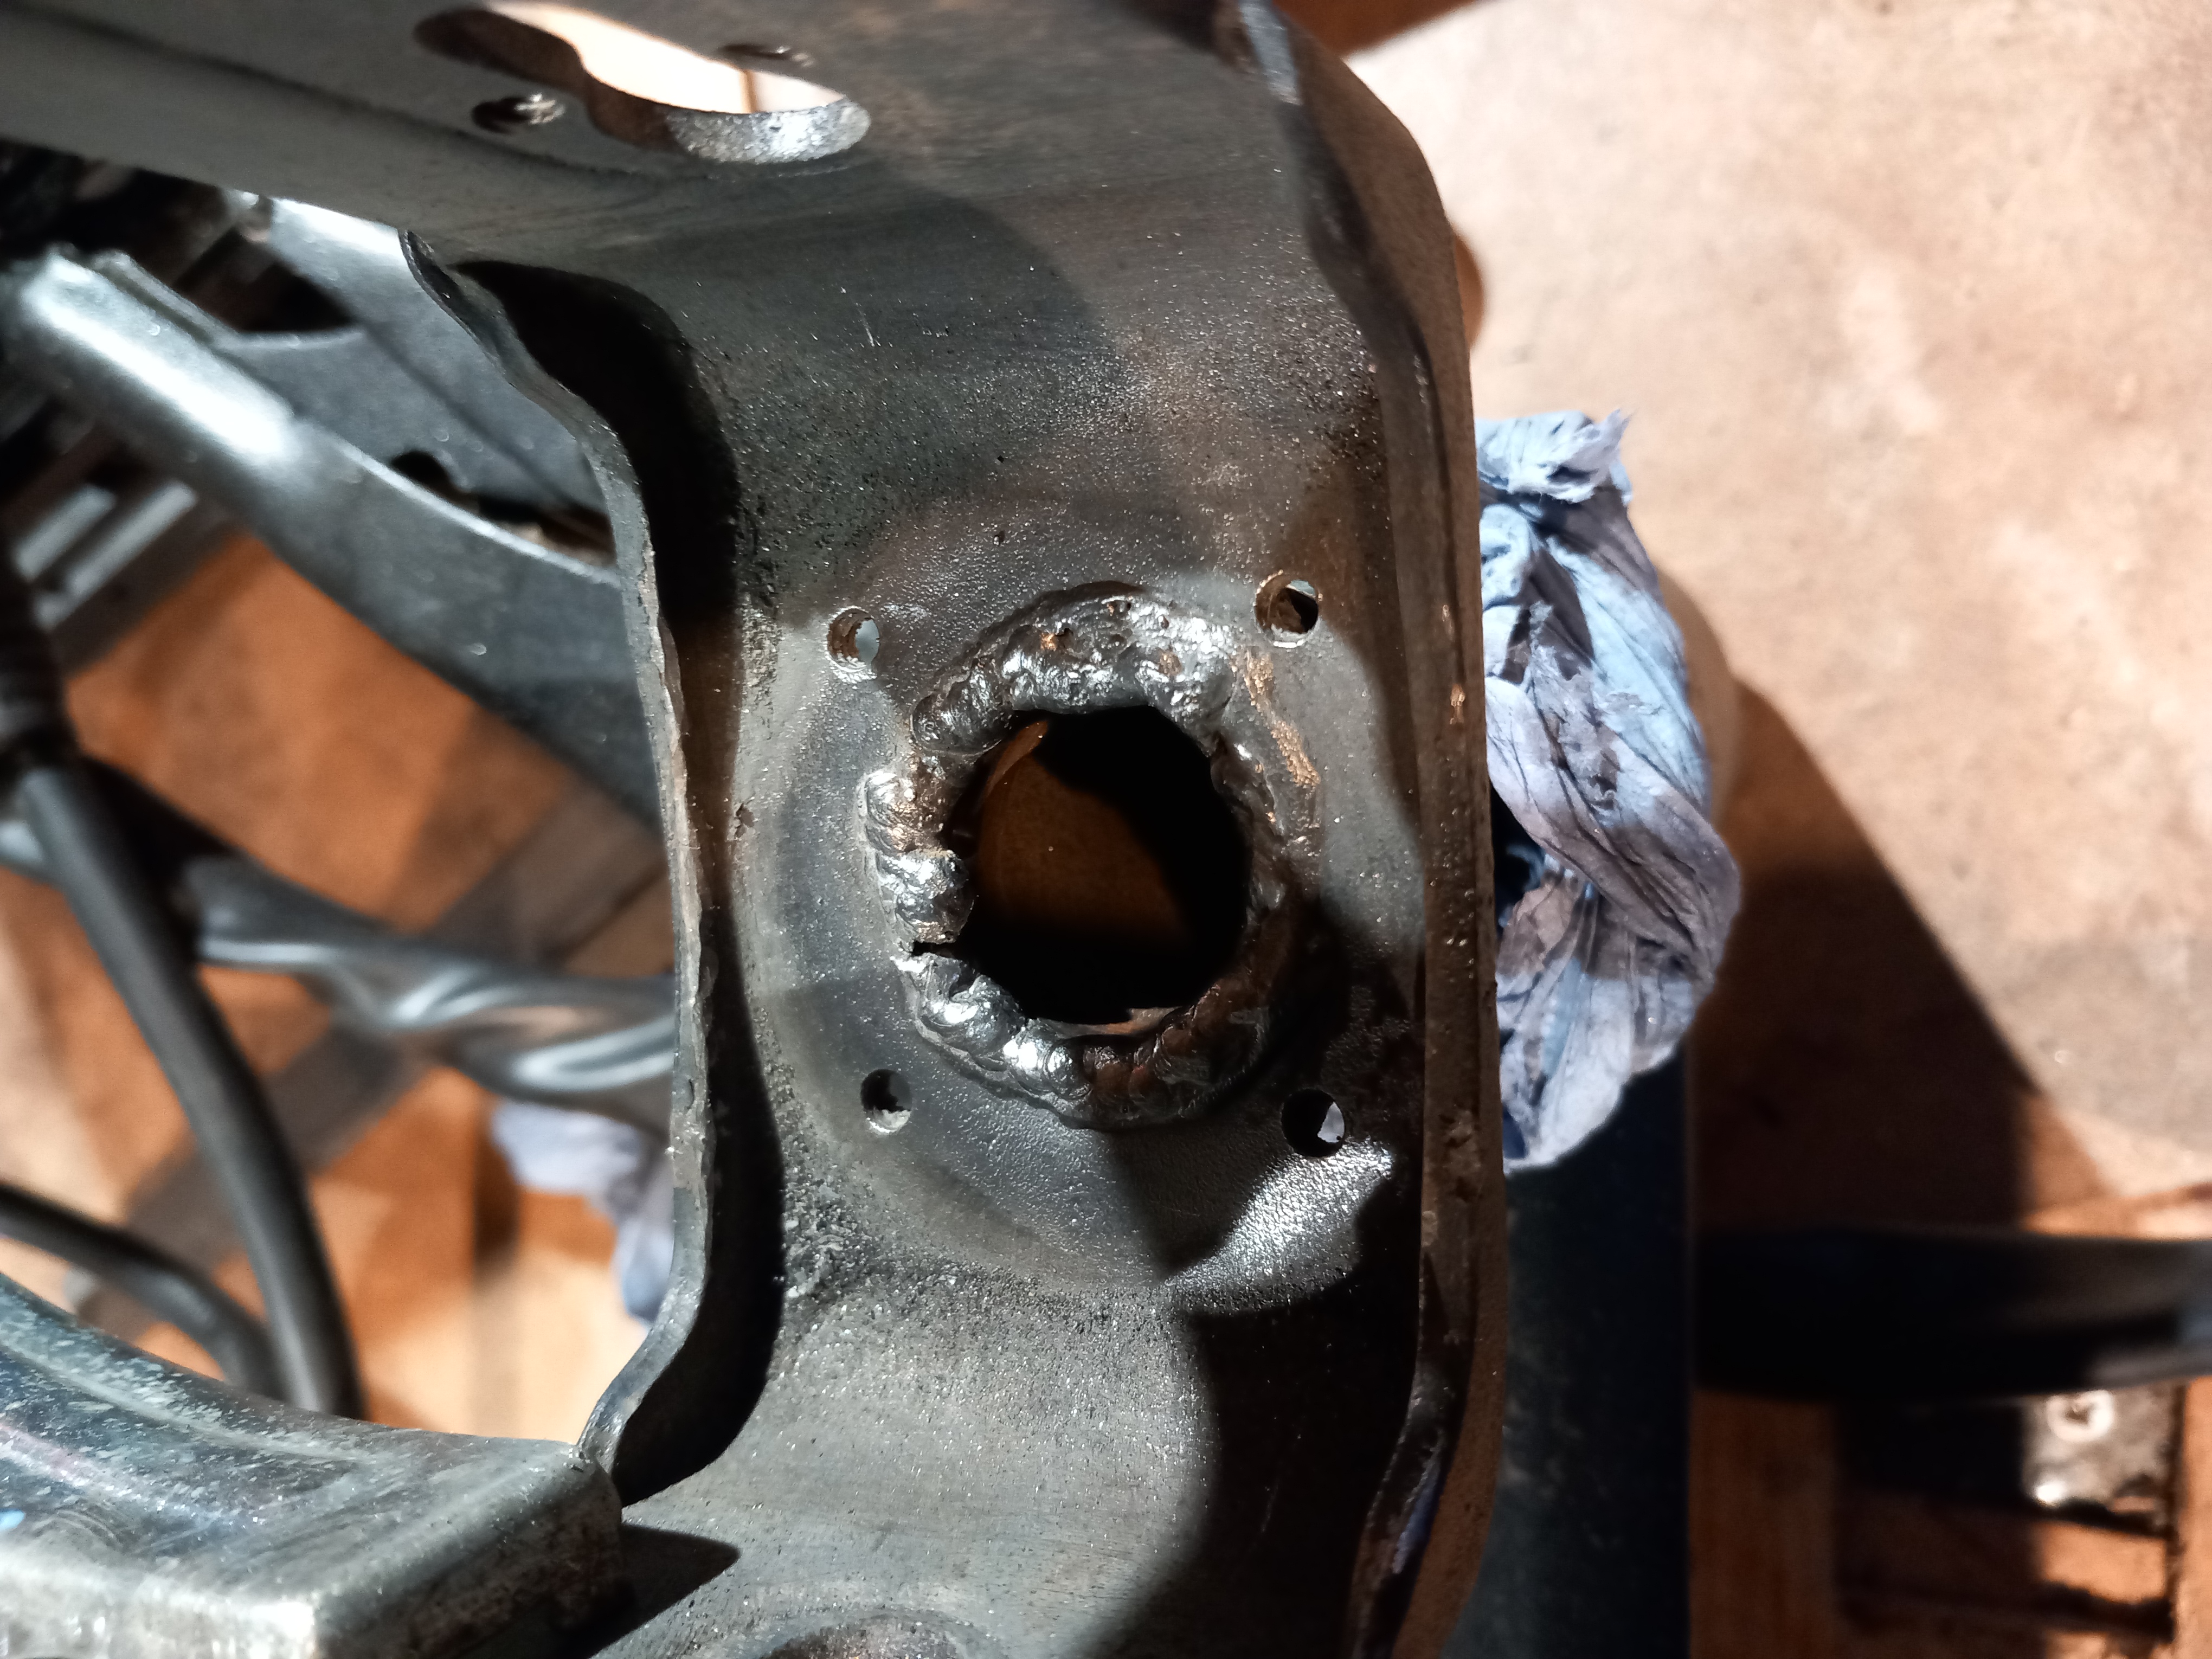
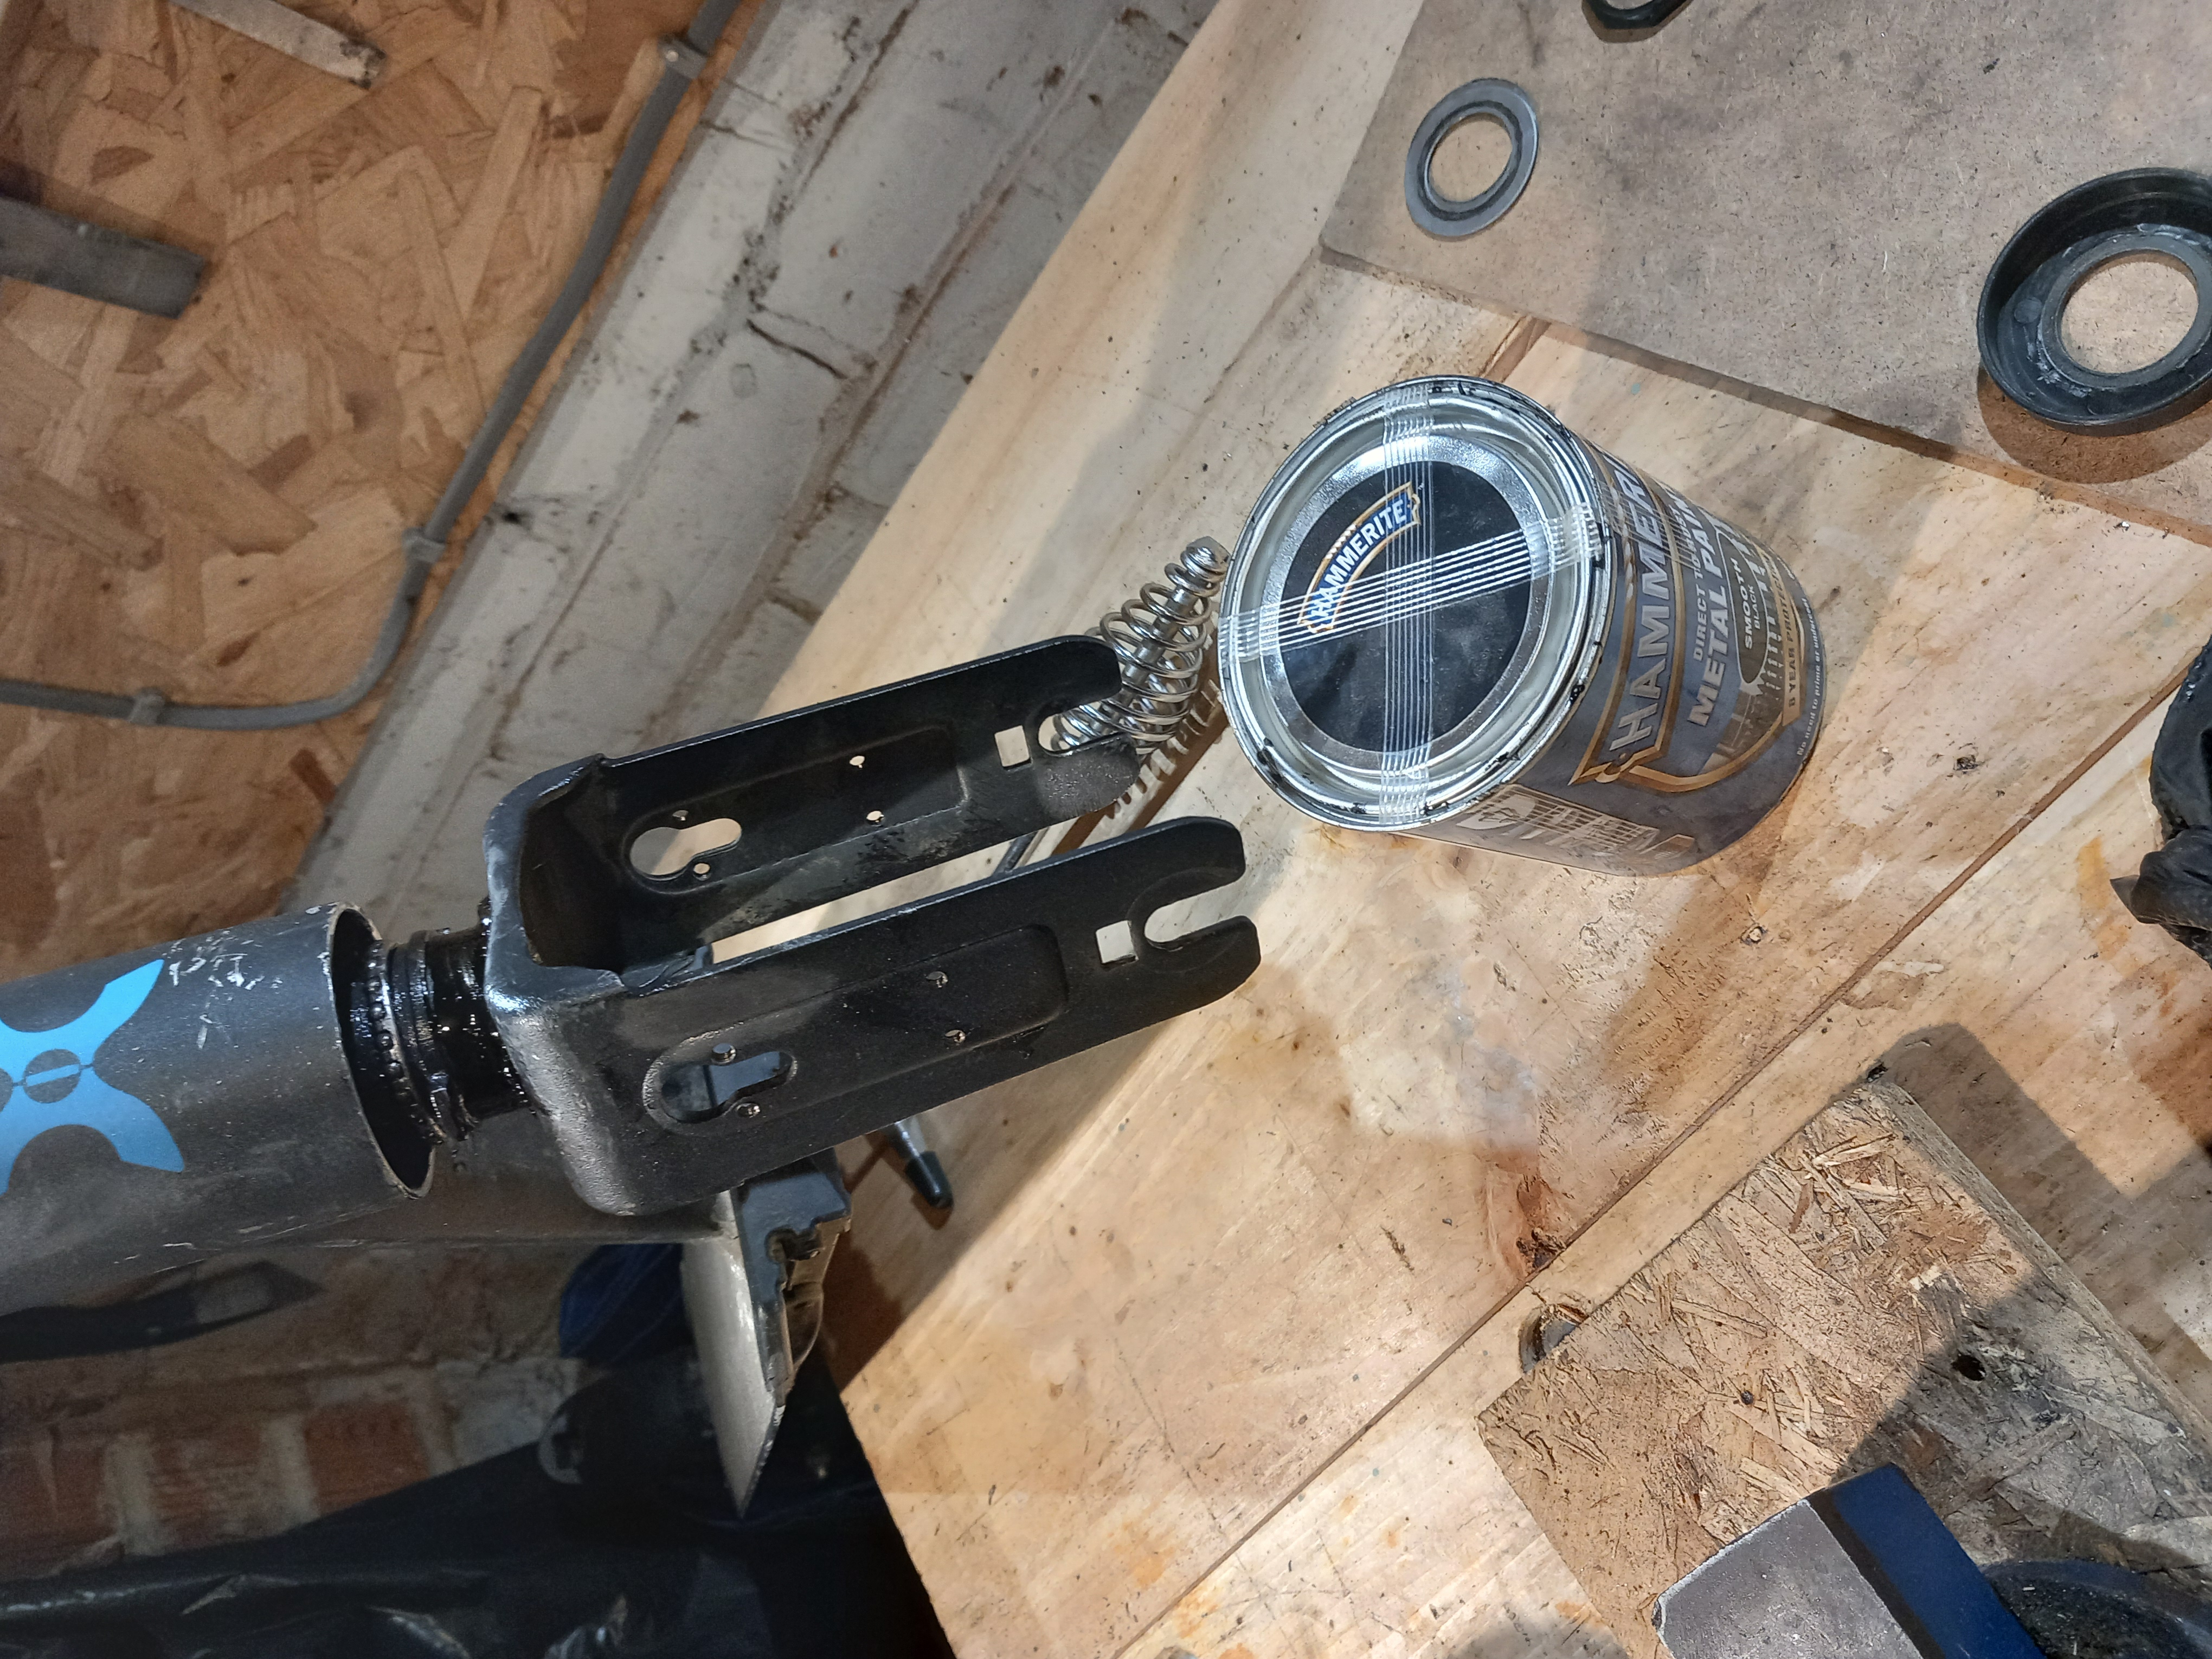
Since this will be impossible to get at later I stuck some hammerite on where I’d welded:
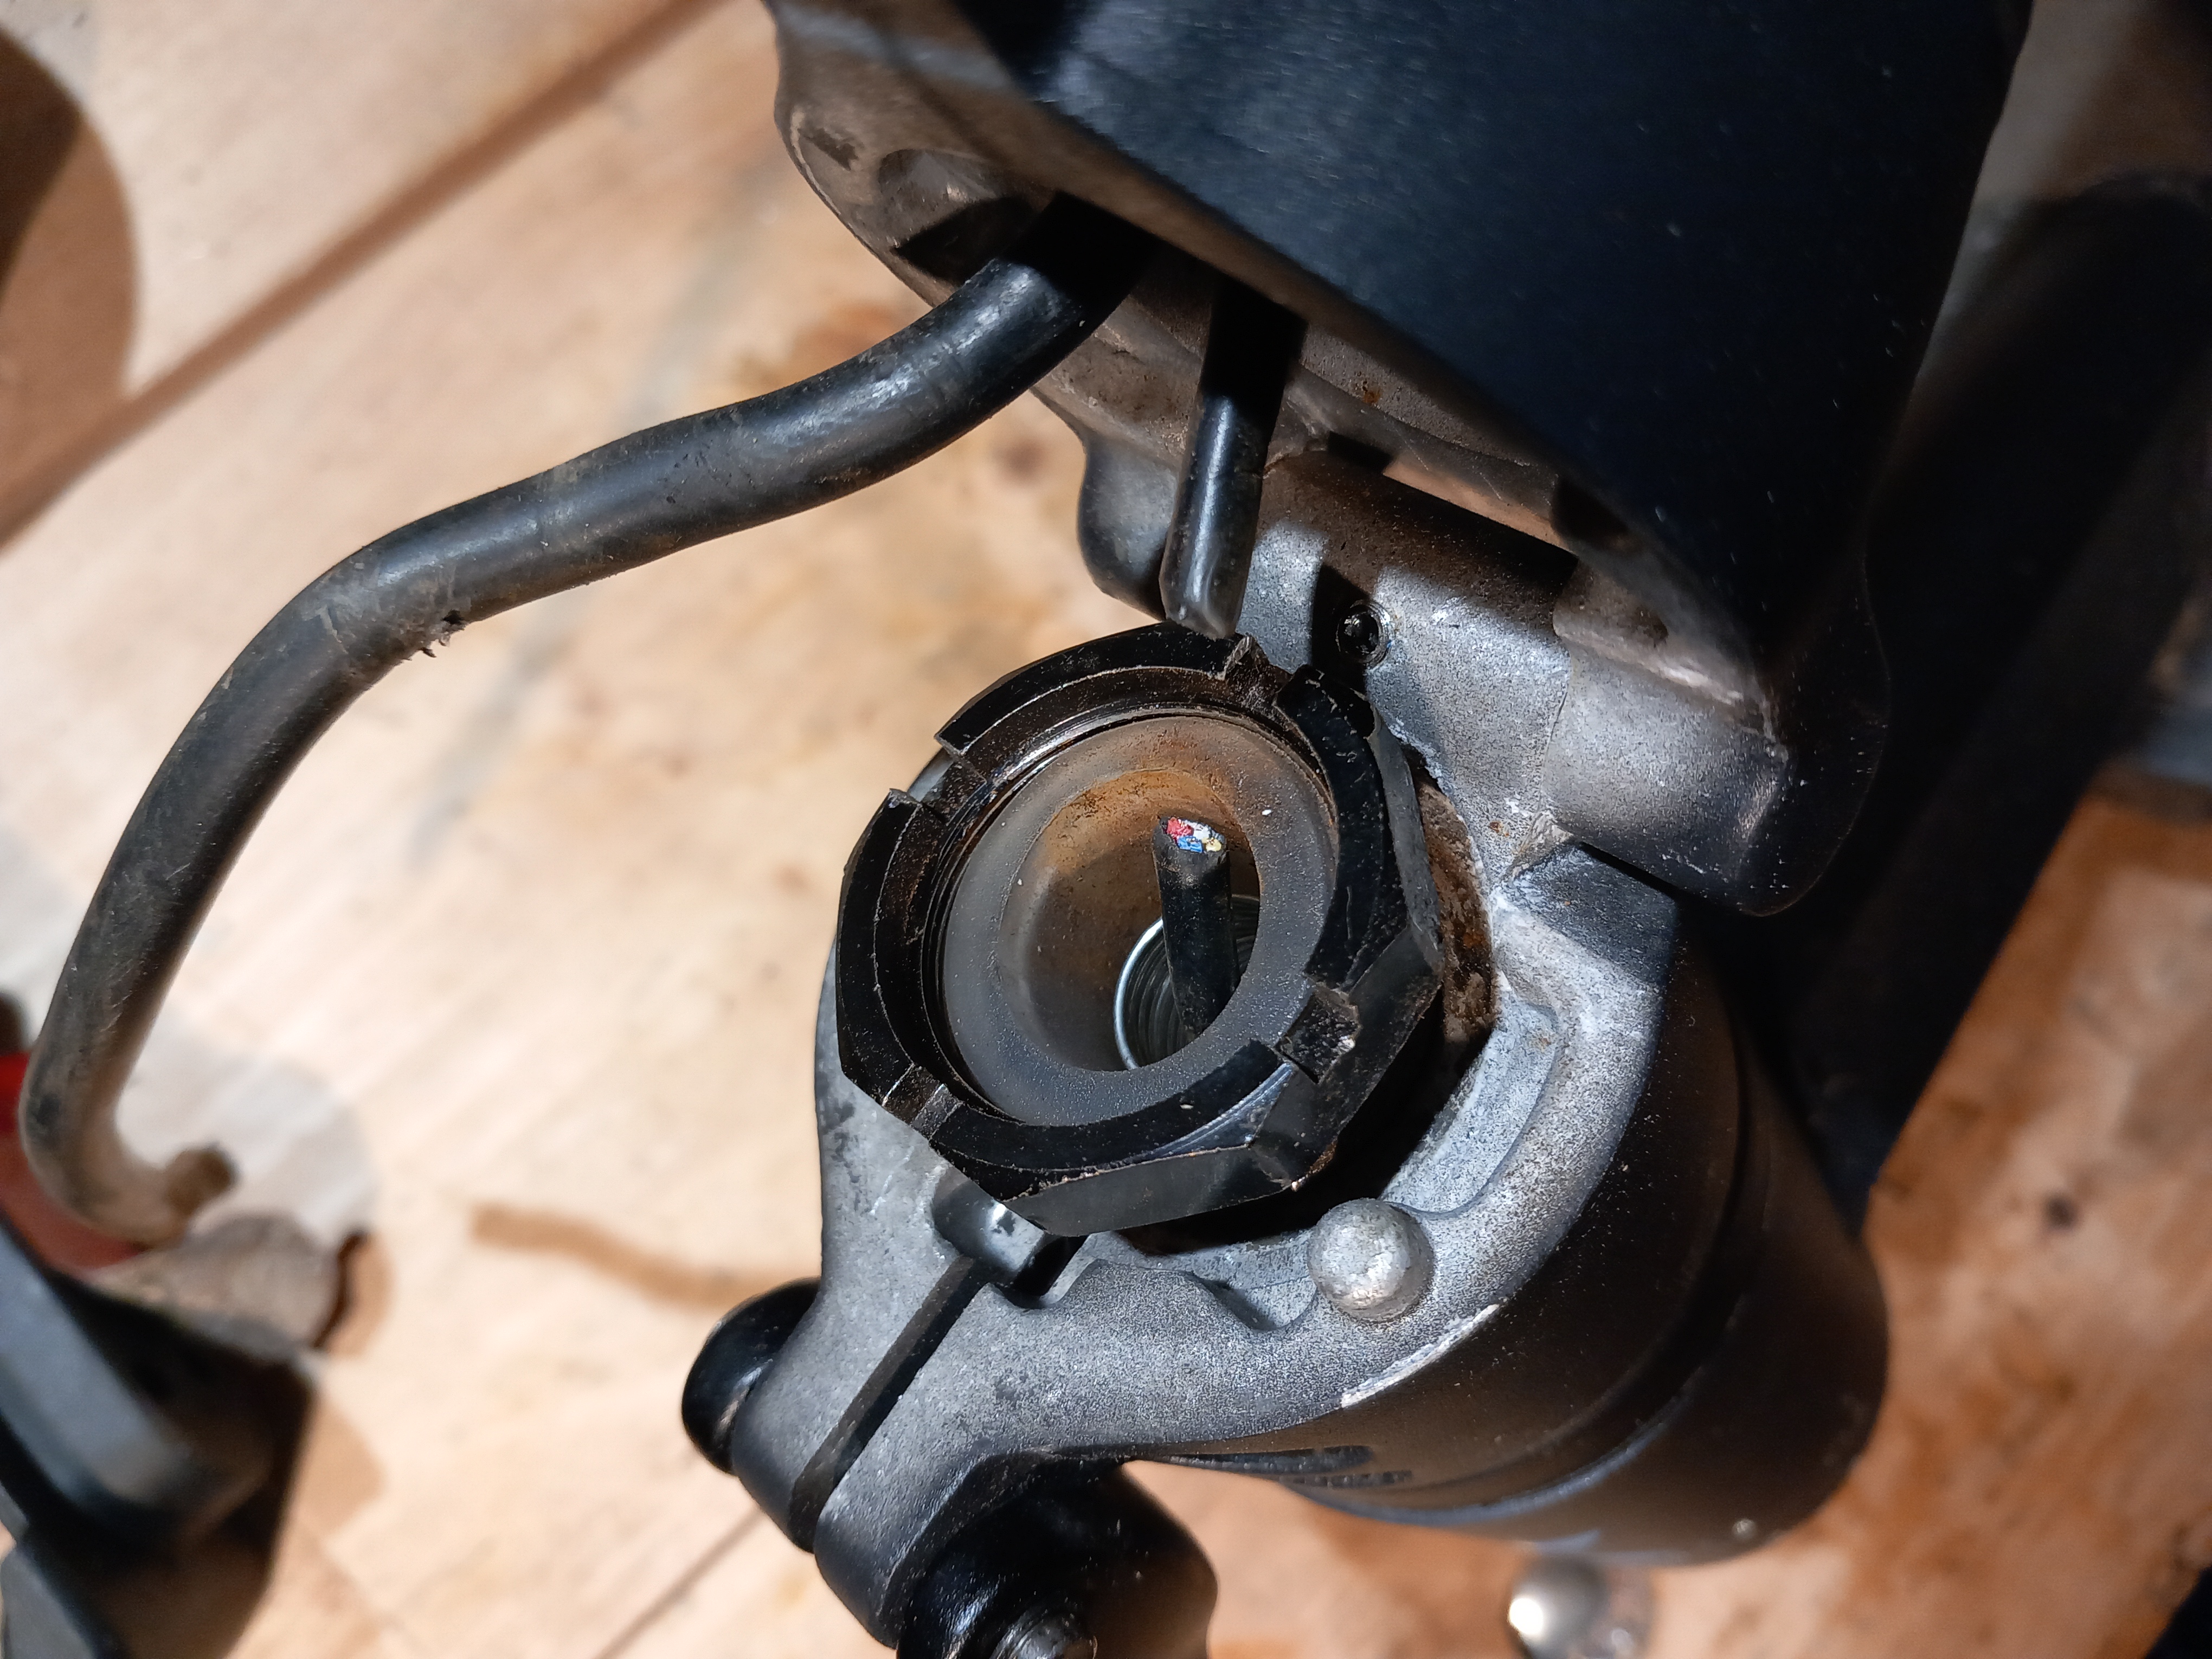
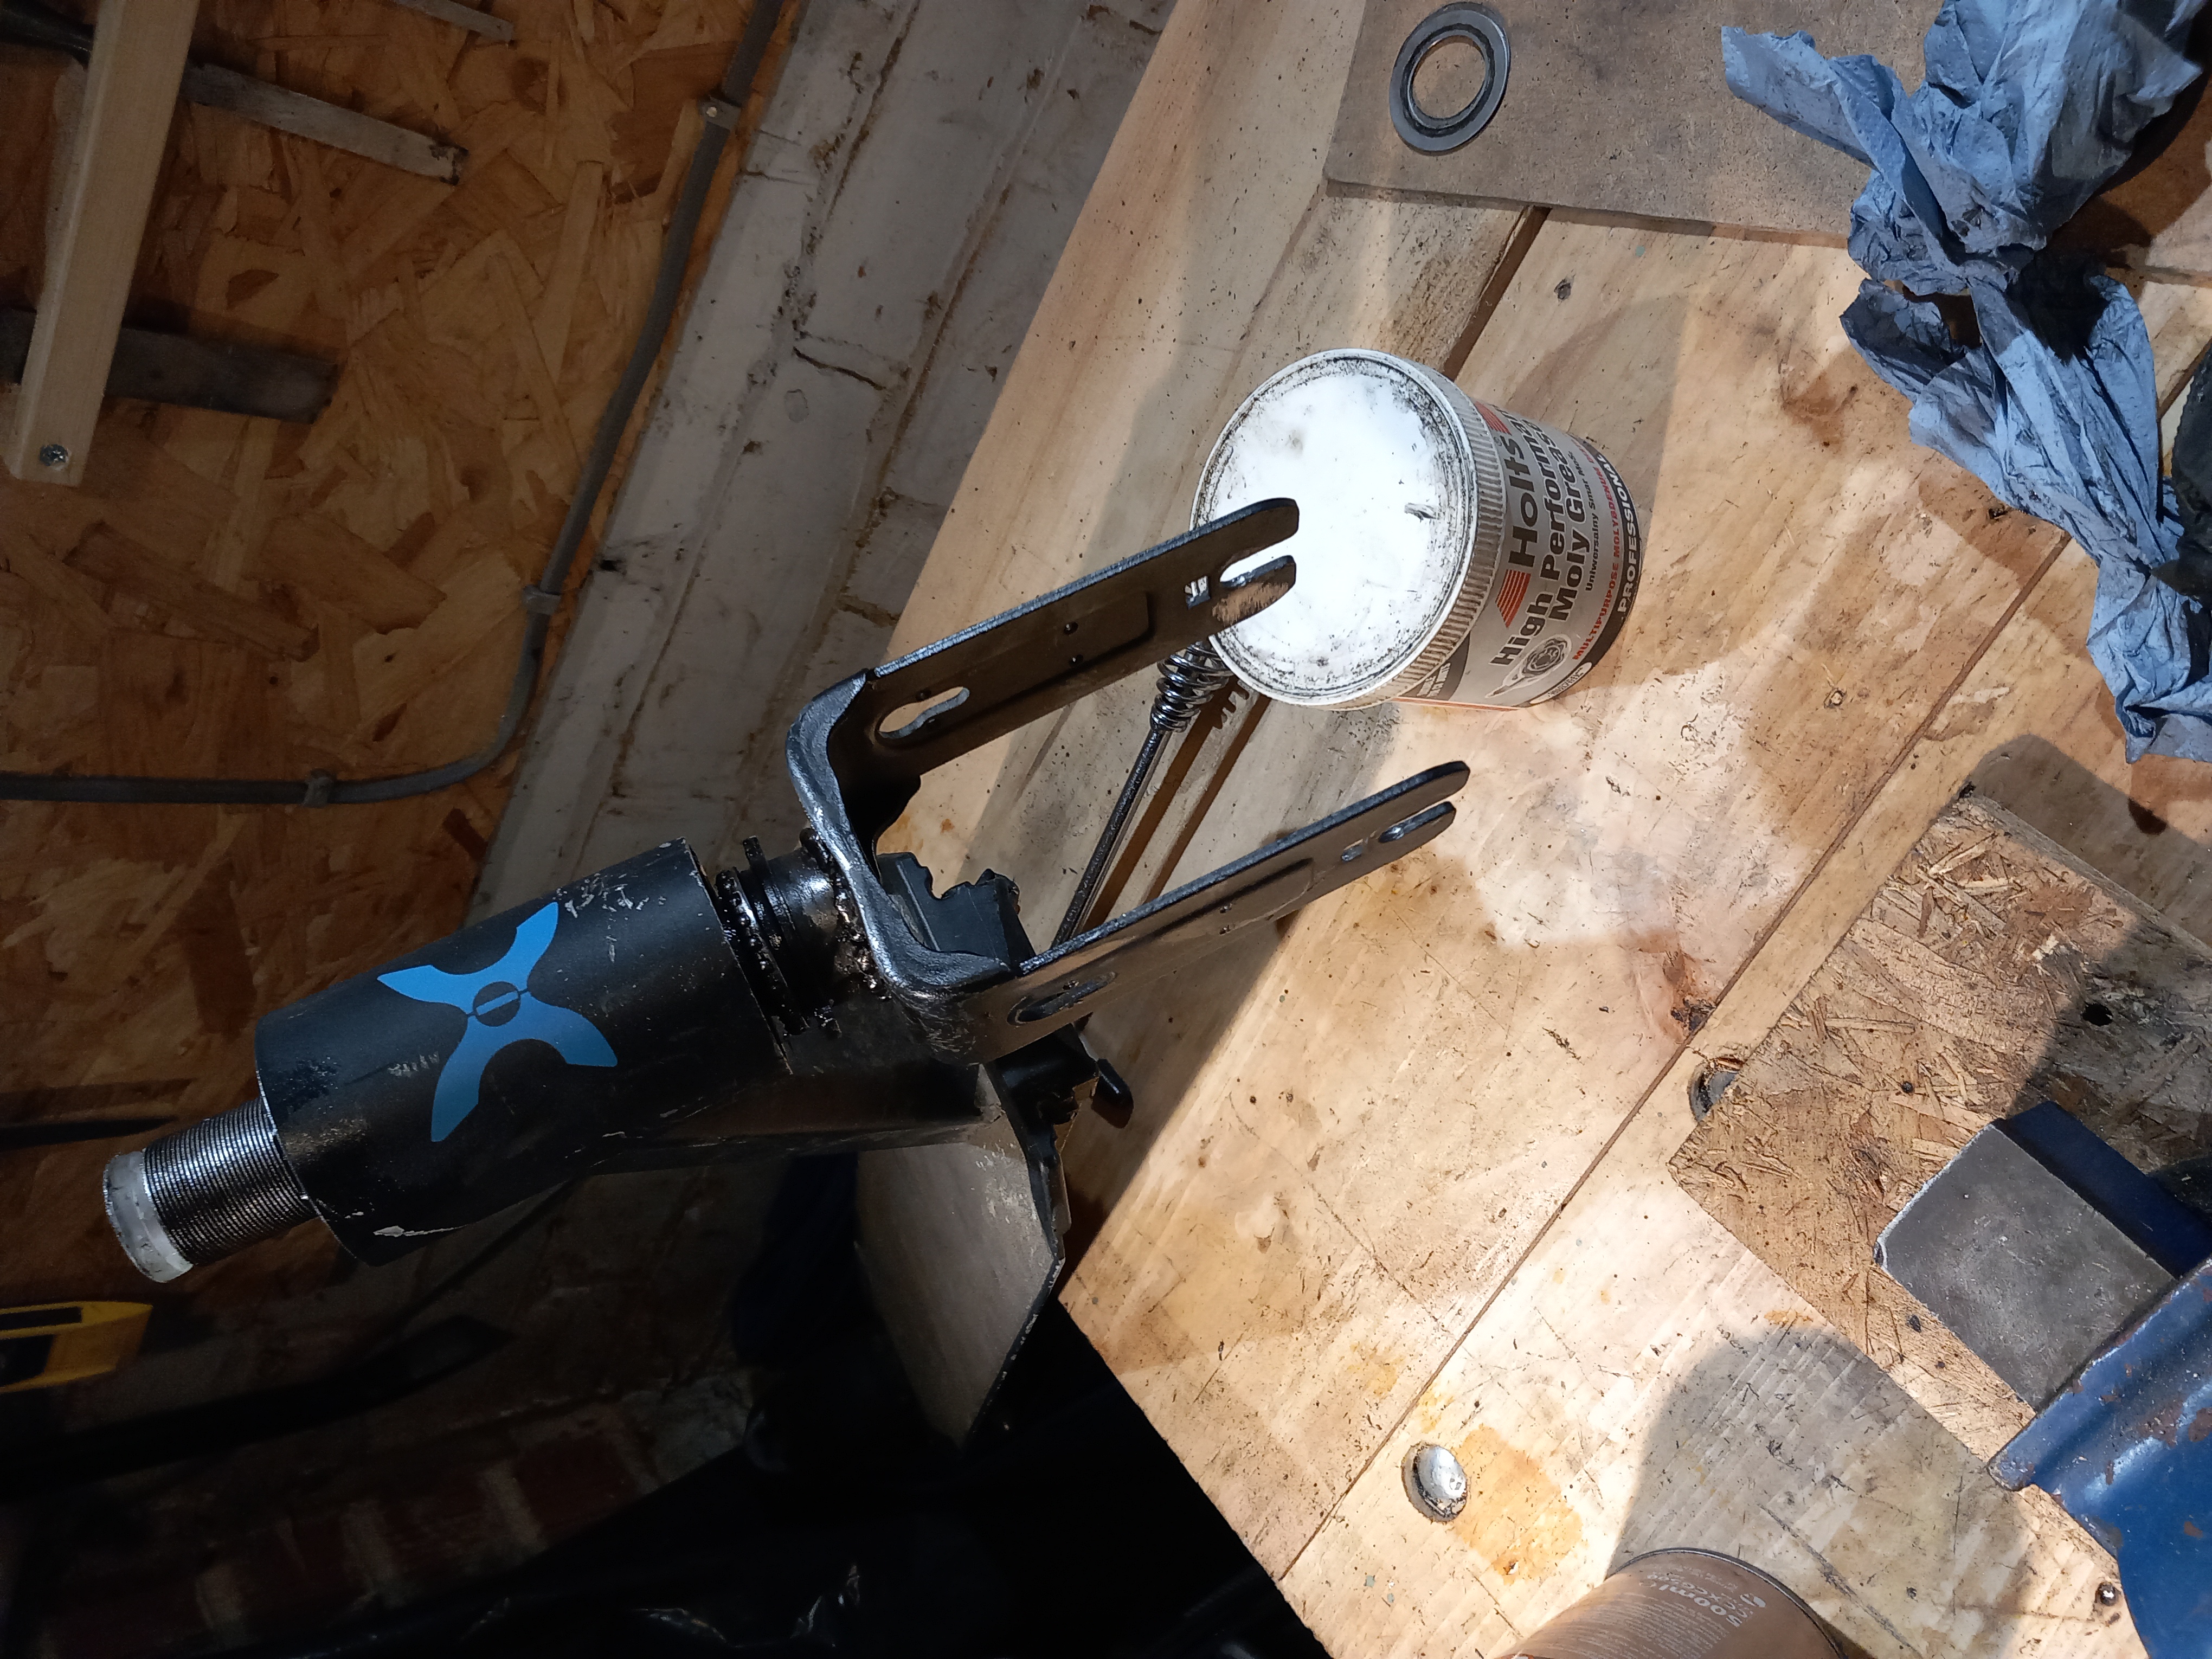
Now for the other half, which resolutely refused to open. There was a grub screw in there, presumably to add some friction on the pin (the outside ends are fixed and painted over, so it has to be the centre of the hinge which rotates round the pin).
I have no idea who thought that more friction was needed on that pin. The screw ended up being drilled out, and then the joint could be slowly unsiezed by working it back and forth with plenty of oil as a cutting fluid, stopping periodically to blow out any swarf. And even then it took the best part of an hour to get the blasted thing approaching the point where I’d expect someone to think it was supposed to unfold. As far as I can tell there was no lubrication on the pin at all.
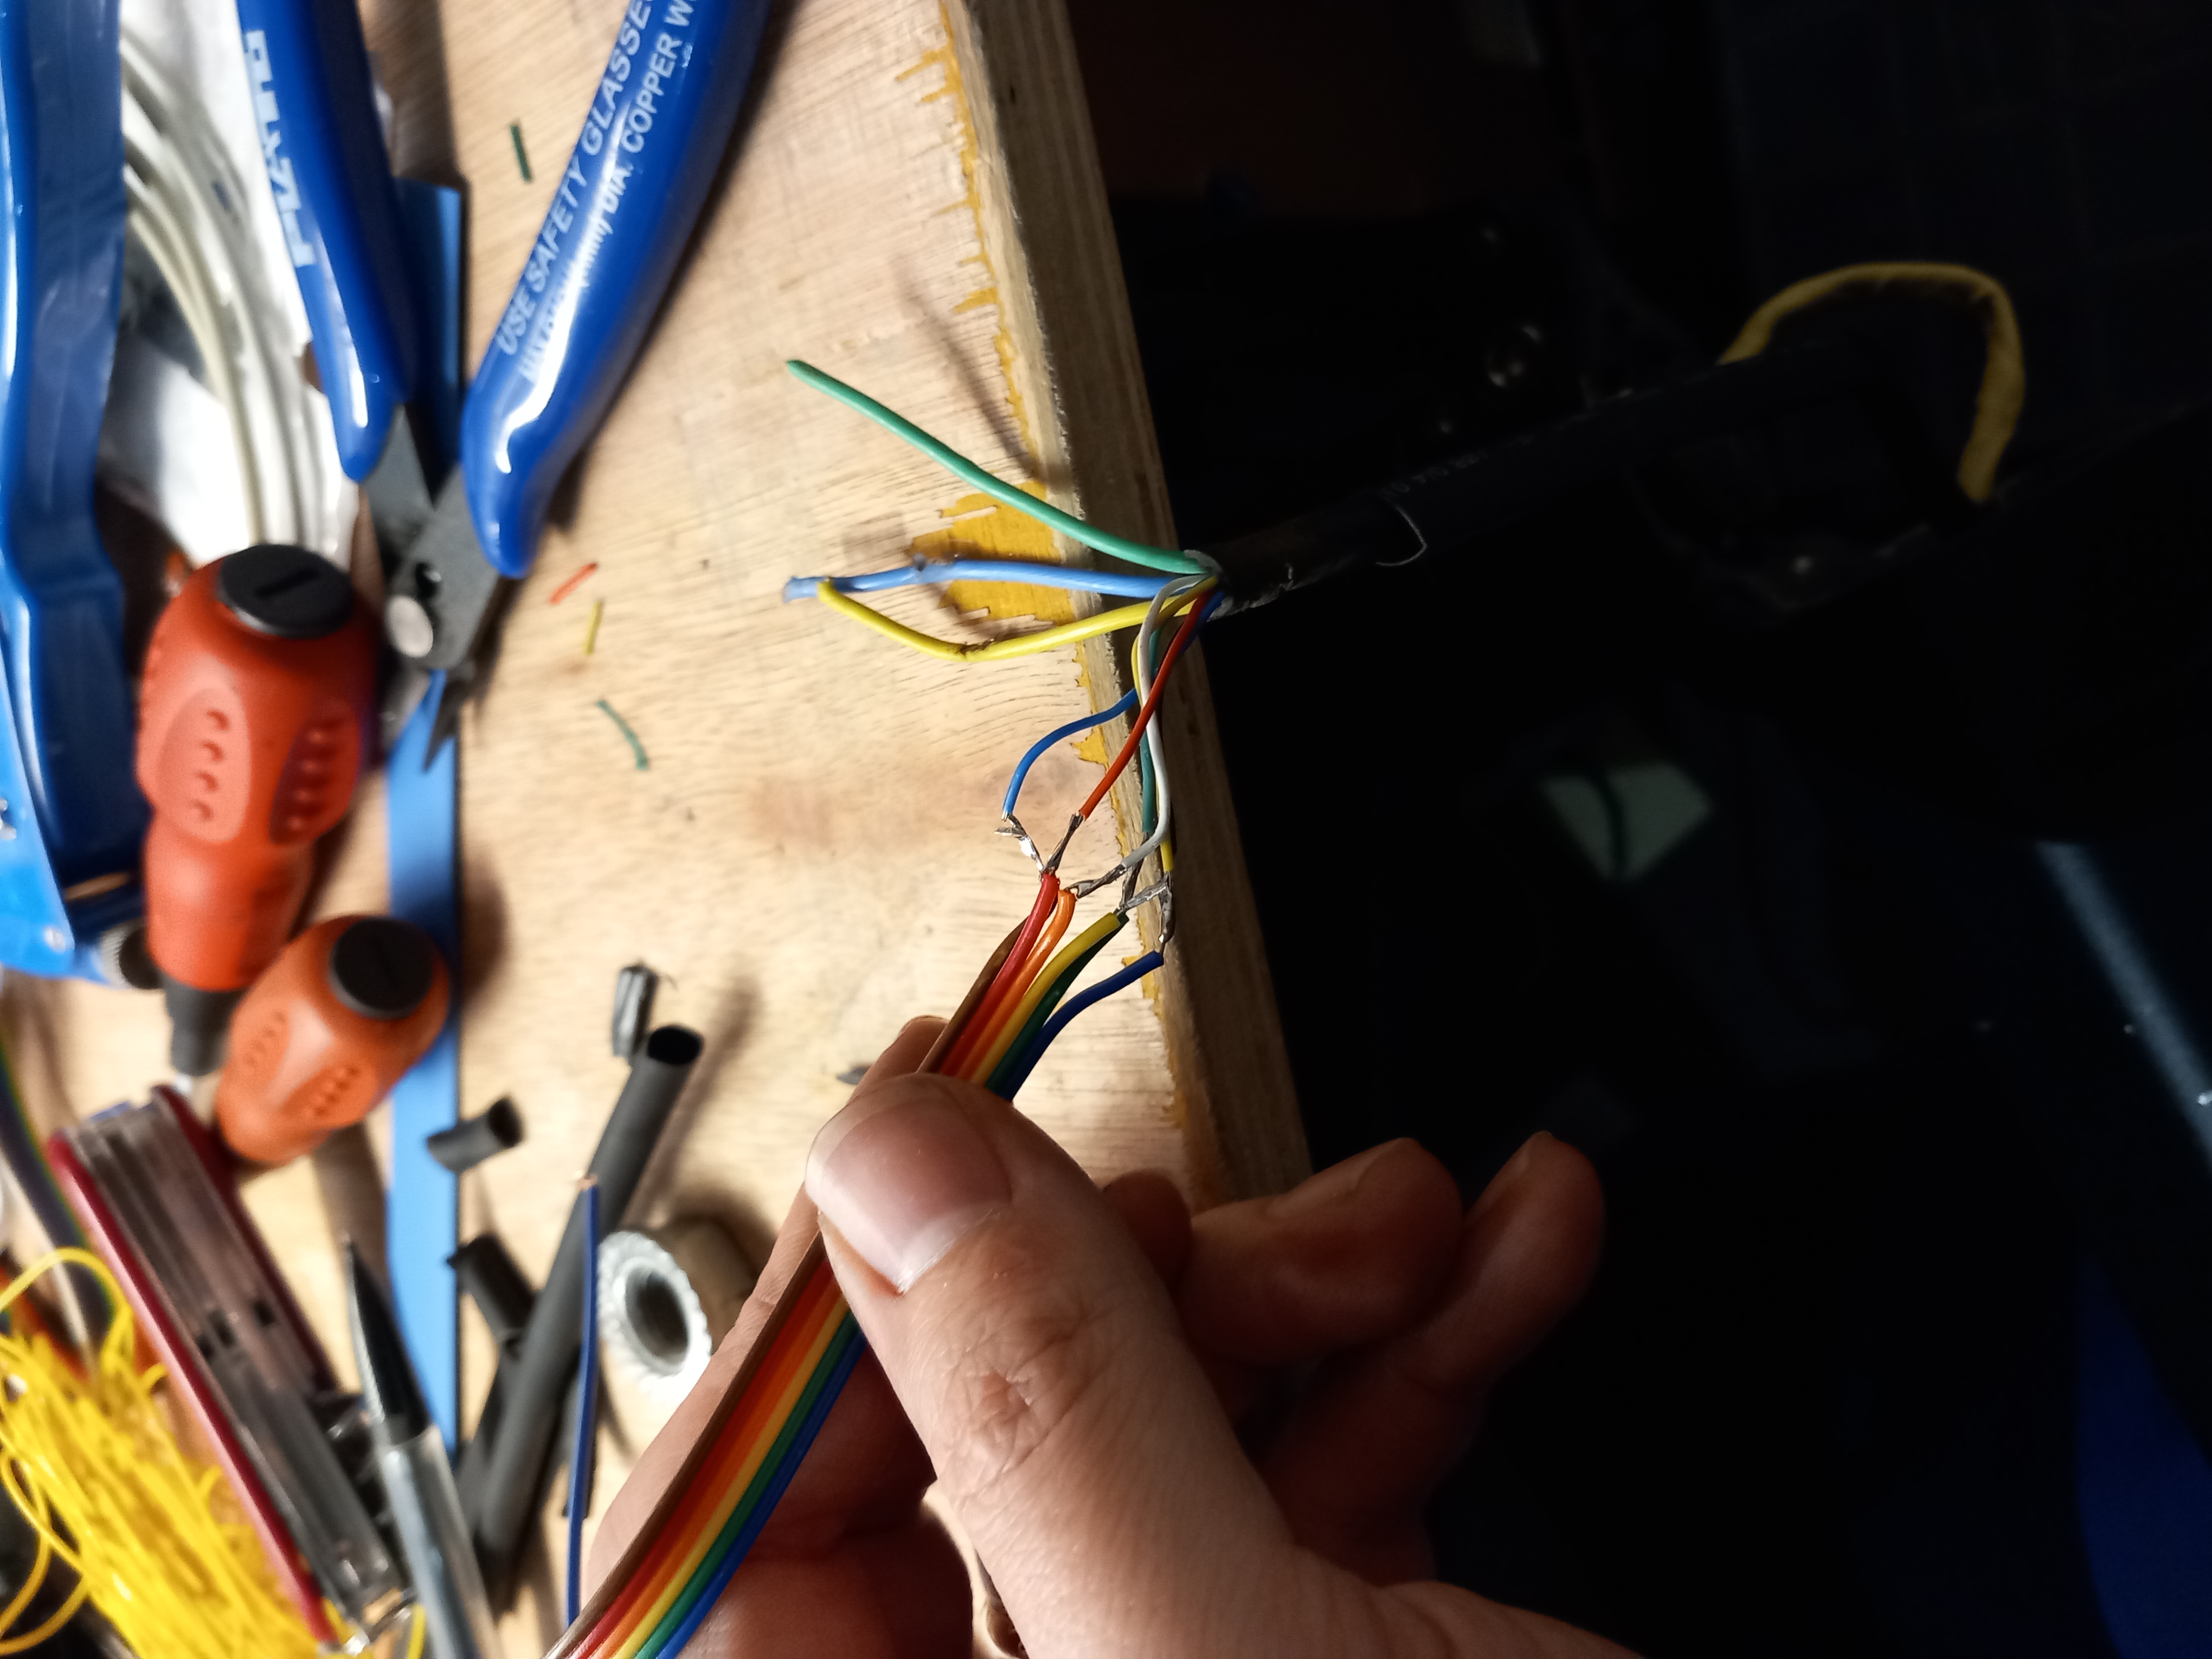
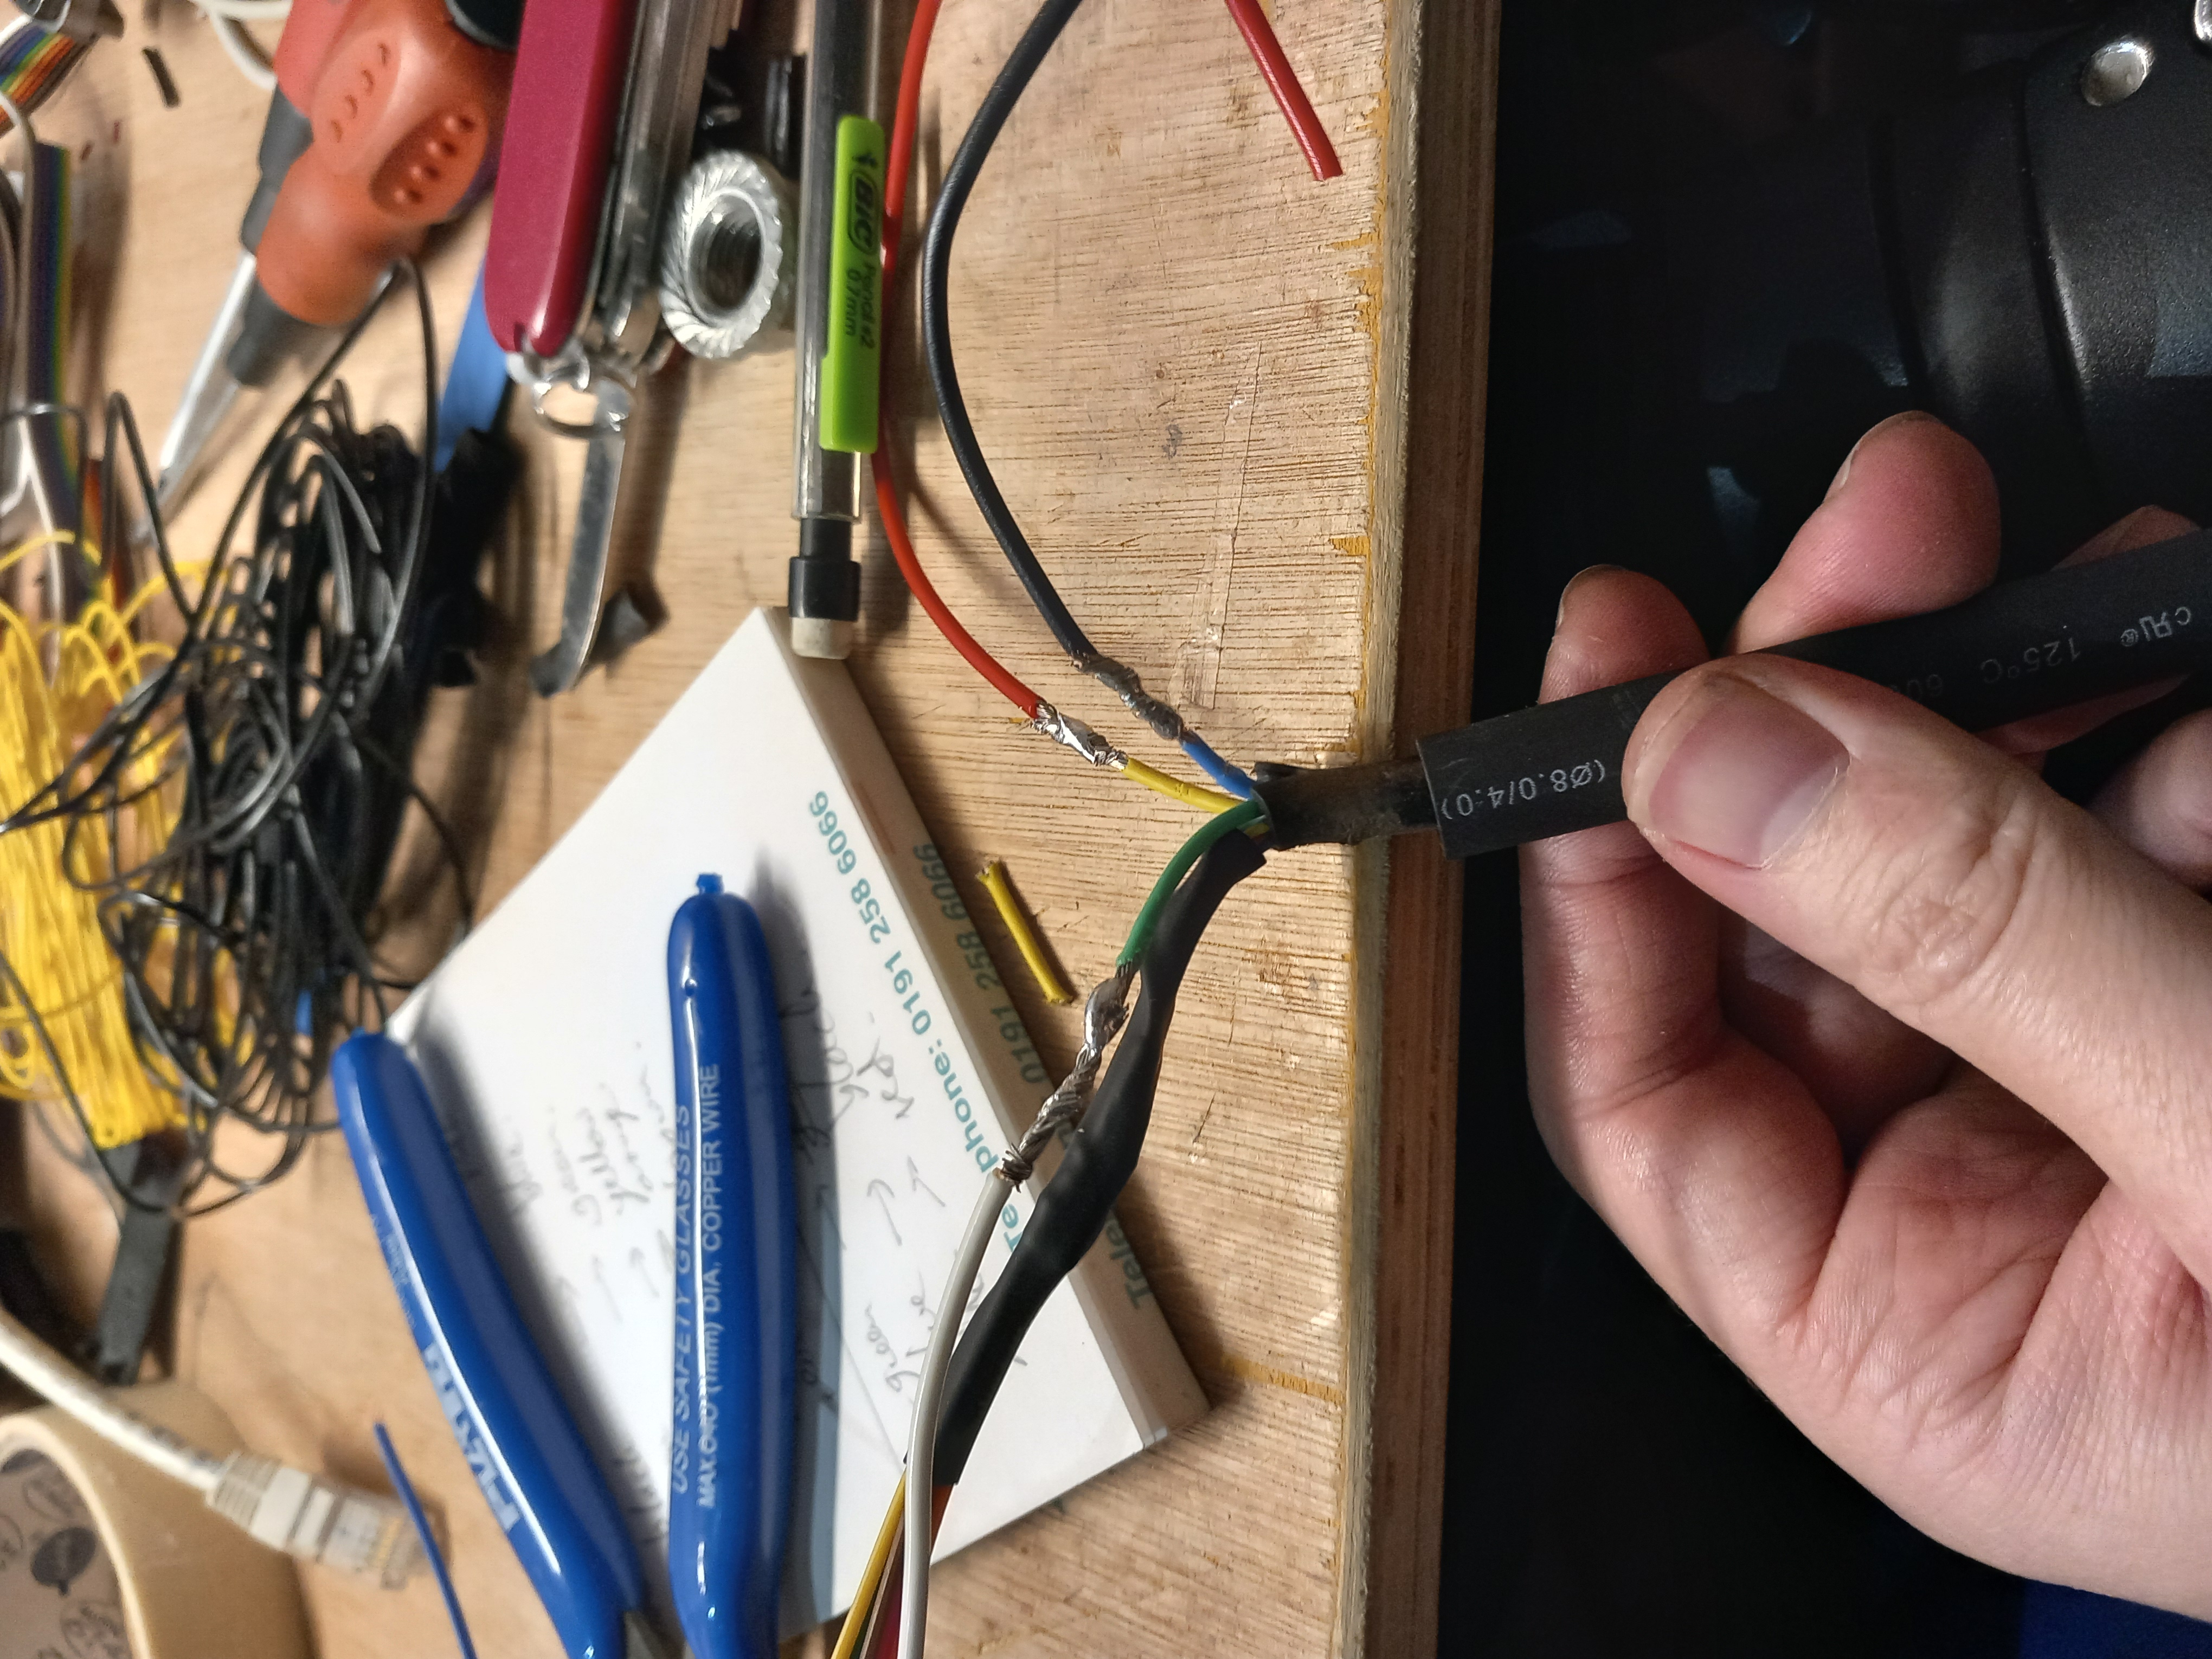
After that it was the slow work of making good the cut wiring. There was barely room to strip and solder to begin with, so a section had to be spliced in, and it turned out there were three power and six (!) sense wires to the front wheel, and four more low-current wires to the sensors in the footboard. So thirteen wires to make up into a cable with far too much heatshrink. The result wasn’t pretty and was much less flexible even than the horribly unworkable cable they used in the factory (lending support to the idea that thing was welded up with the cable inside, the section stuck in the fork tube became quite manageable when welding was over).
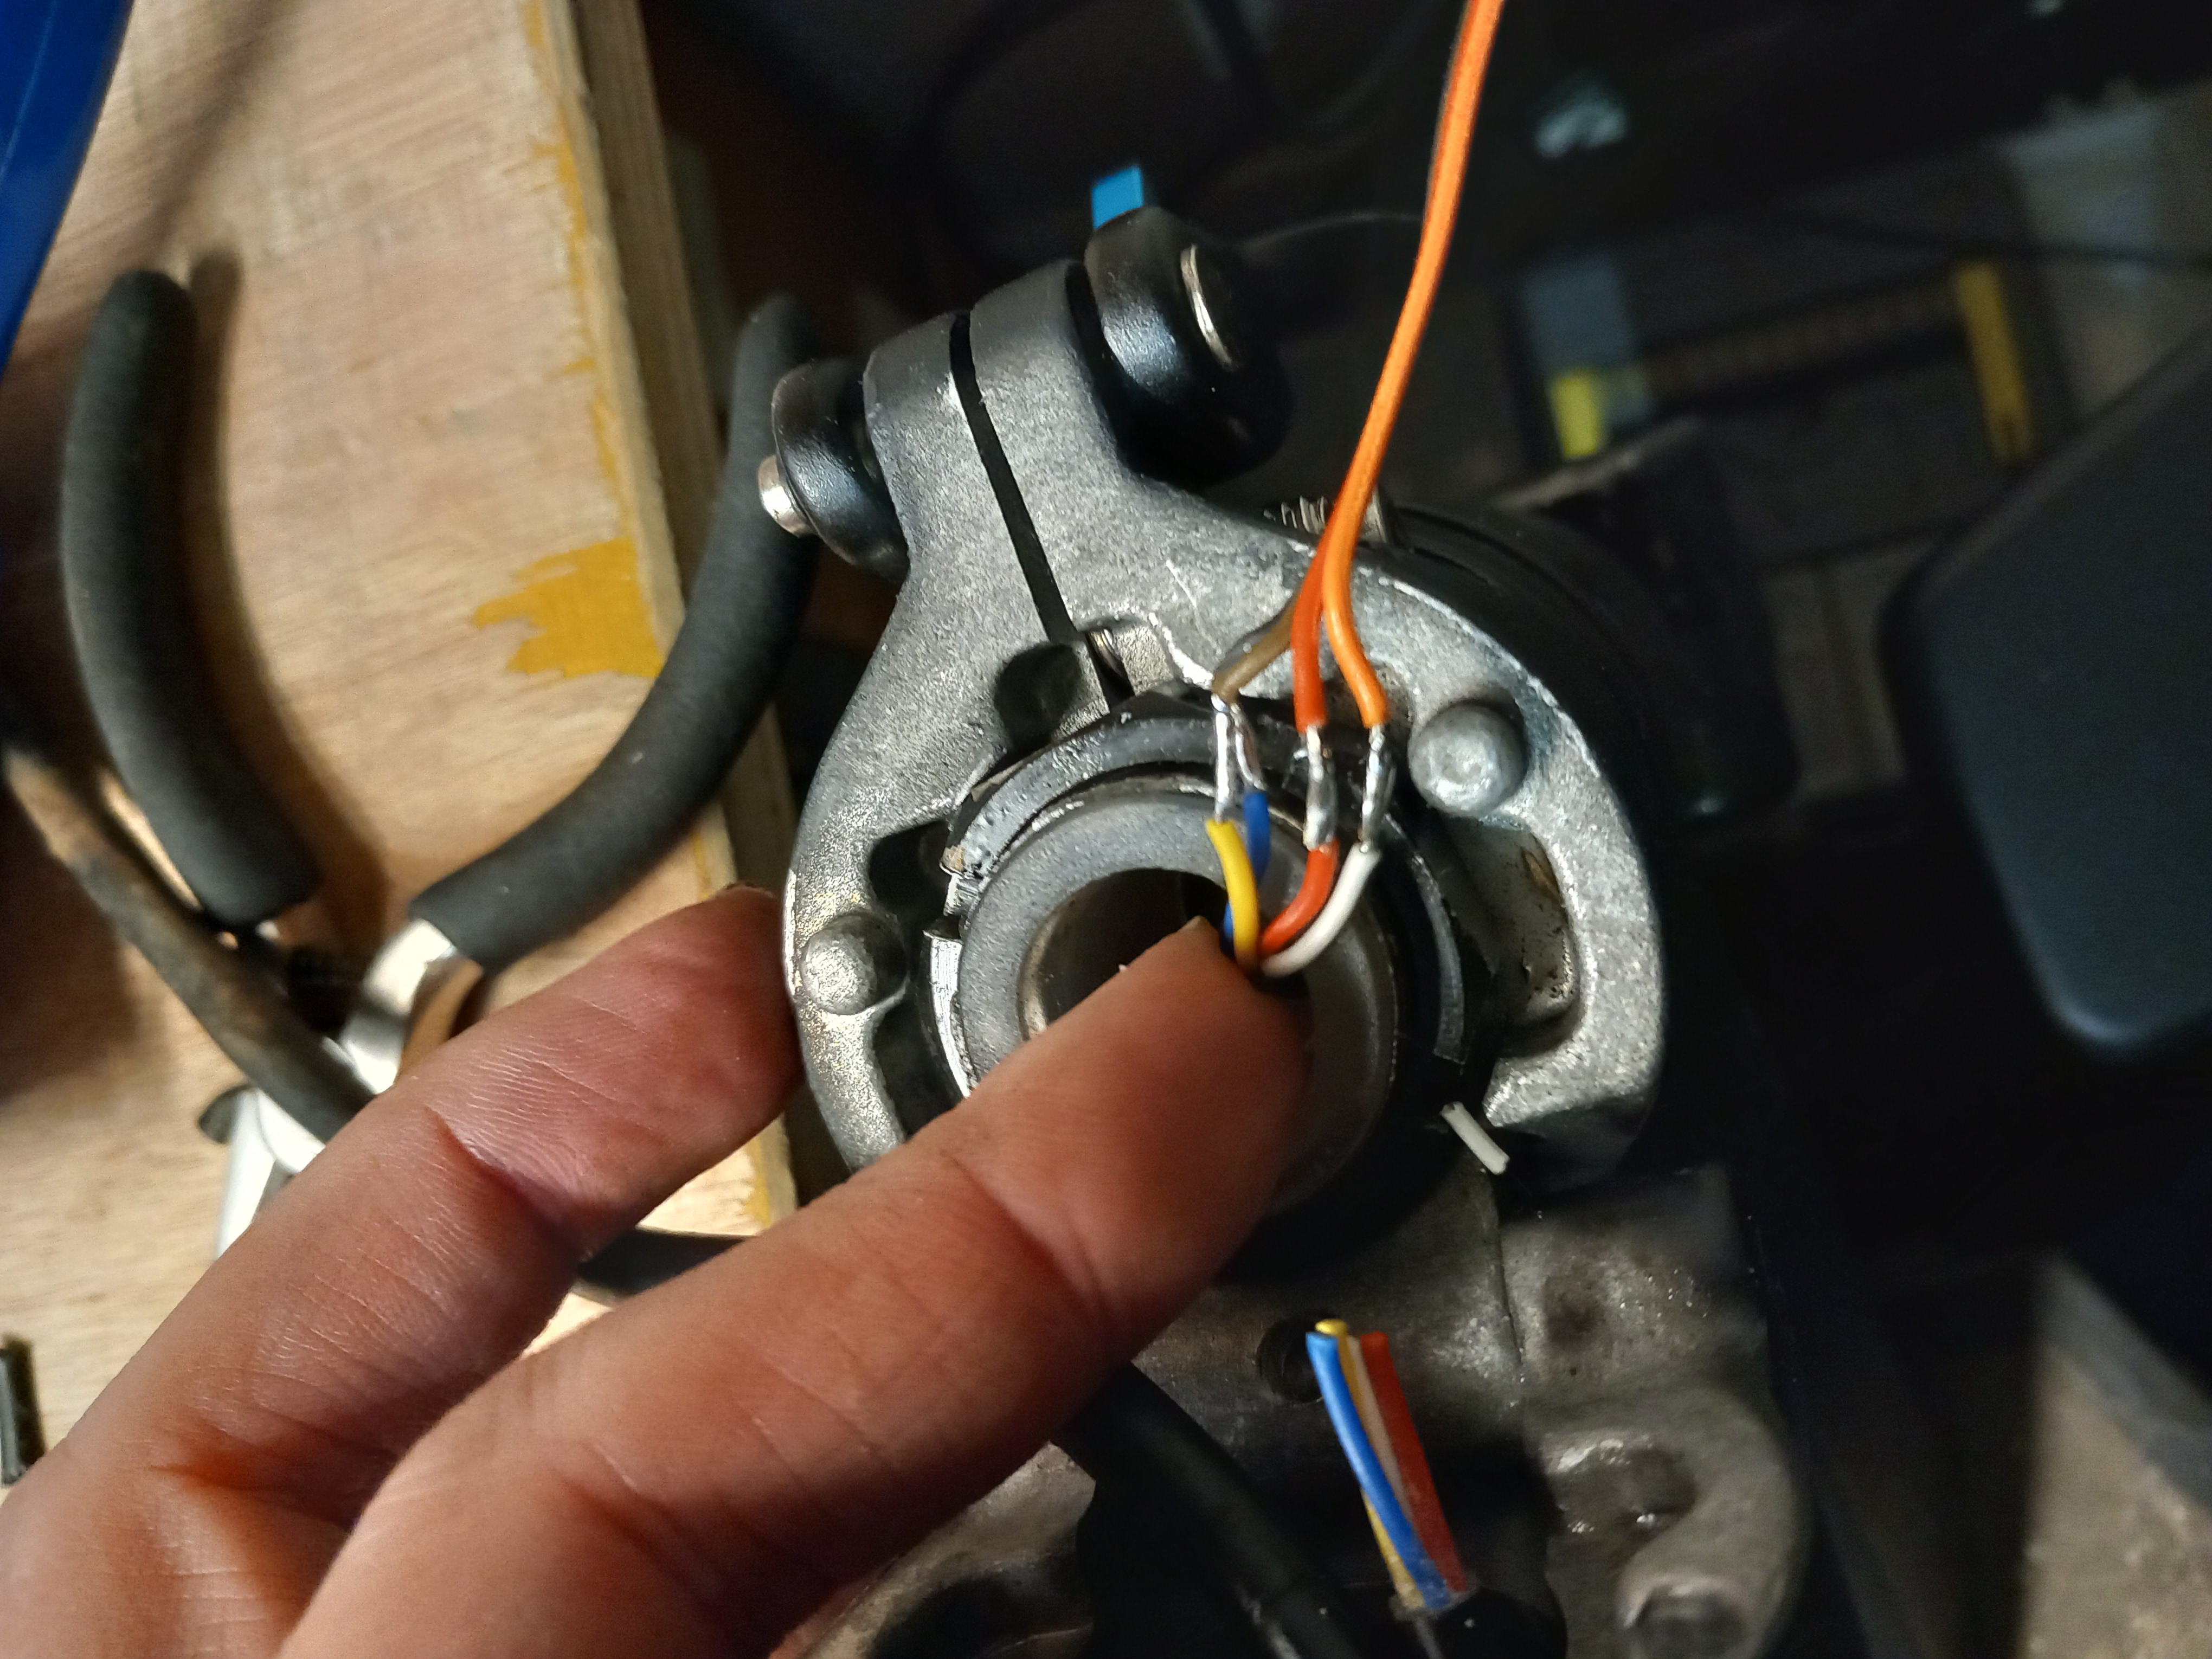
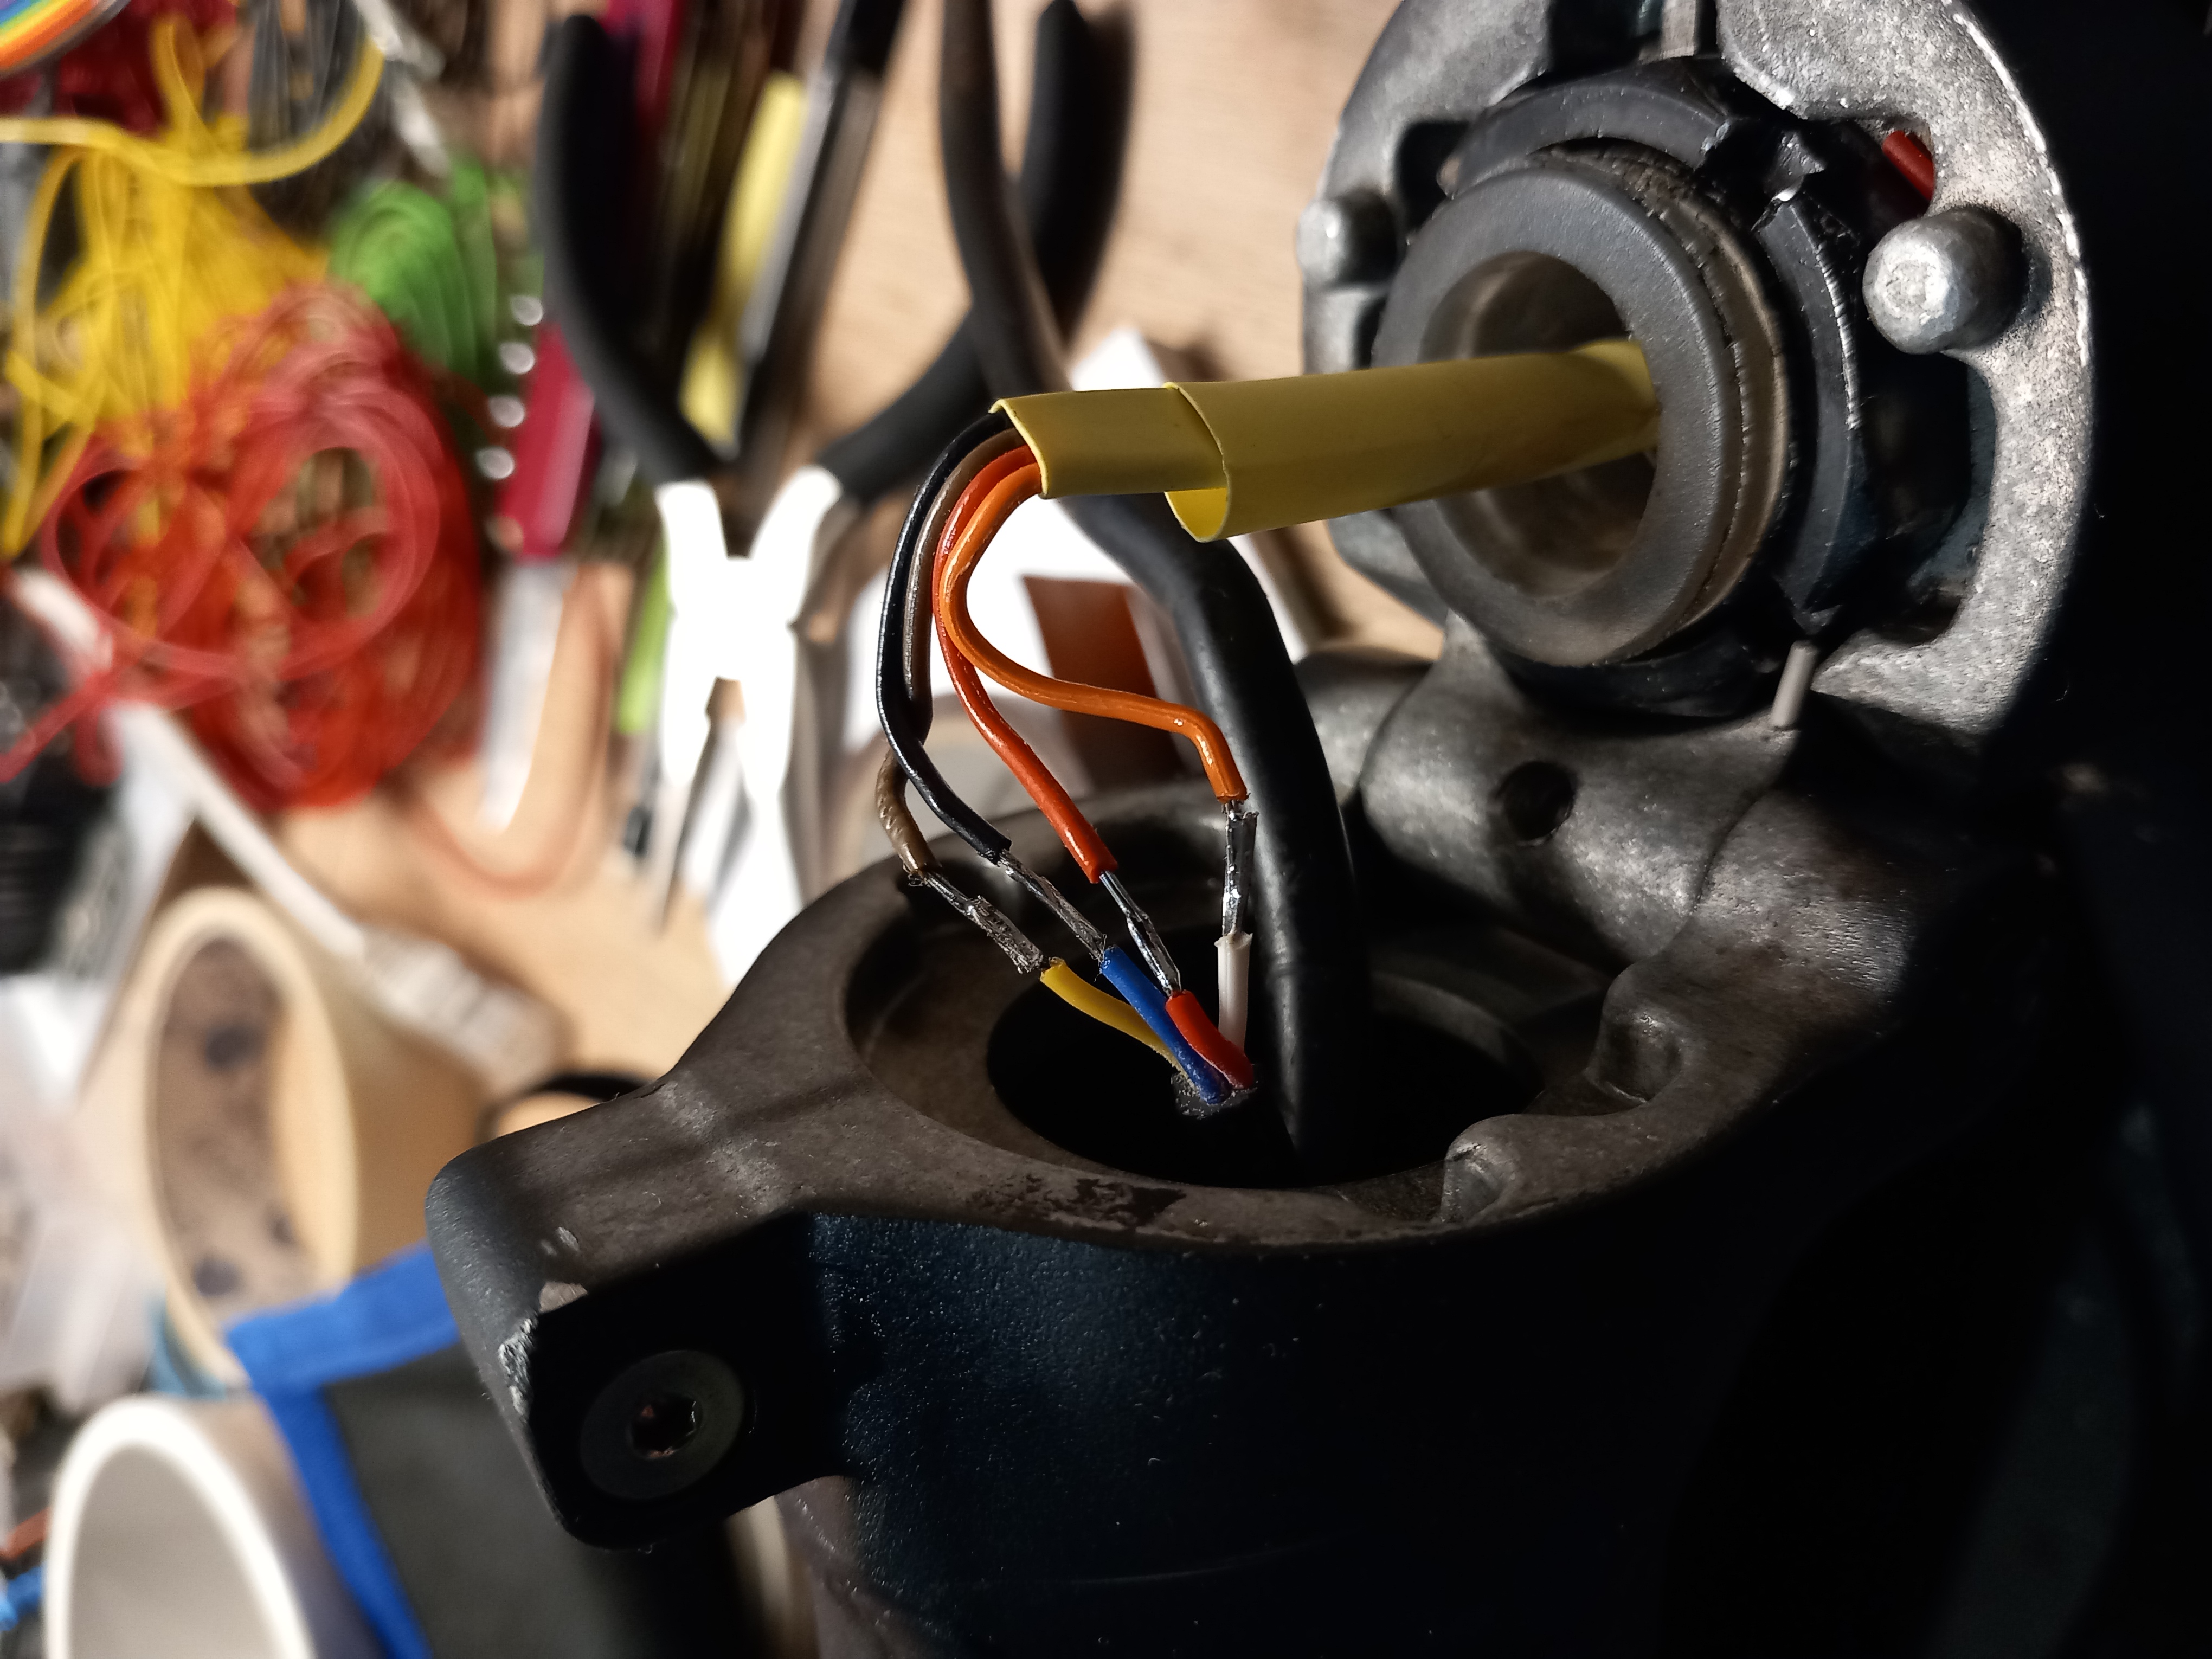
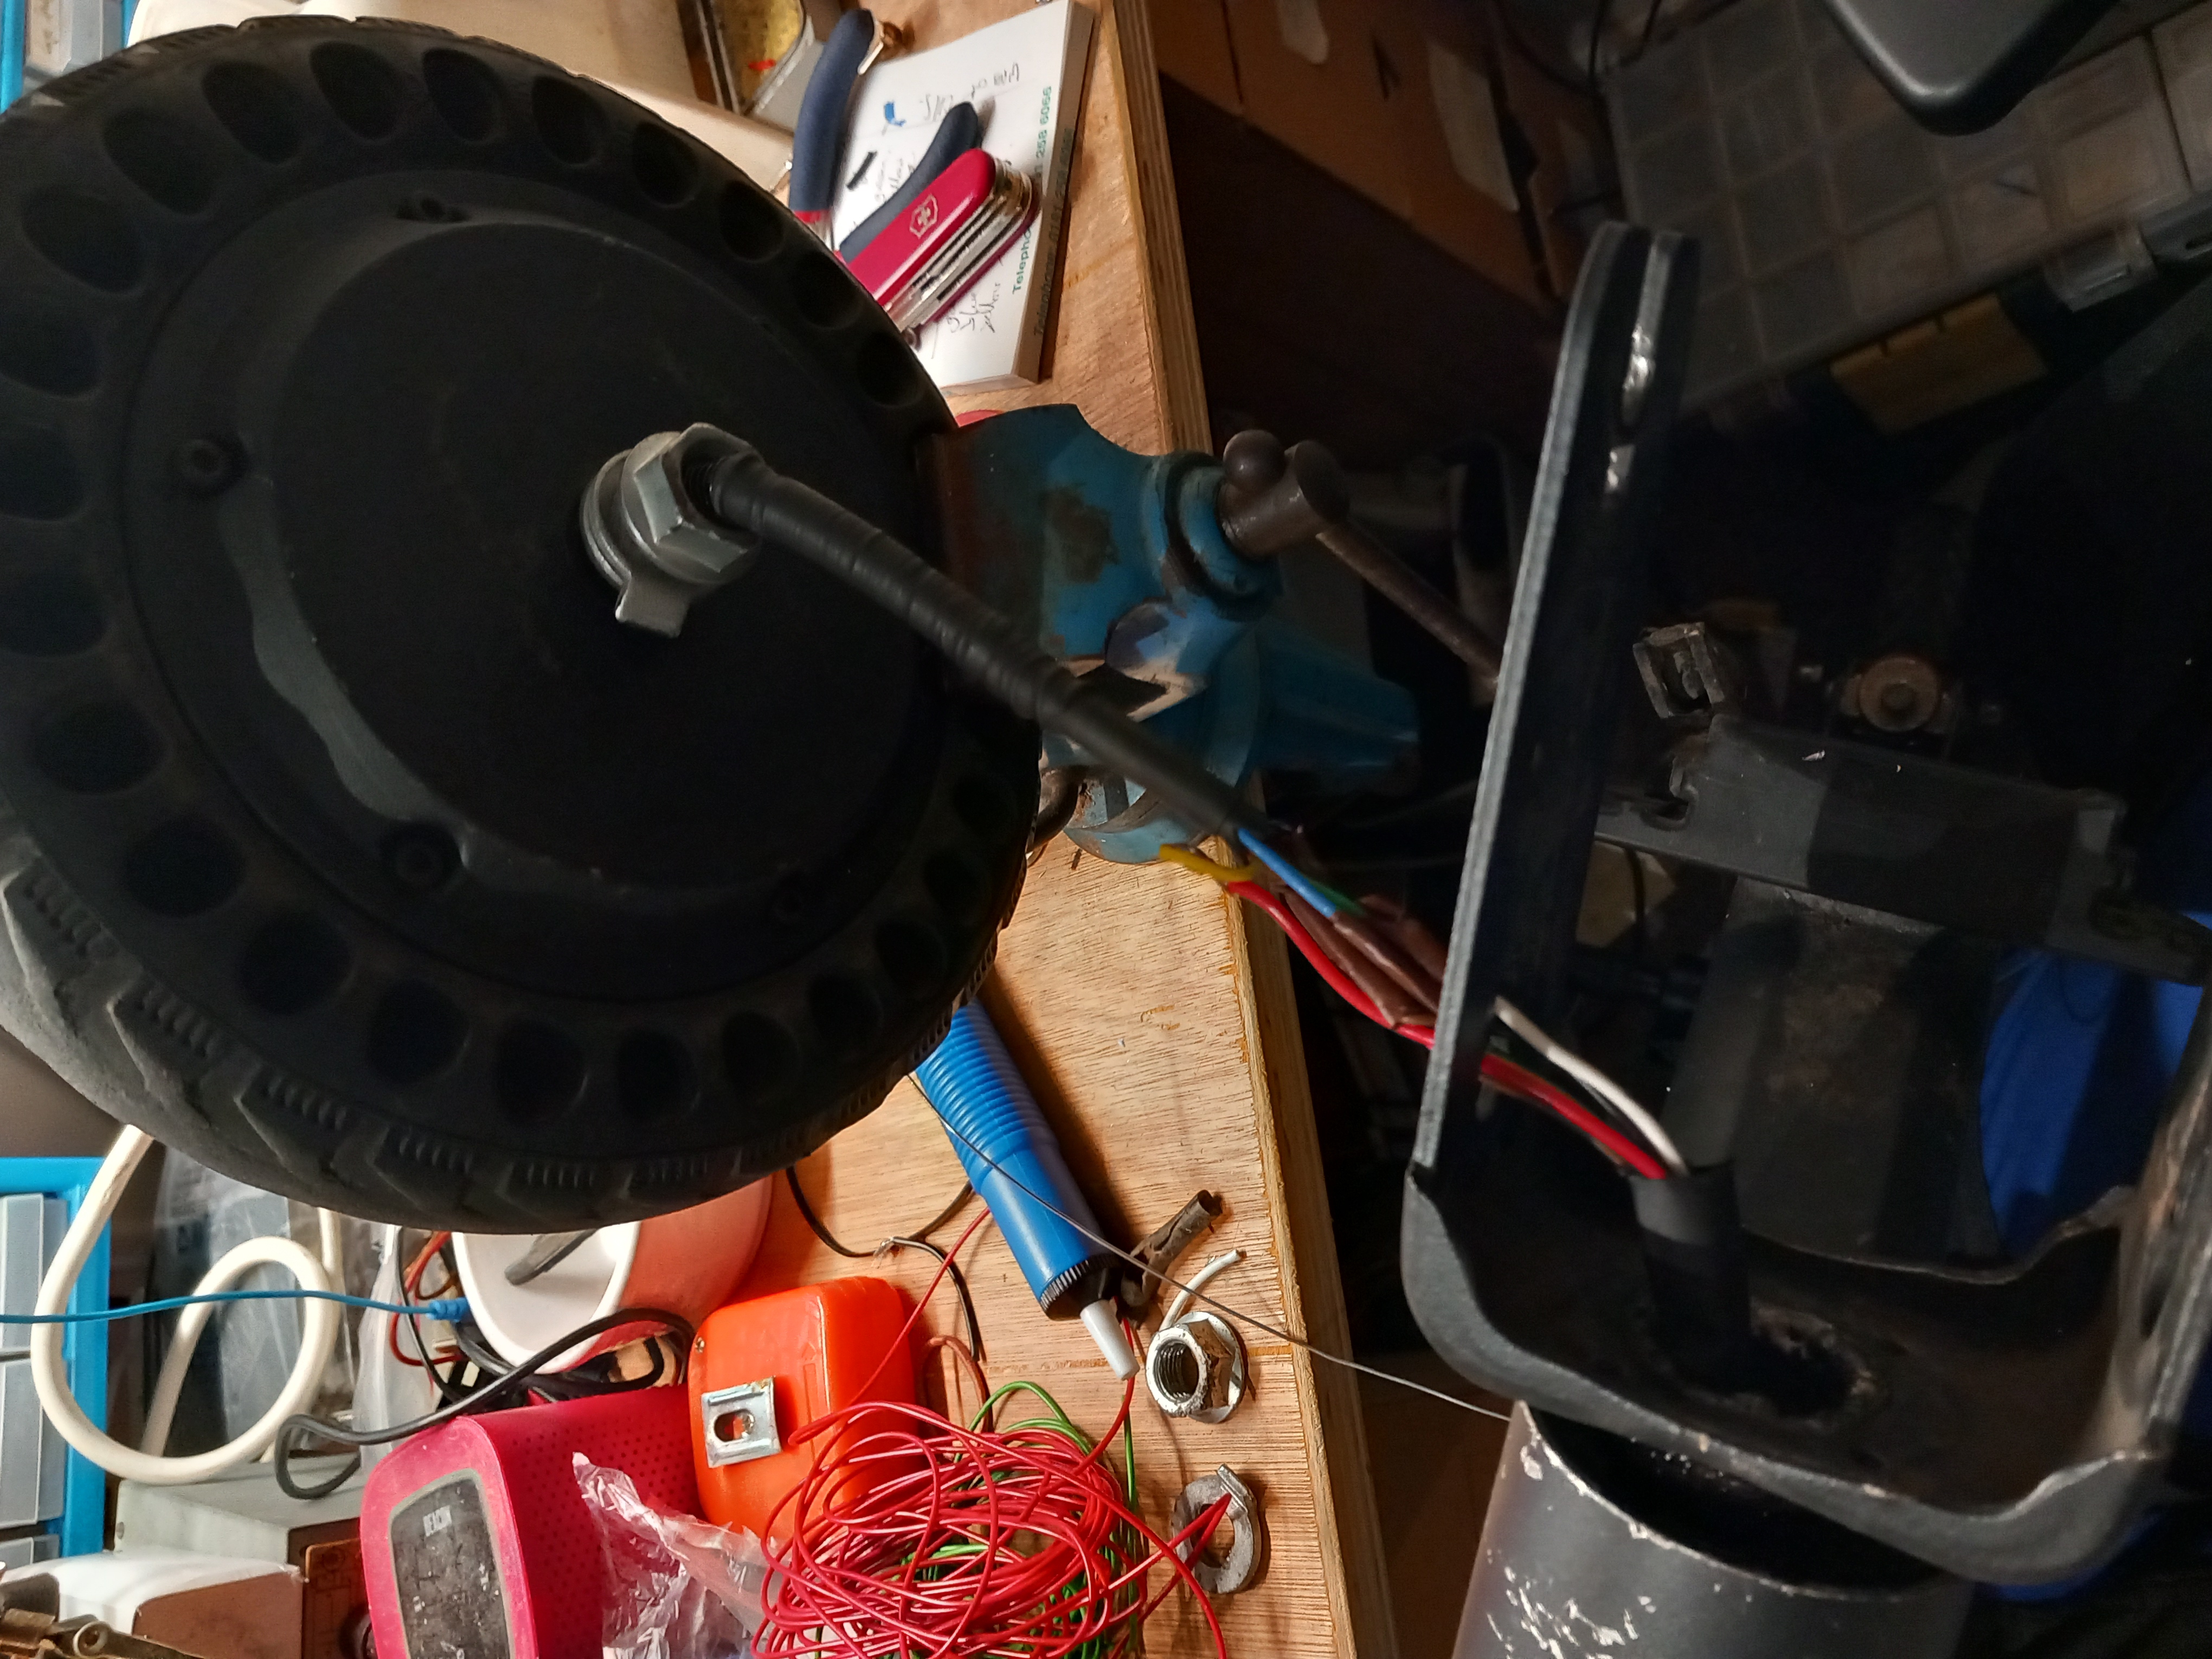
I had to put the whole thing together jury-rigged twice to check which way the motor span, because I kept forgetting which side the wire should come out of the wheel. In the end the made-up cable was so inflexible there was no chance of changing it once it was together.

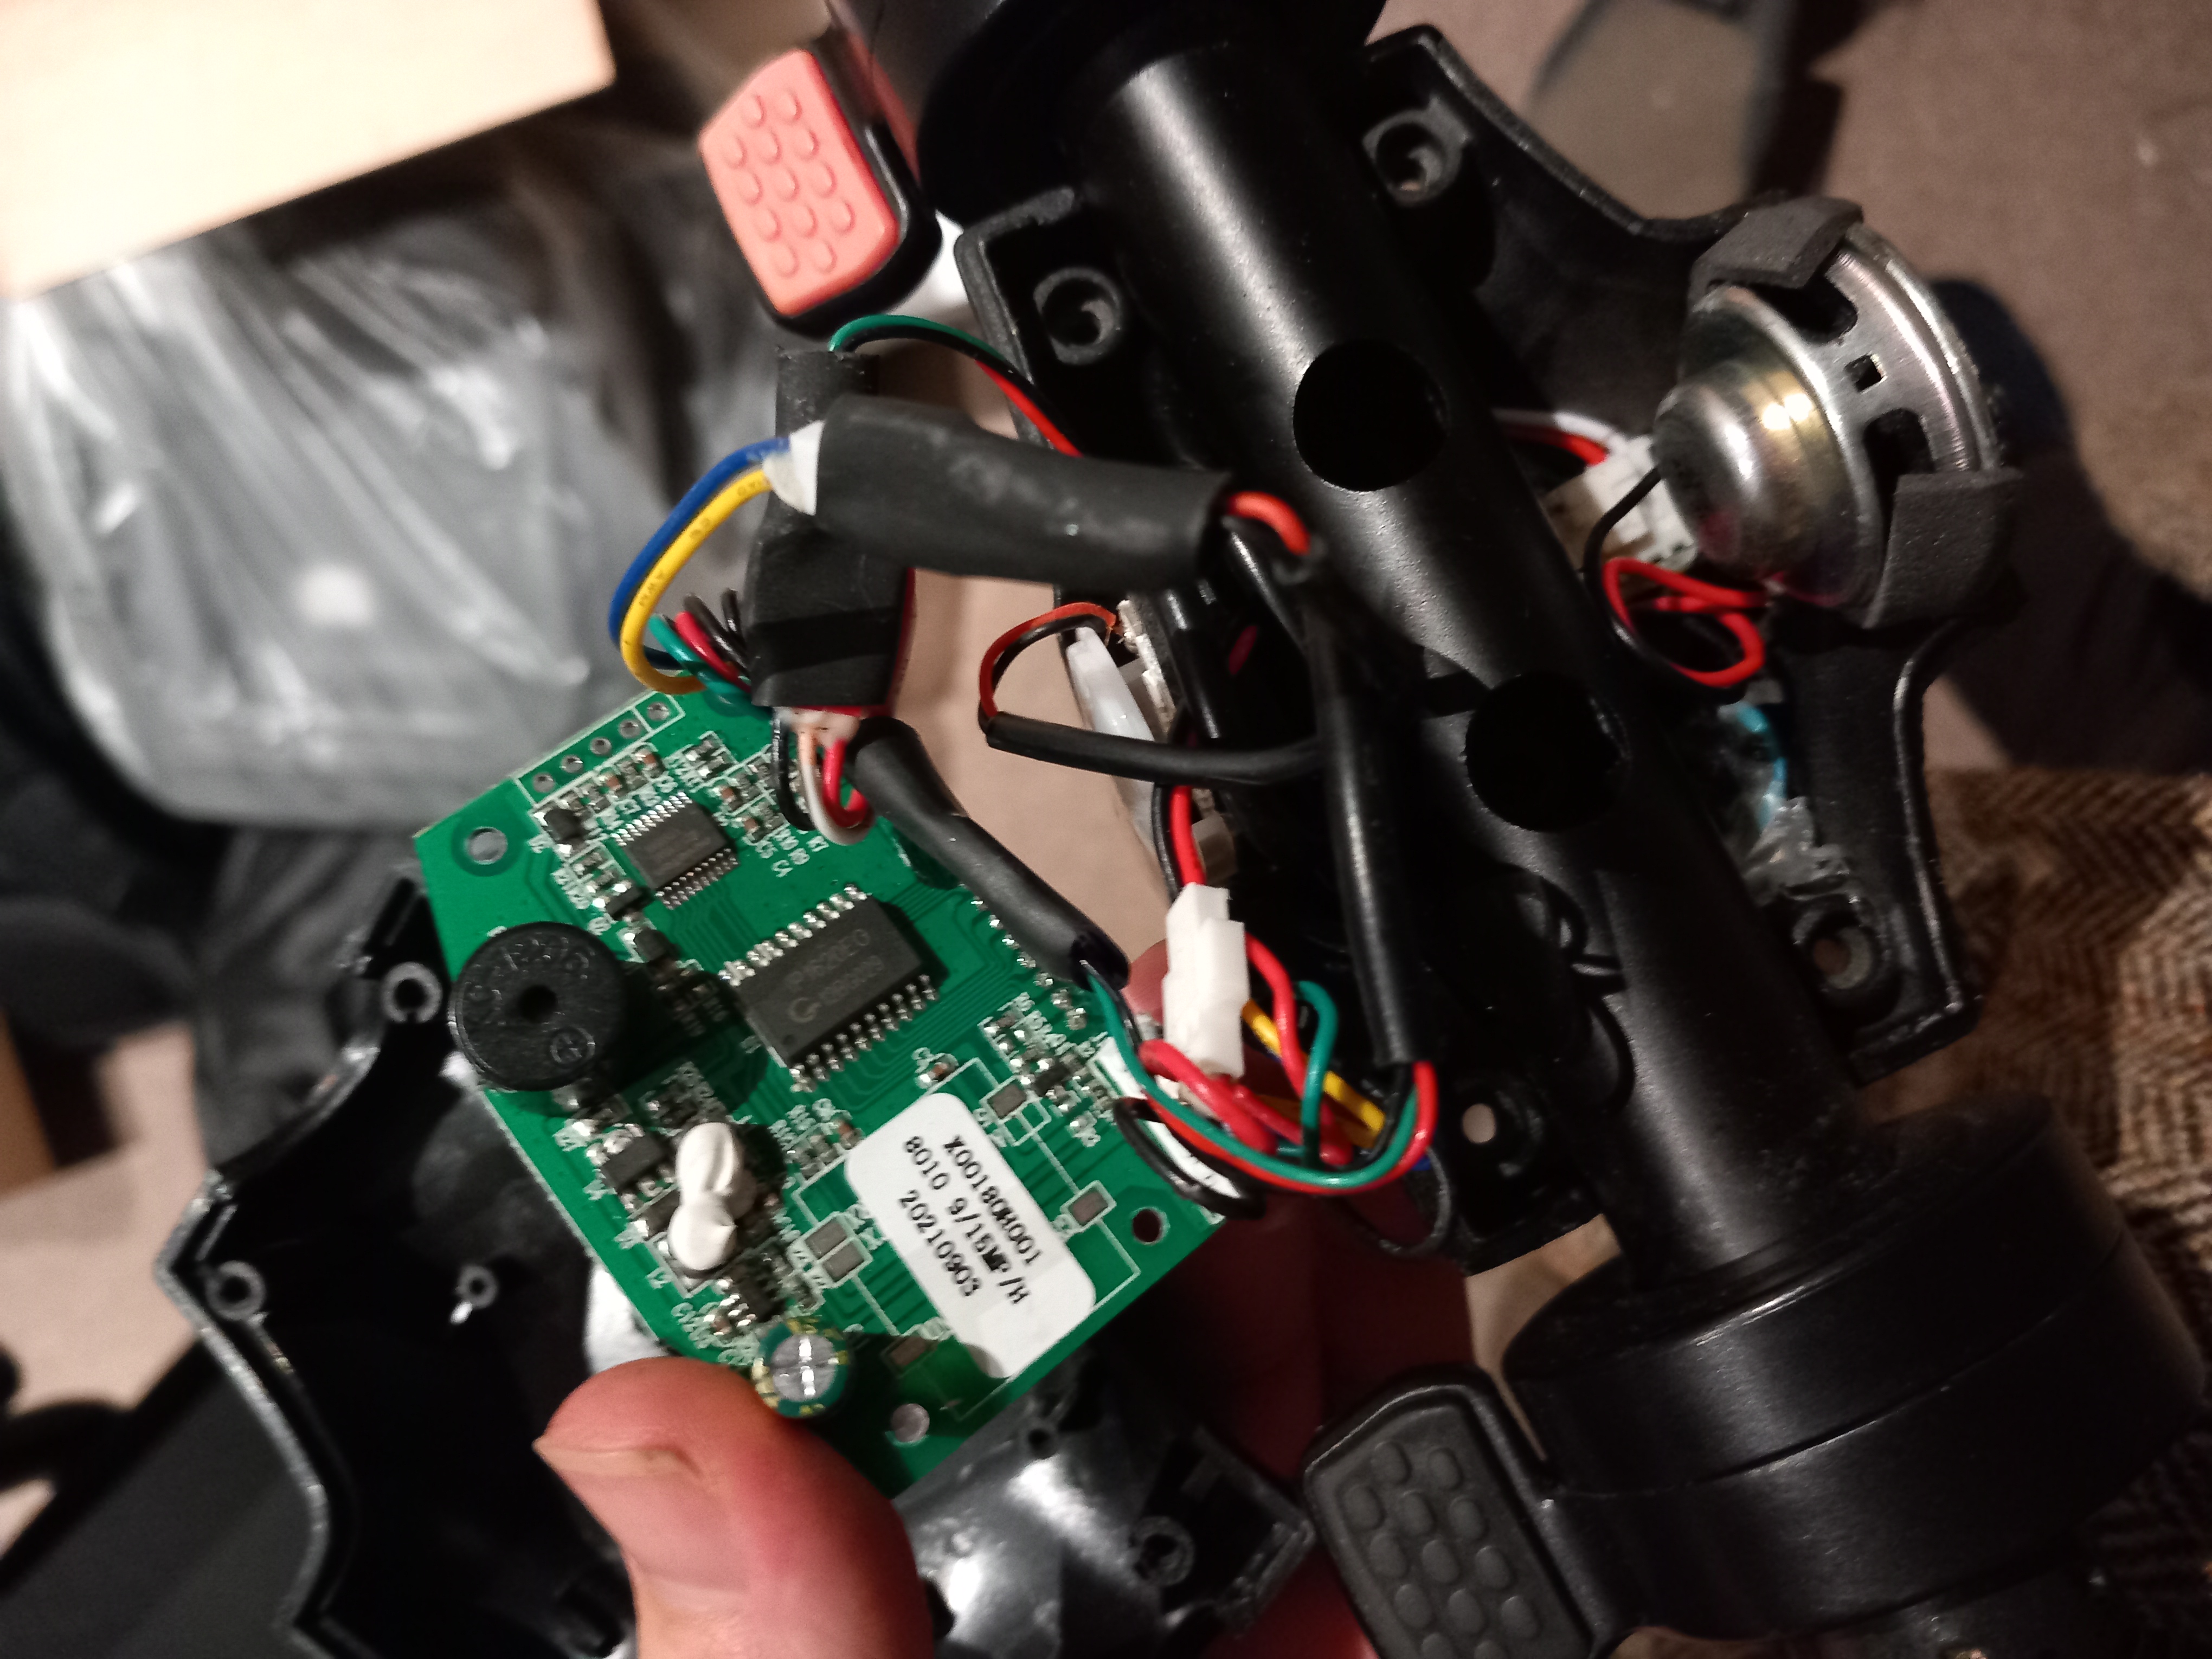
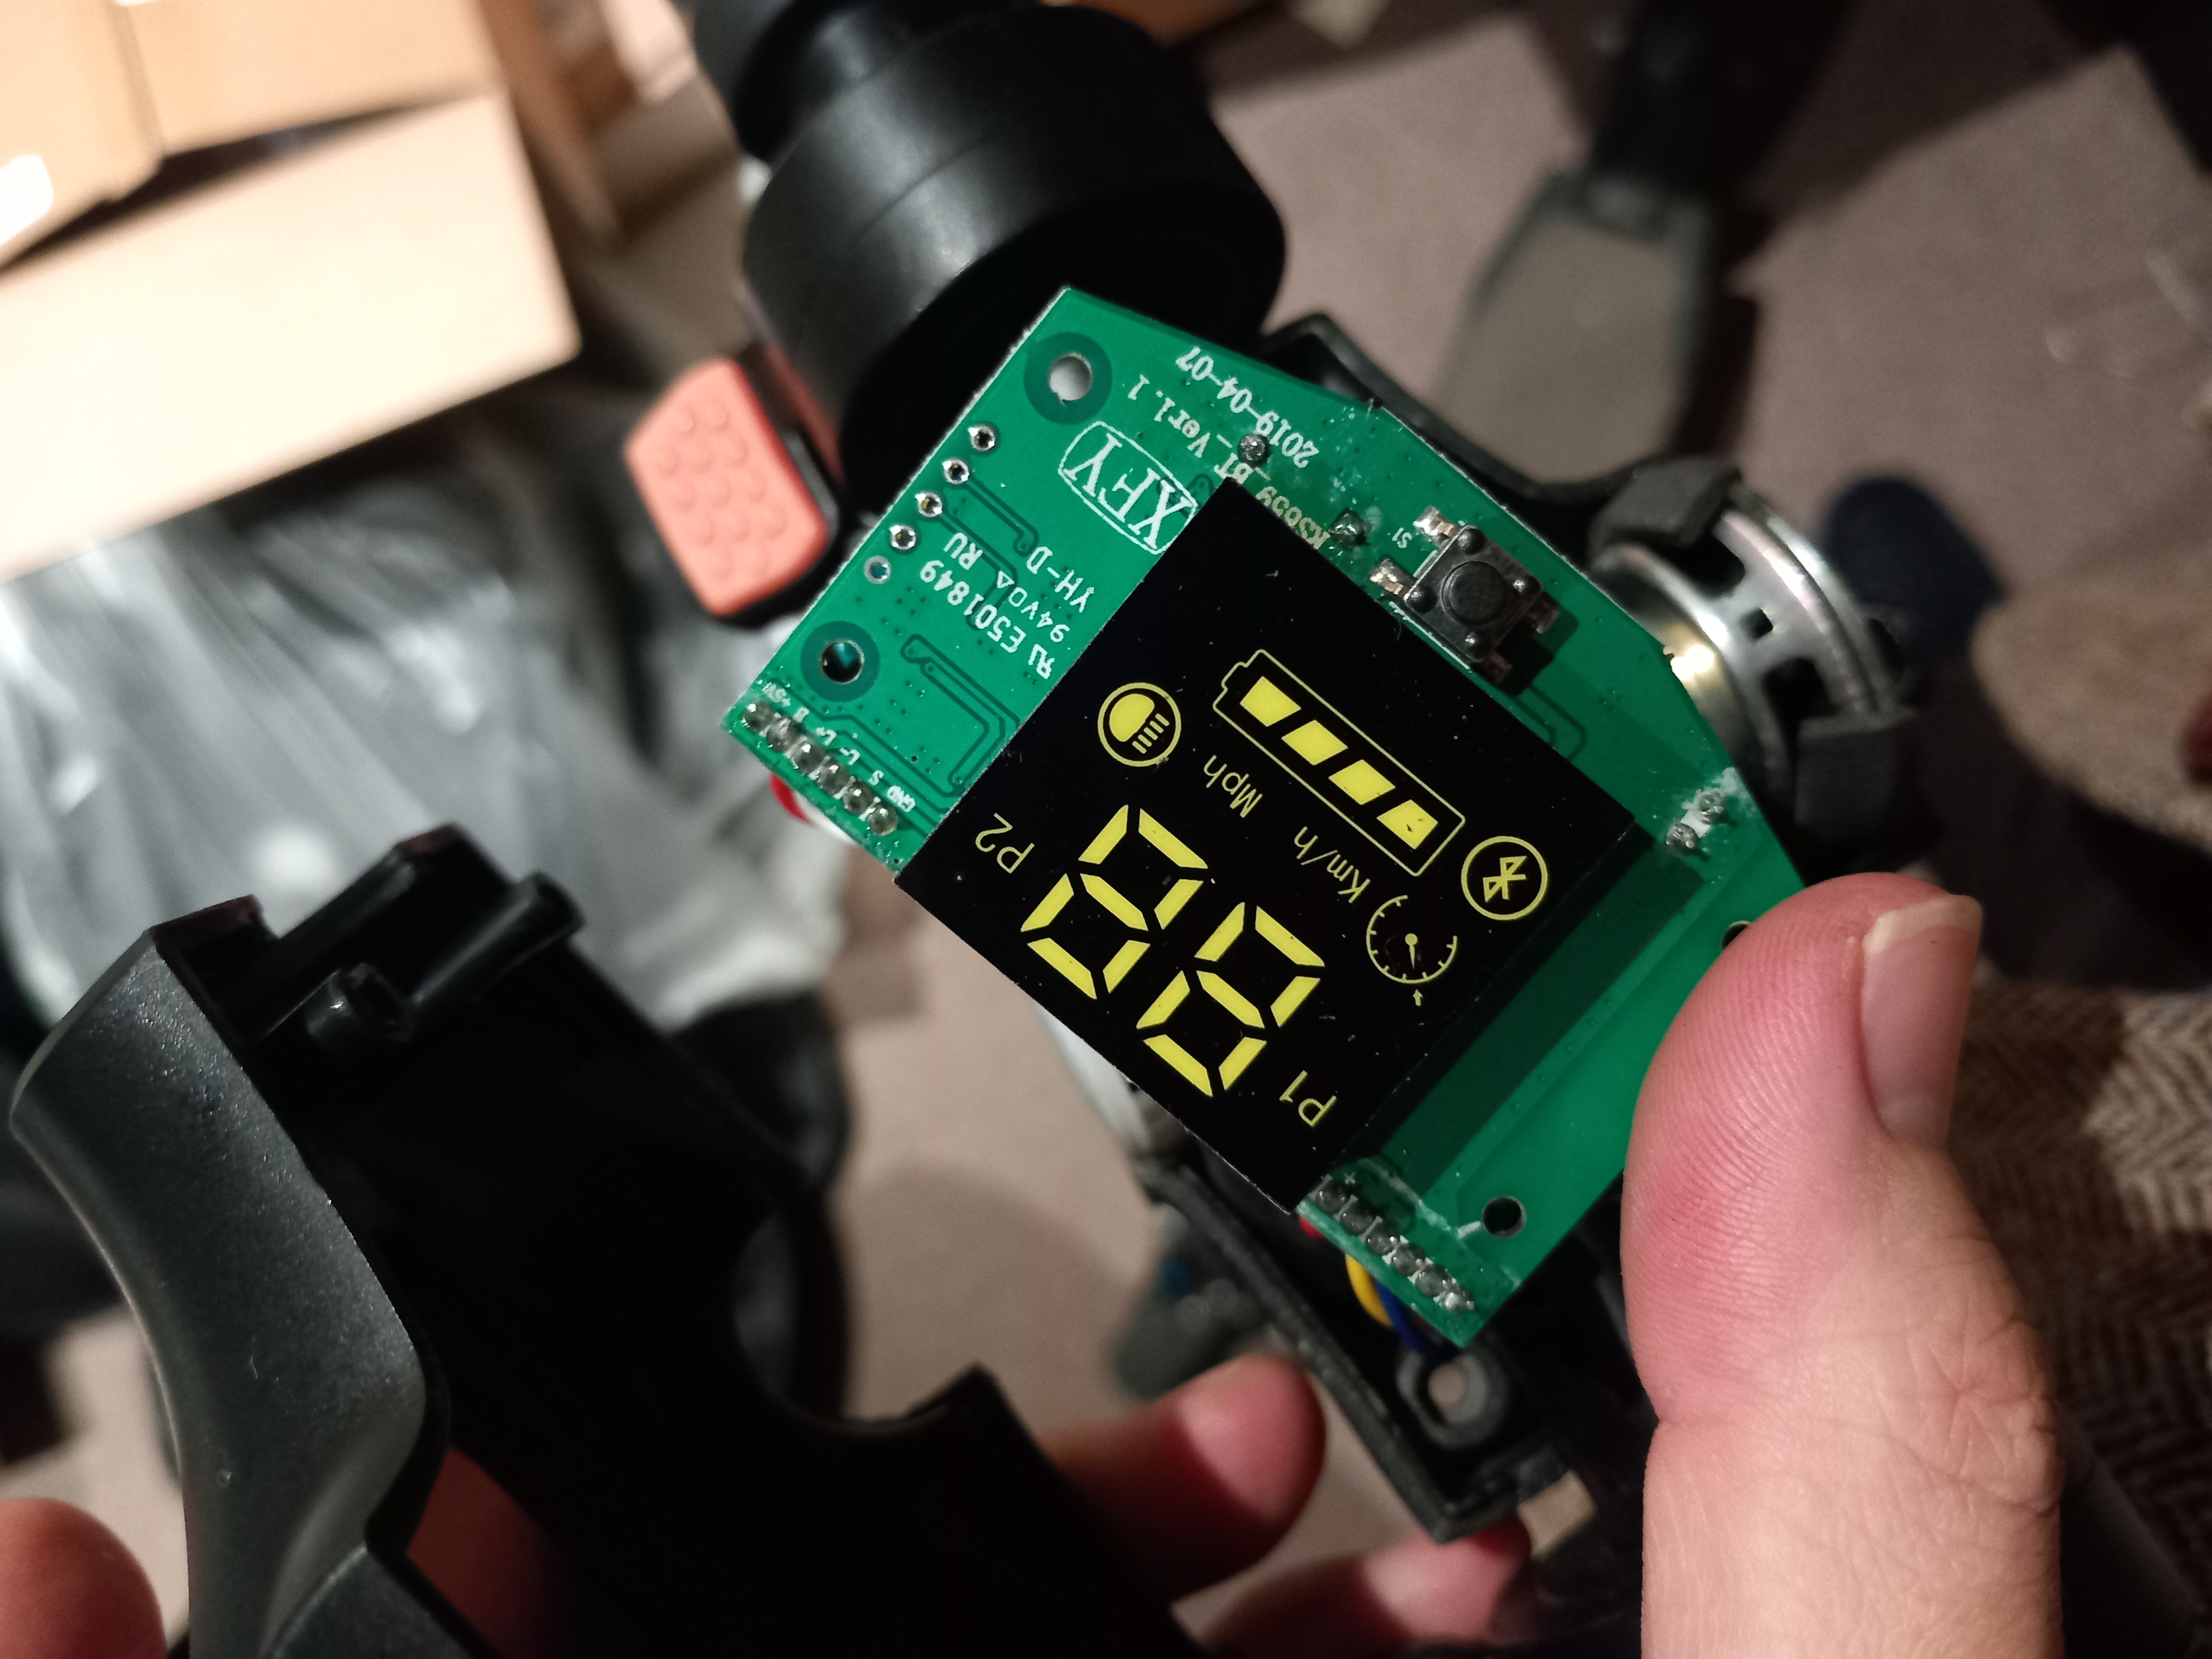
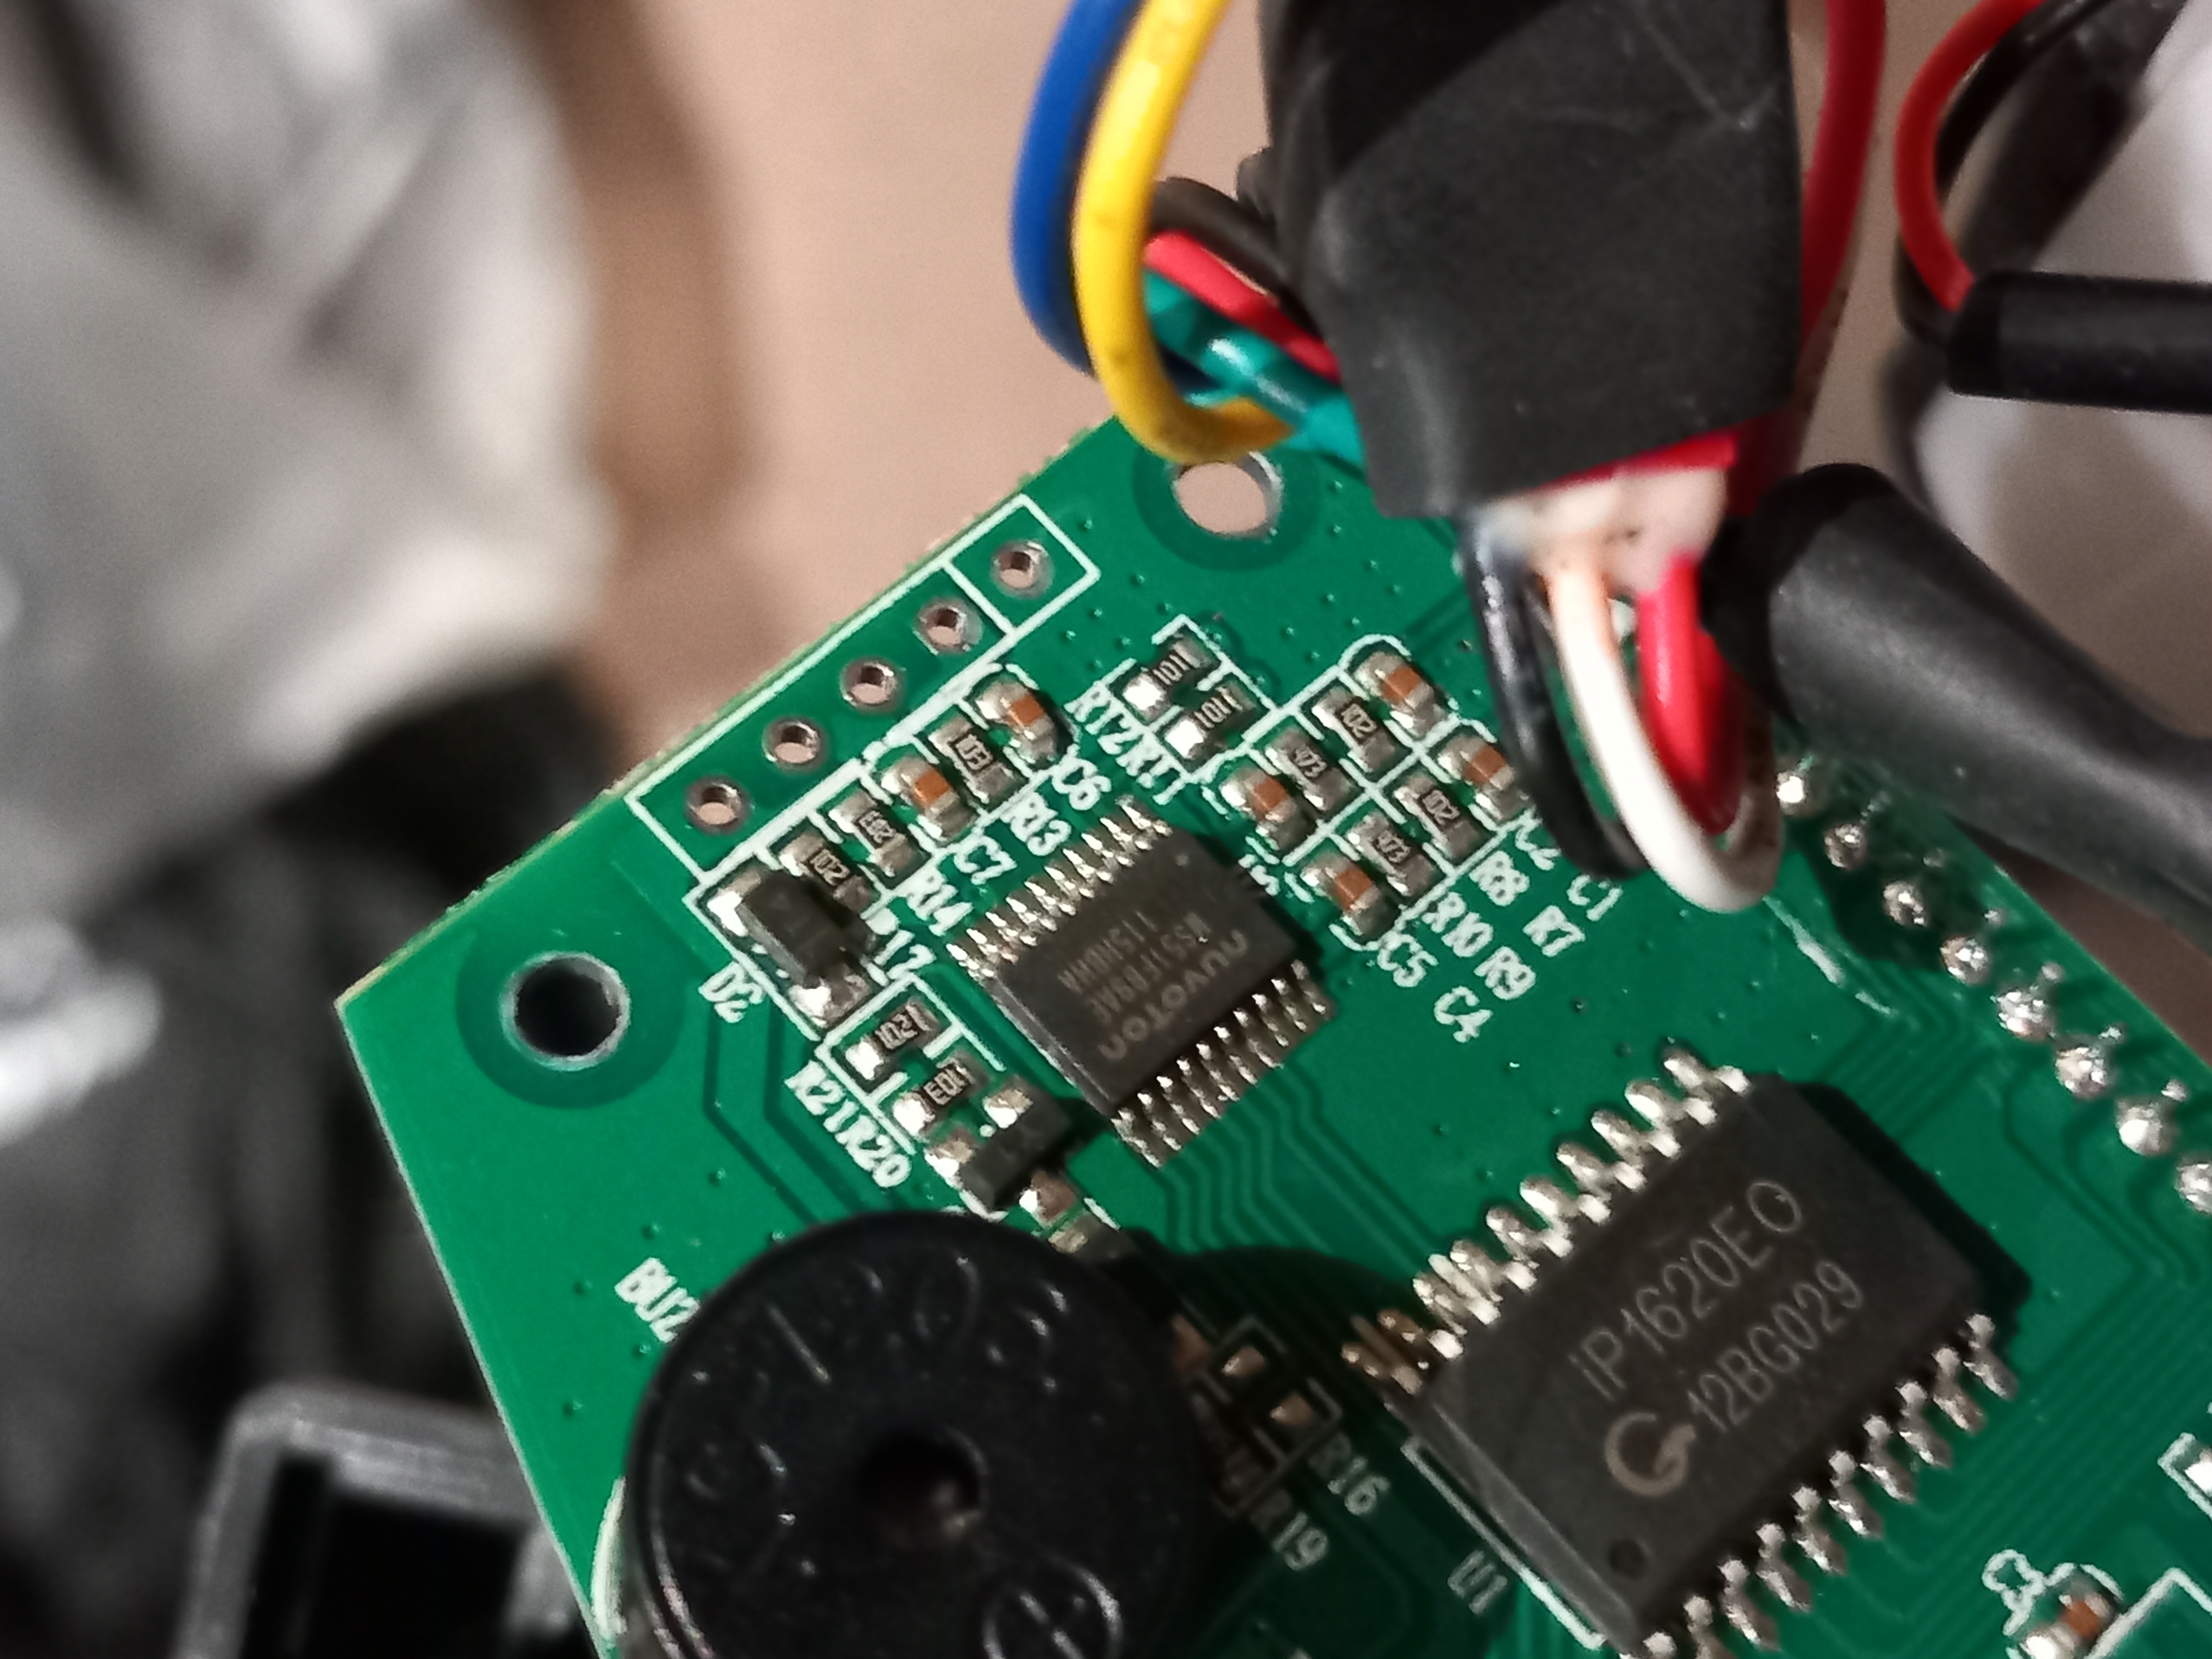
Then there was just an intermittent failure in the control board and the front led not working, probably from cramming it all back inside. So I took that apart again and went looking. Here’s the control board in case anyone wants to google the chips. At least one mcu on there; there’s another board with power wedged into the handle, and then a nice high-brightness led display on the other side. Judging by the symbols this thing has bluetooth for some reason or other.
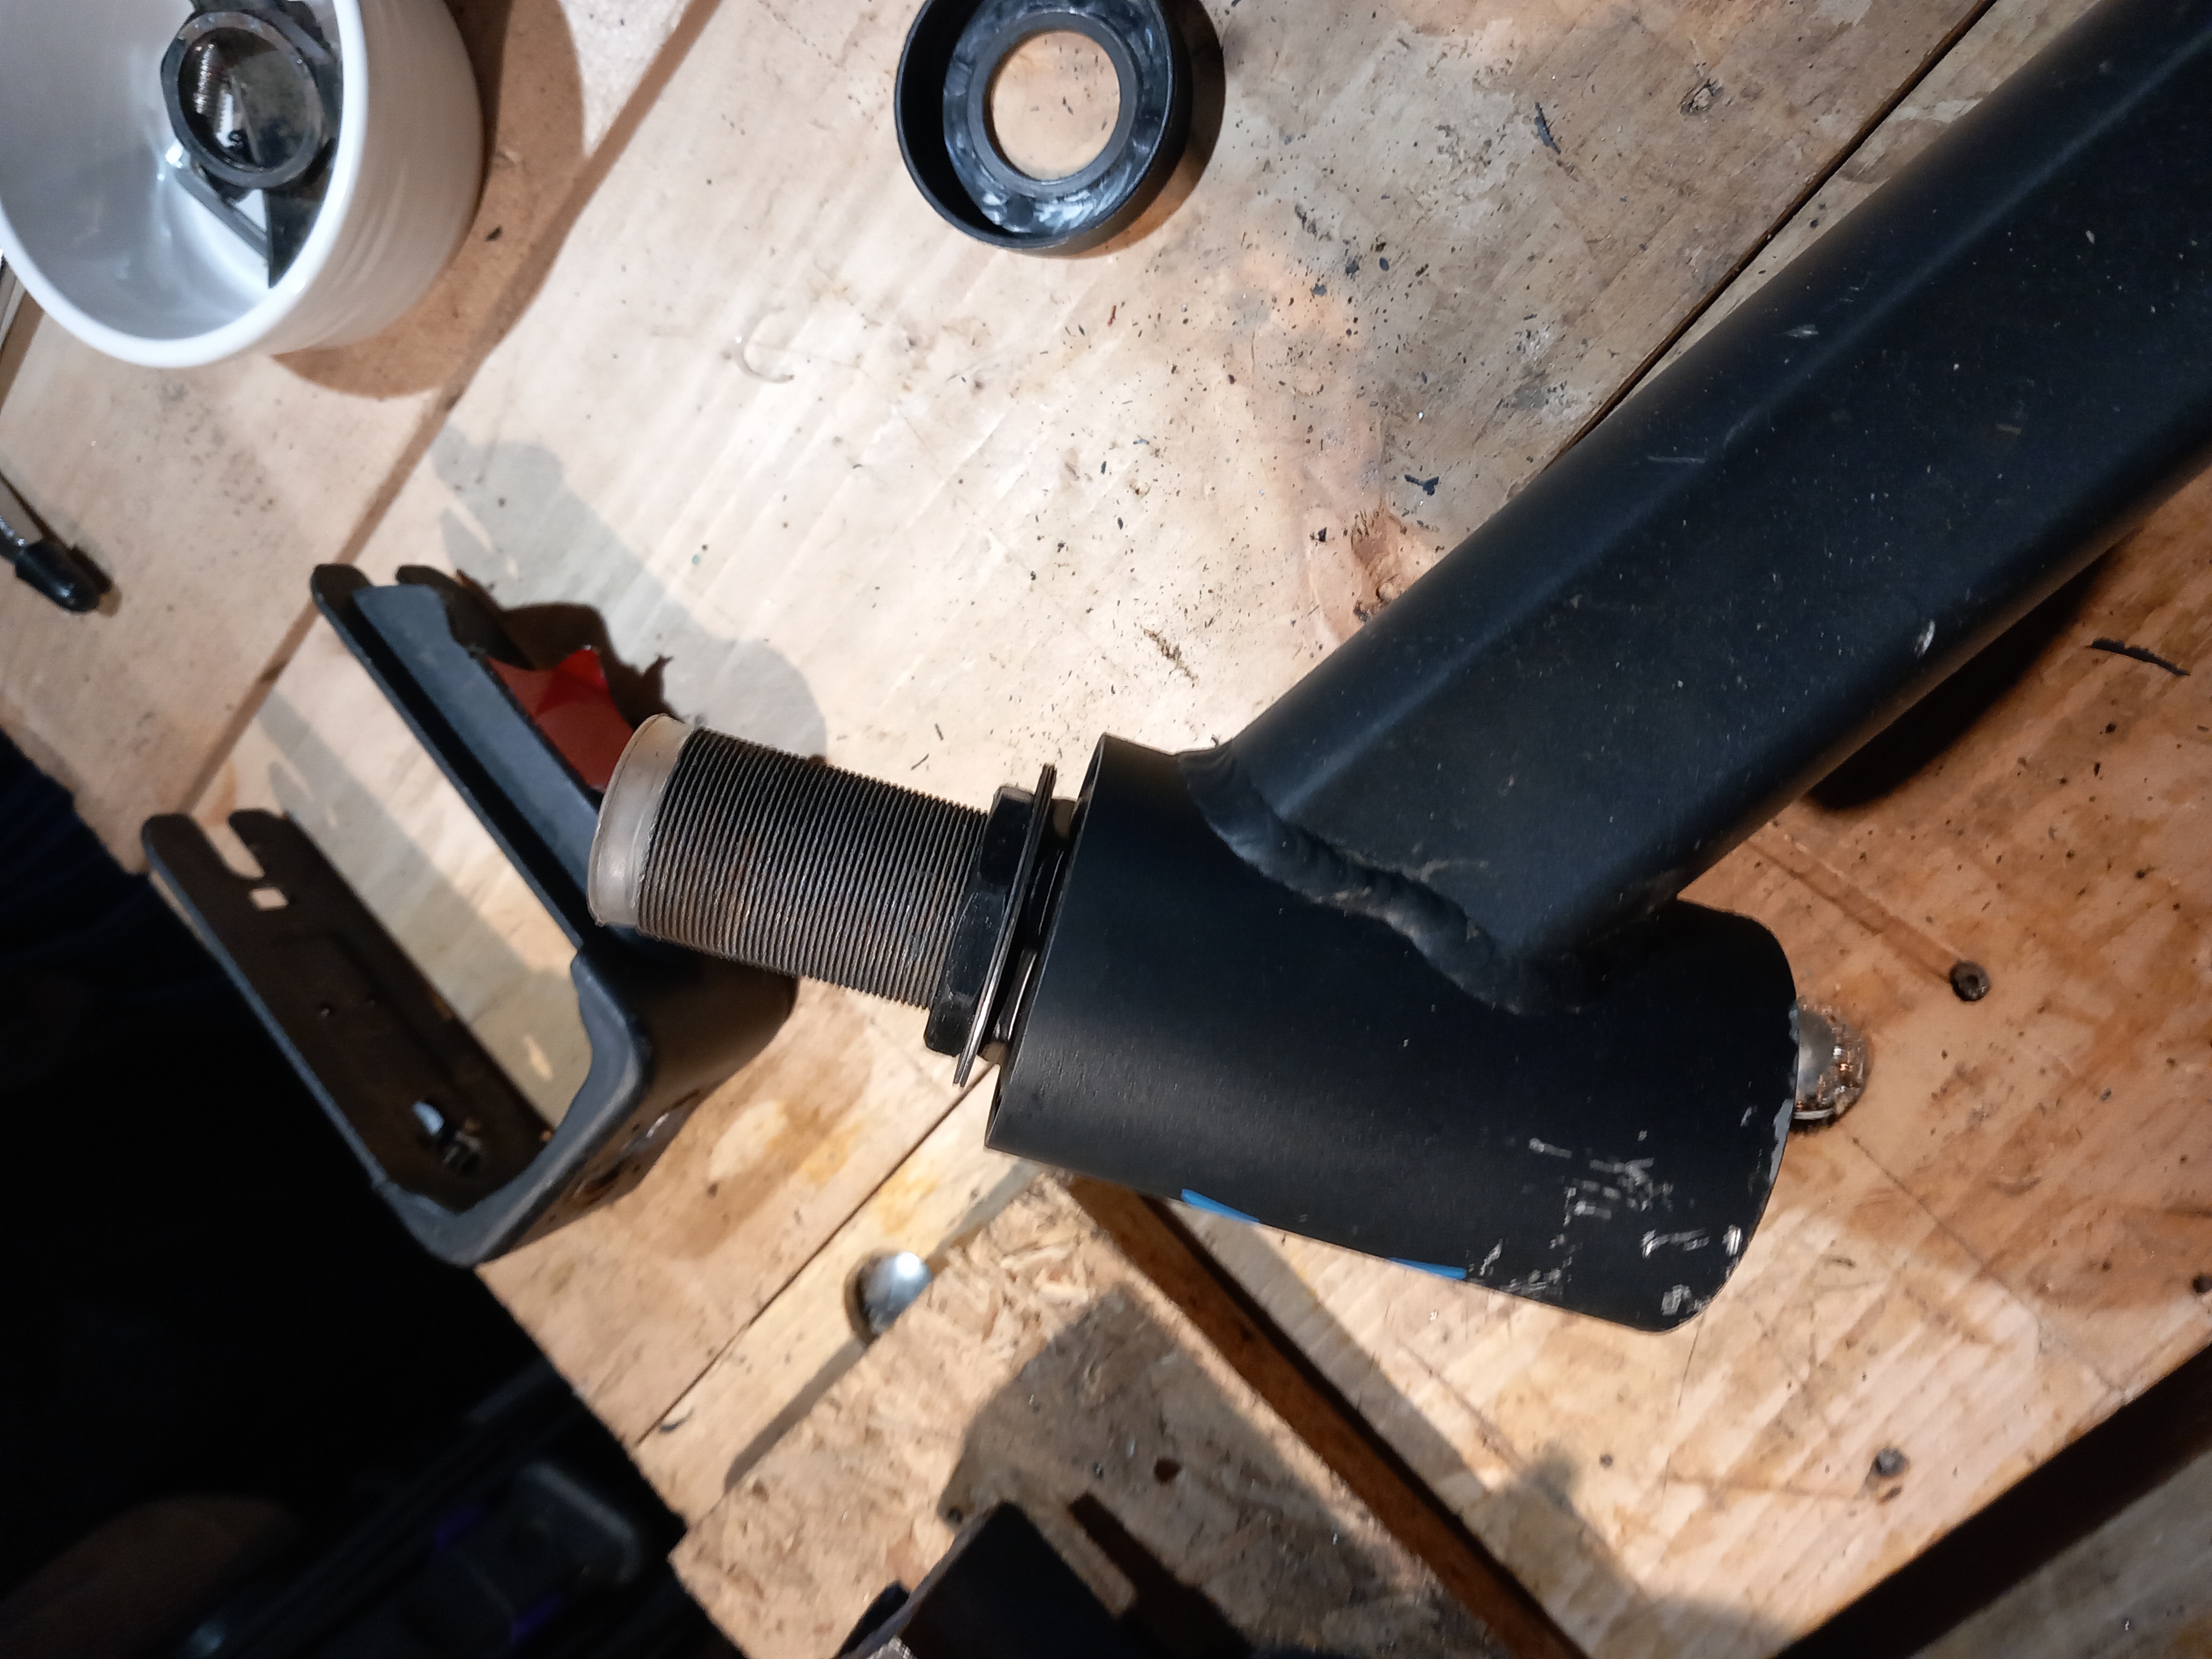
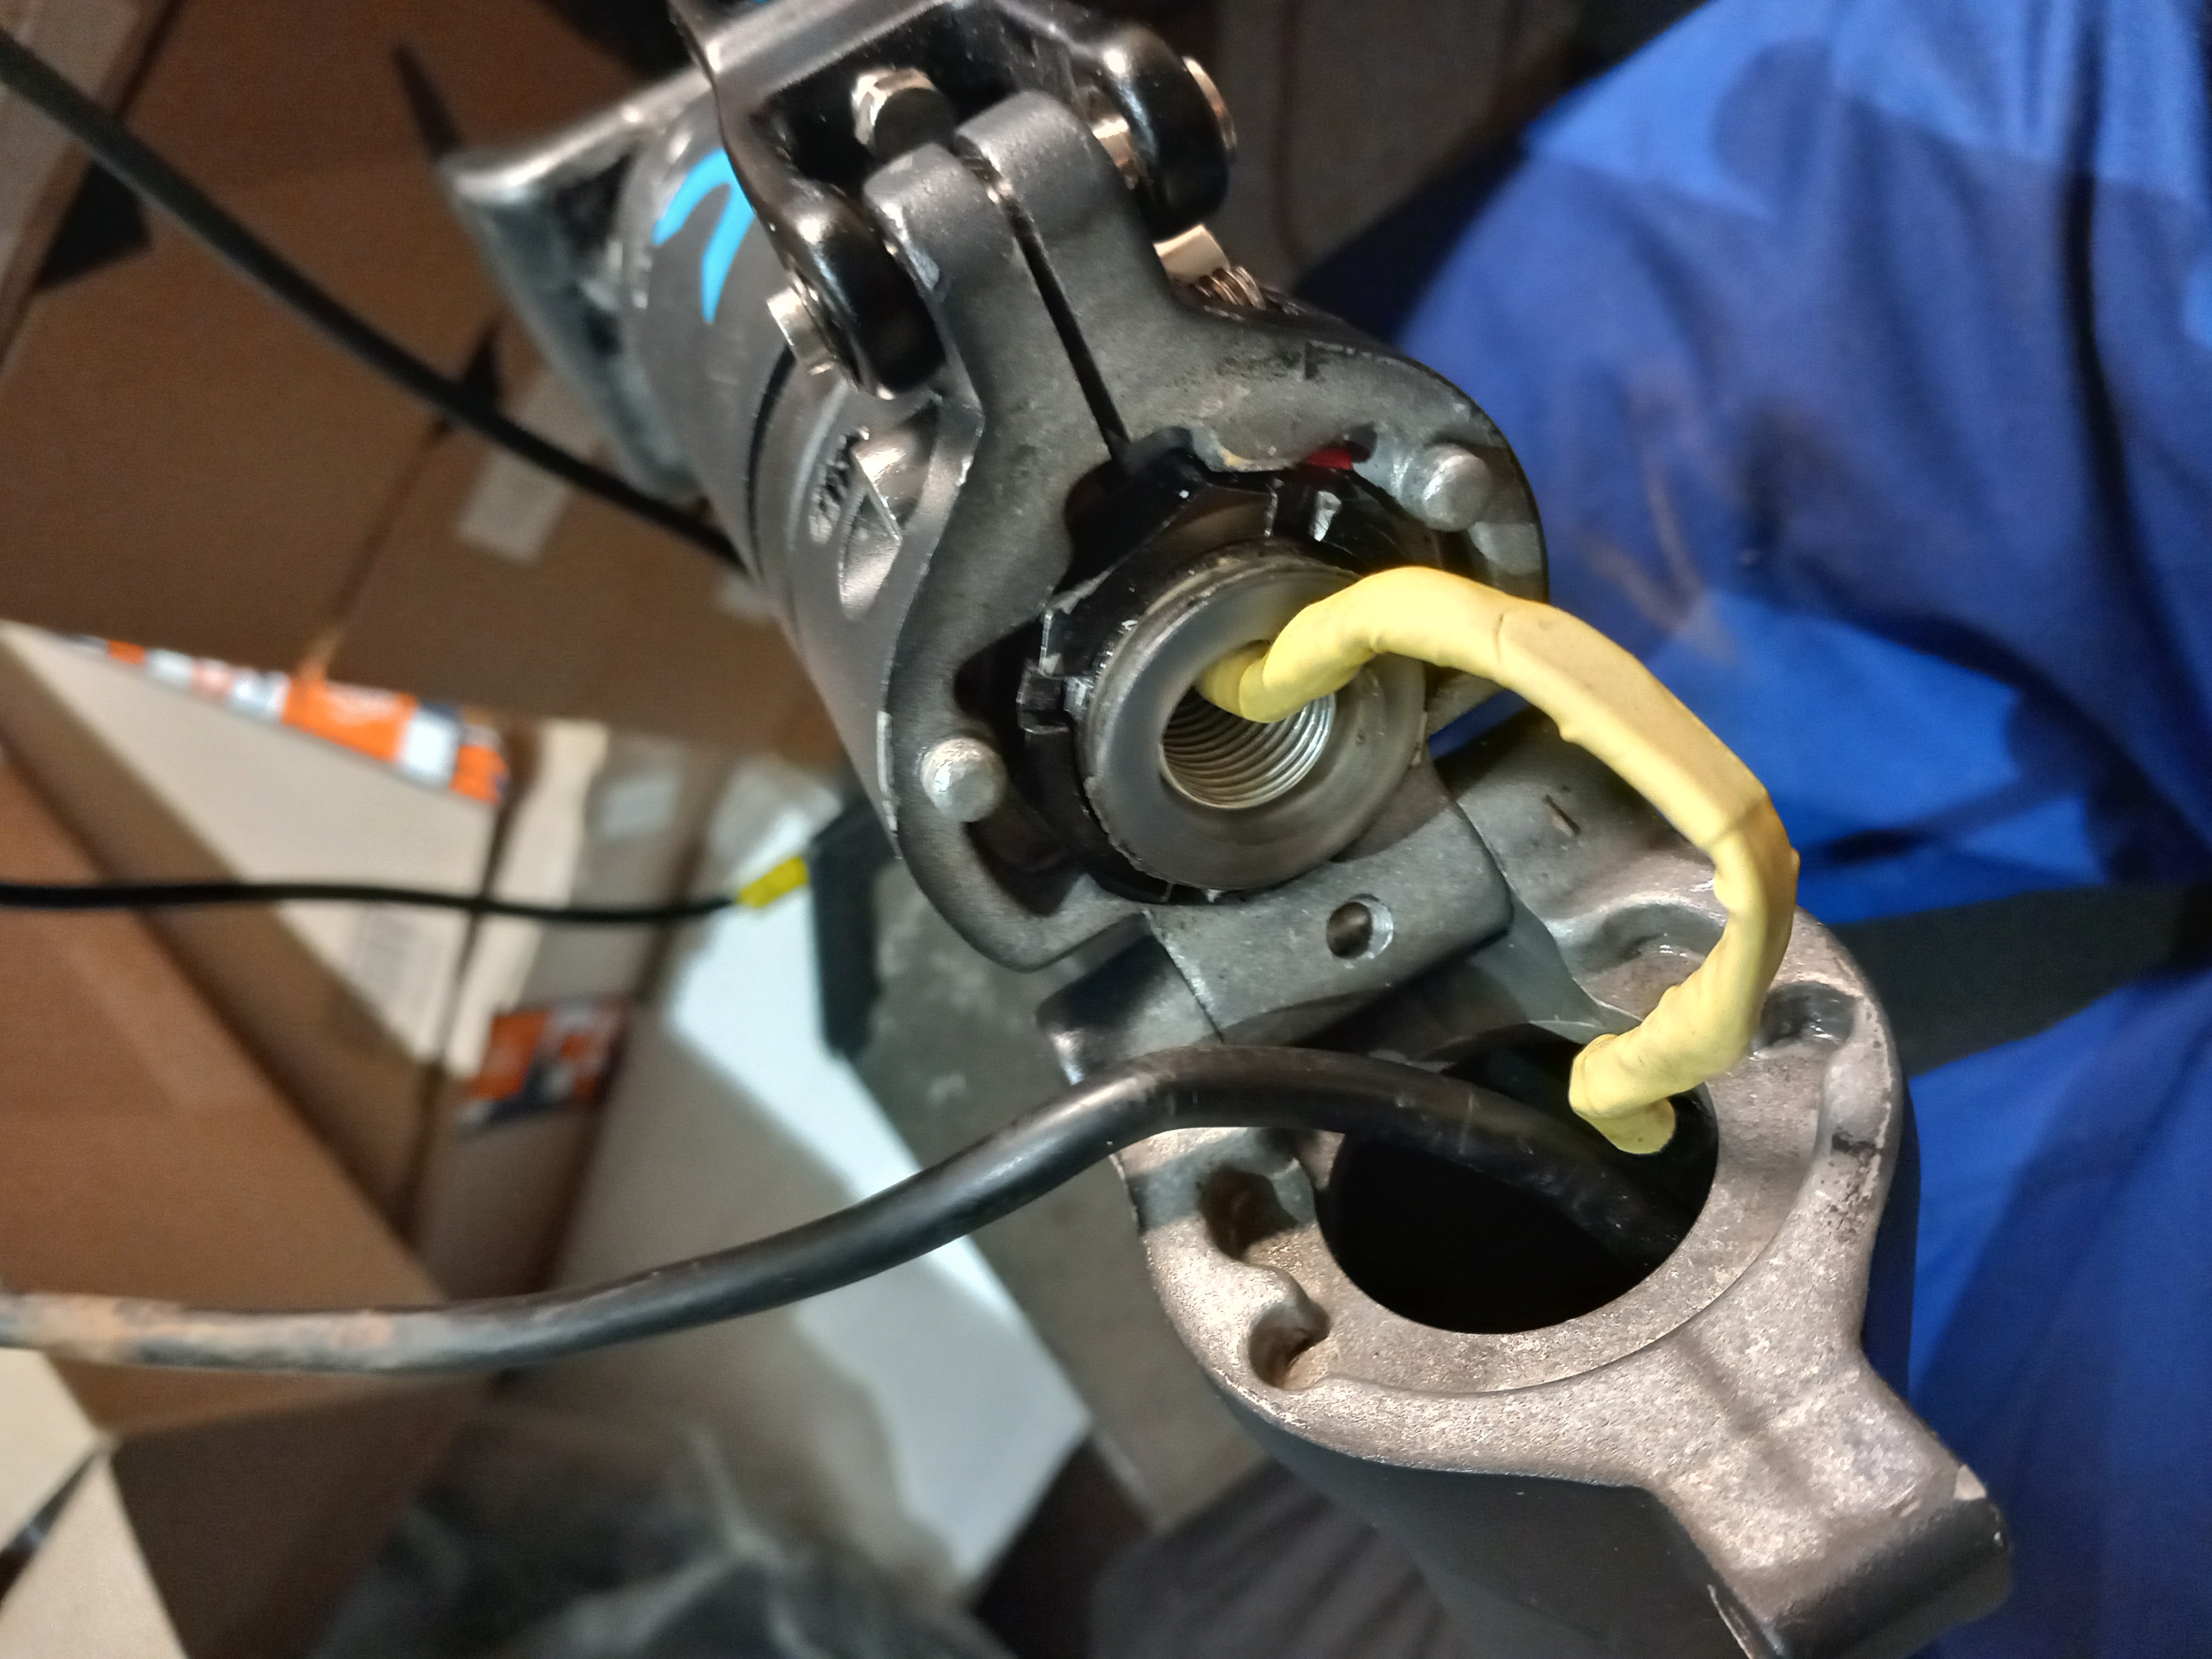
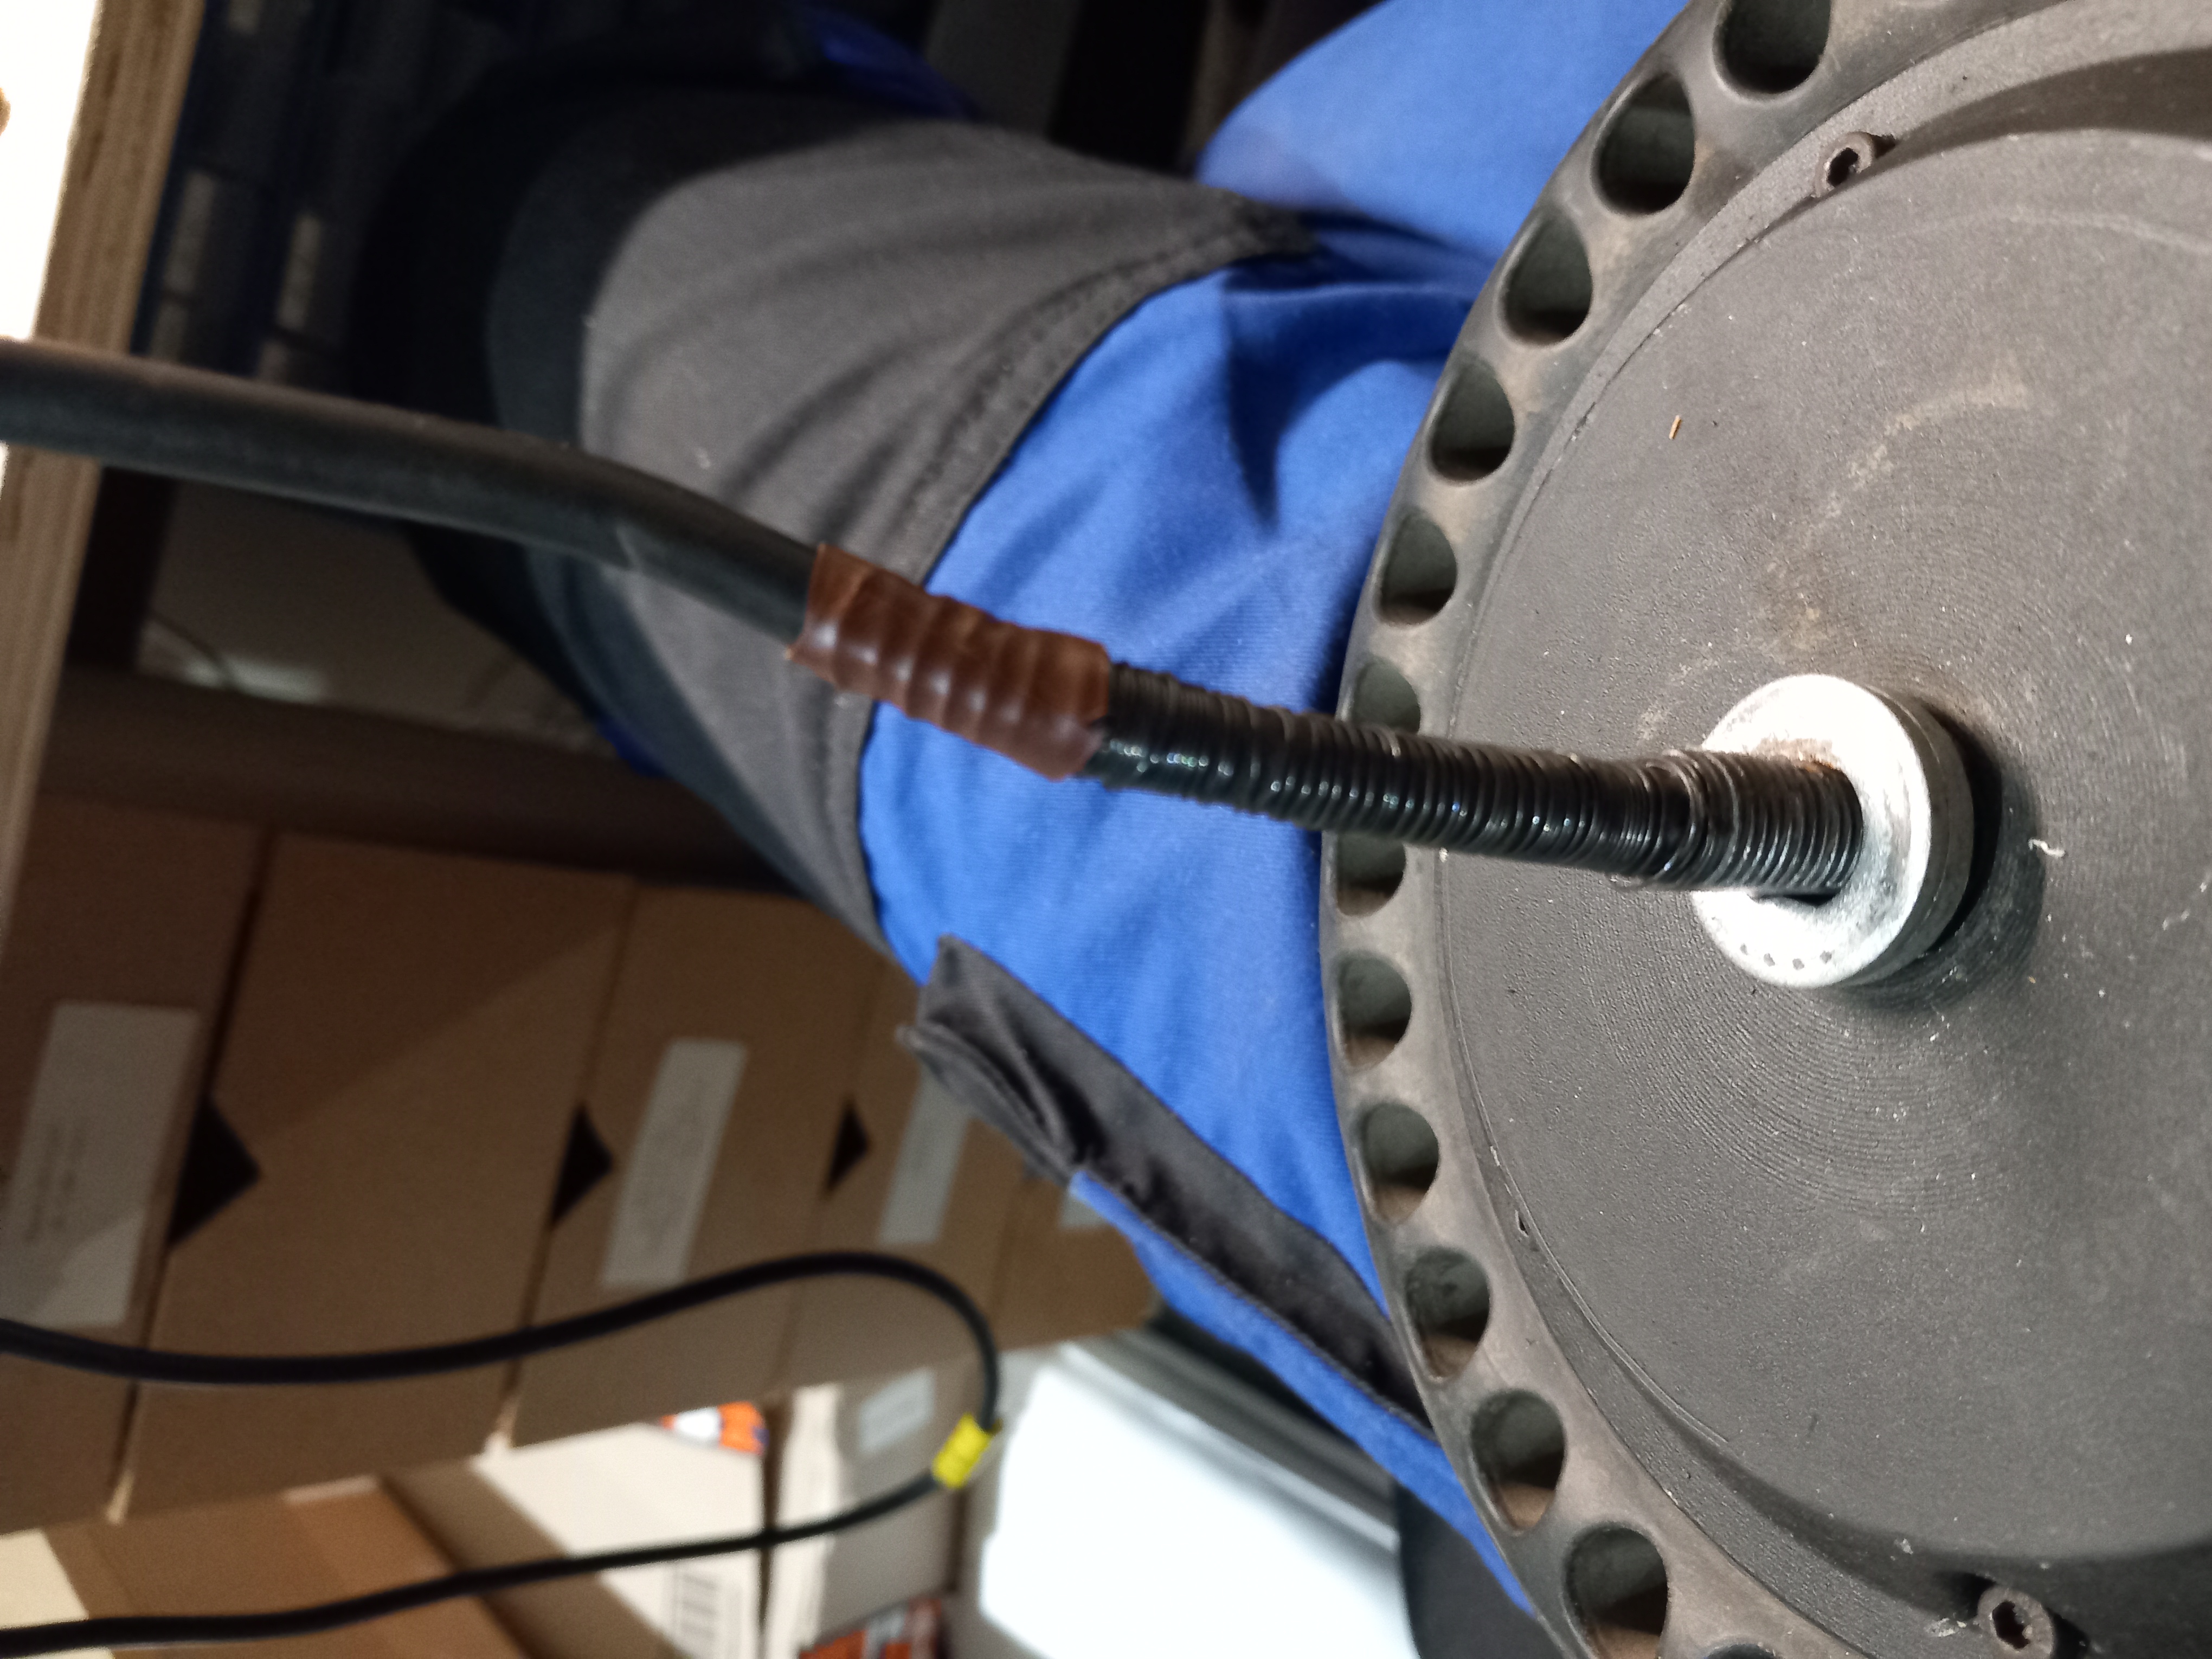
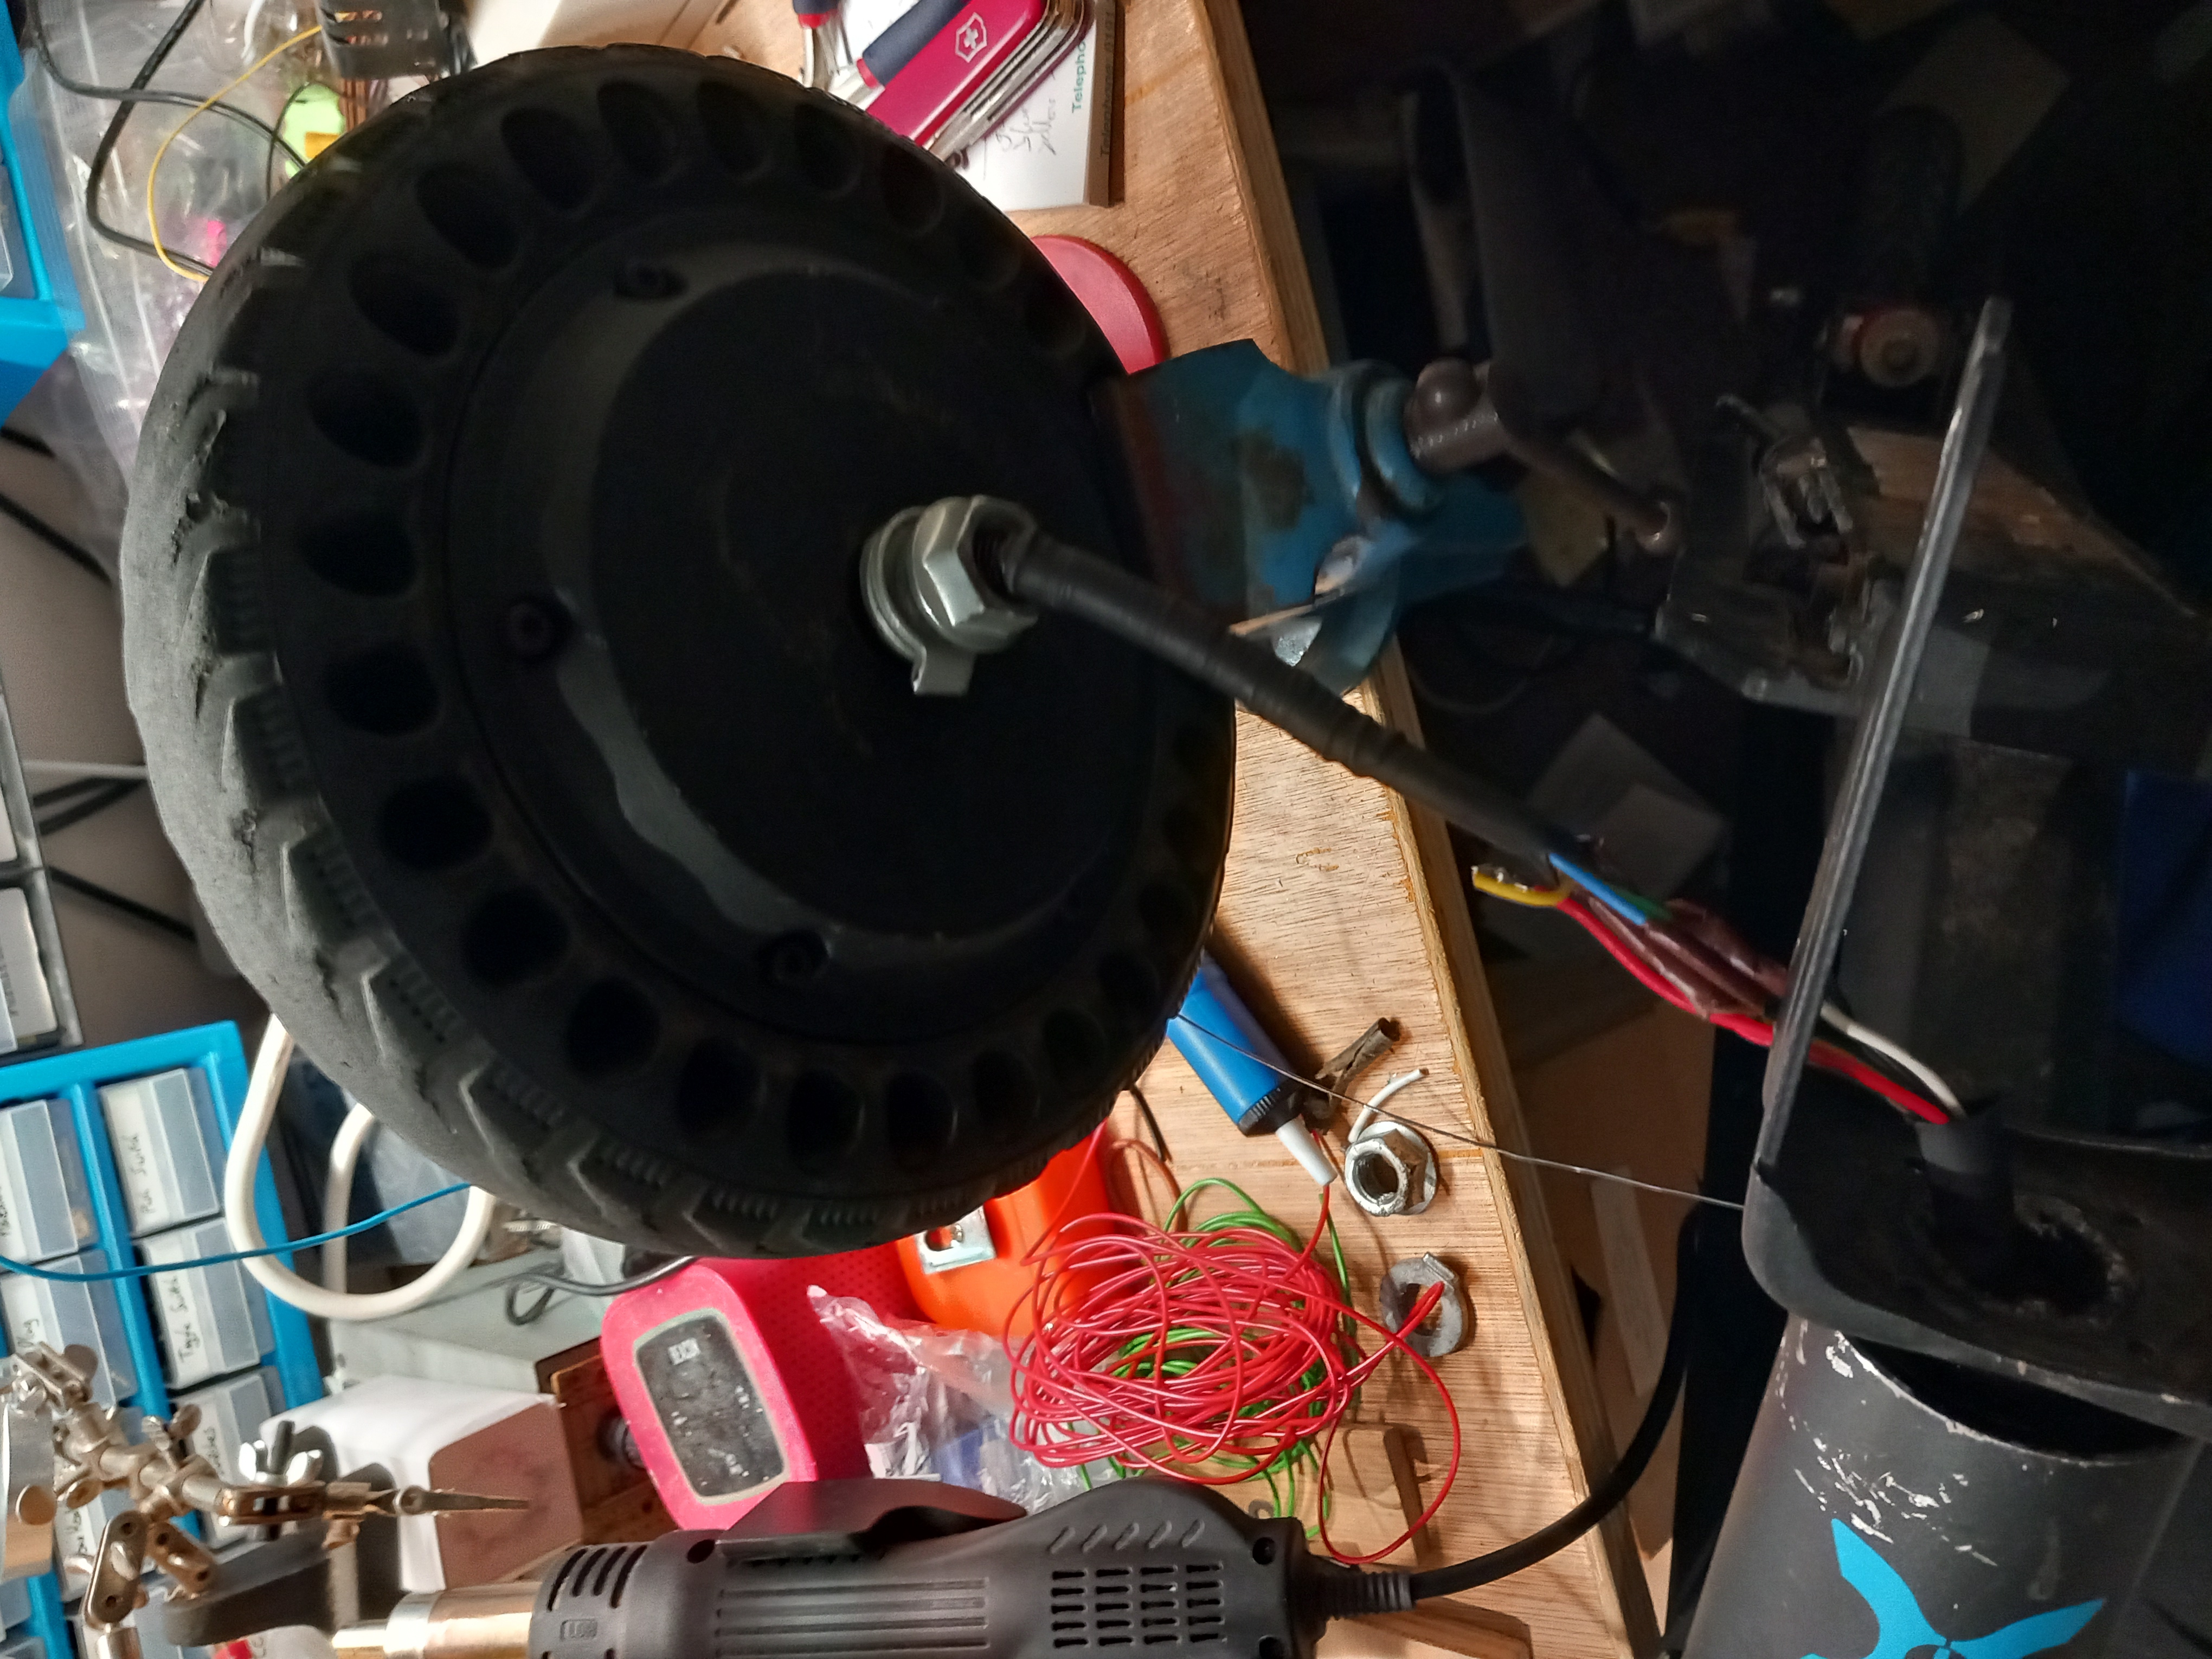
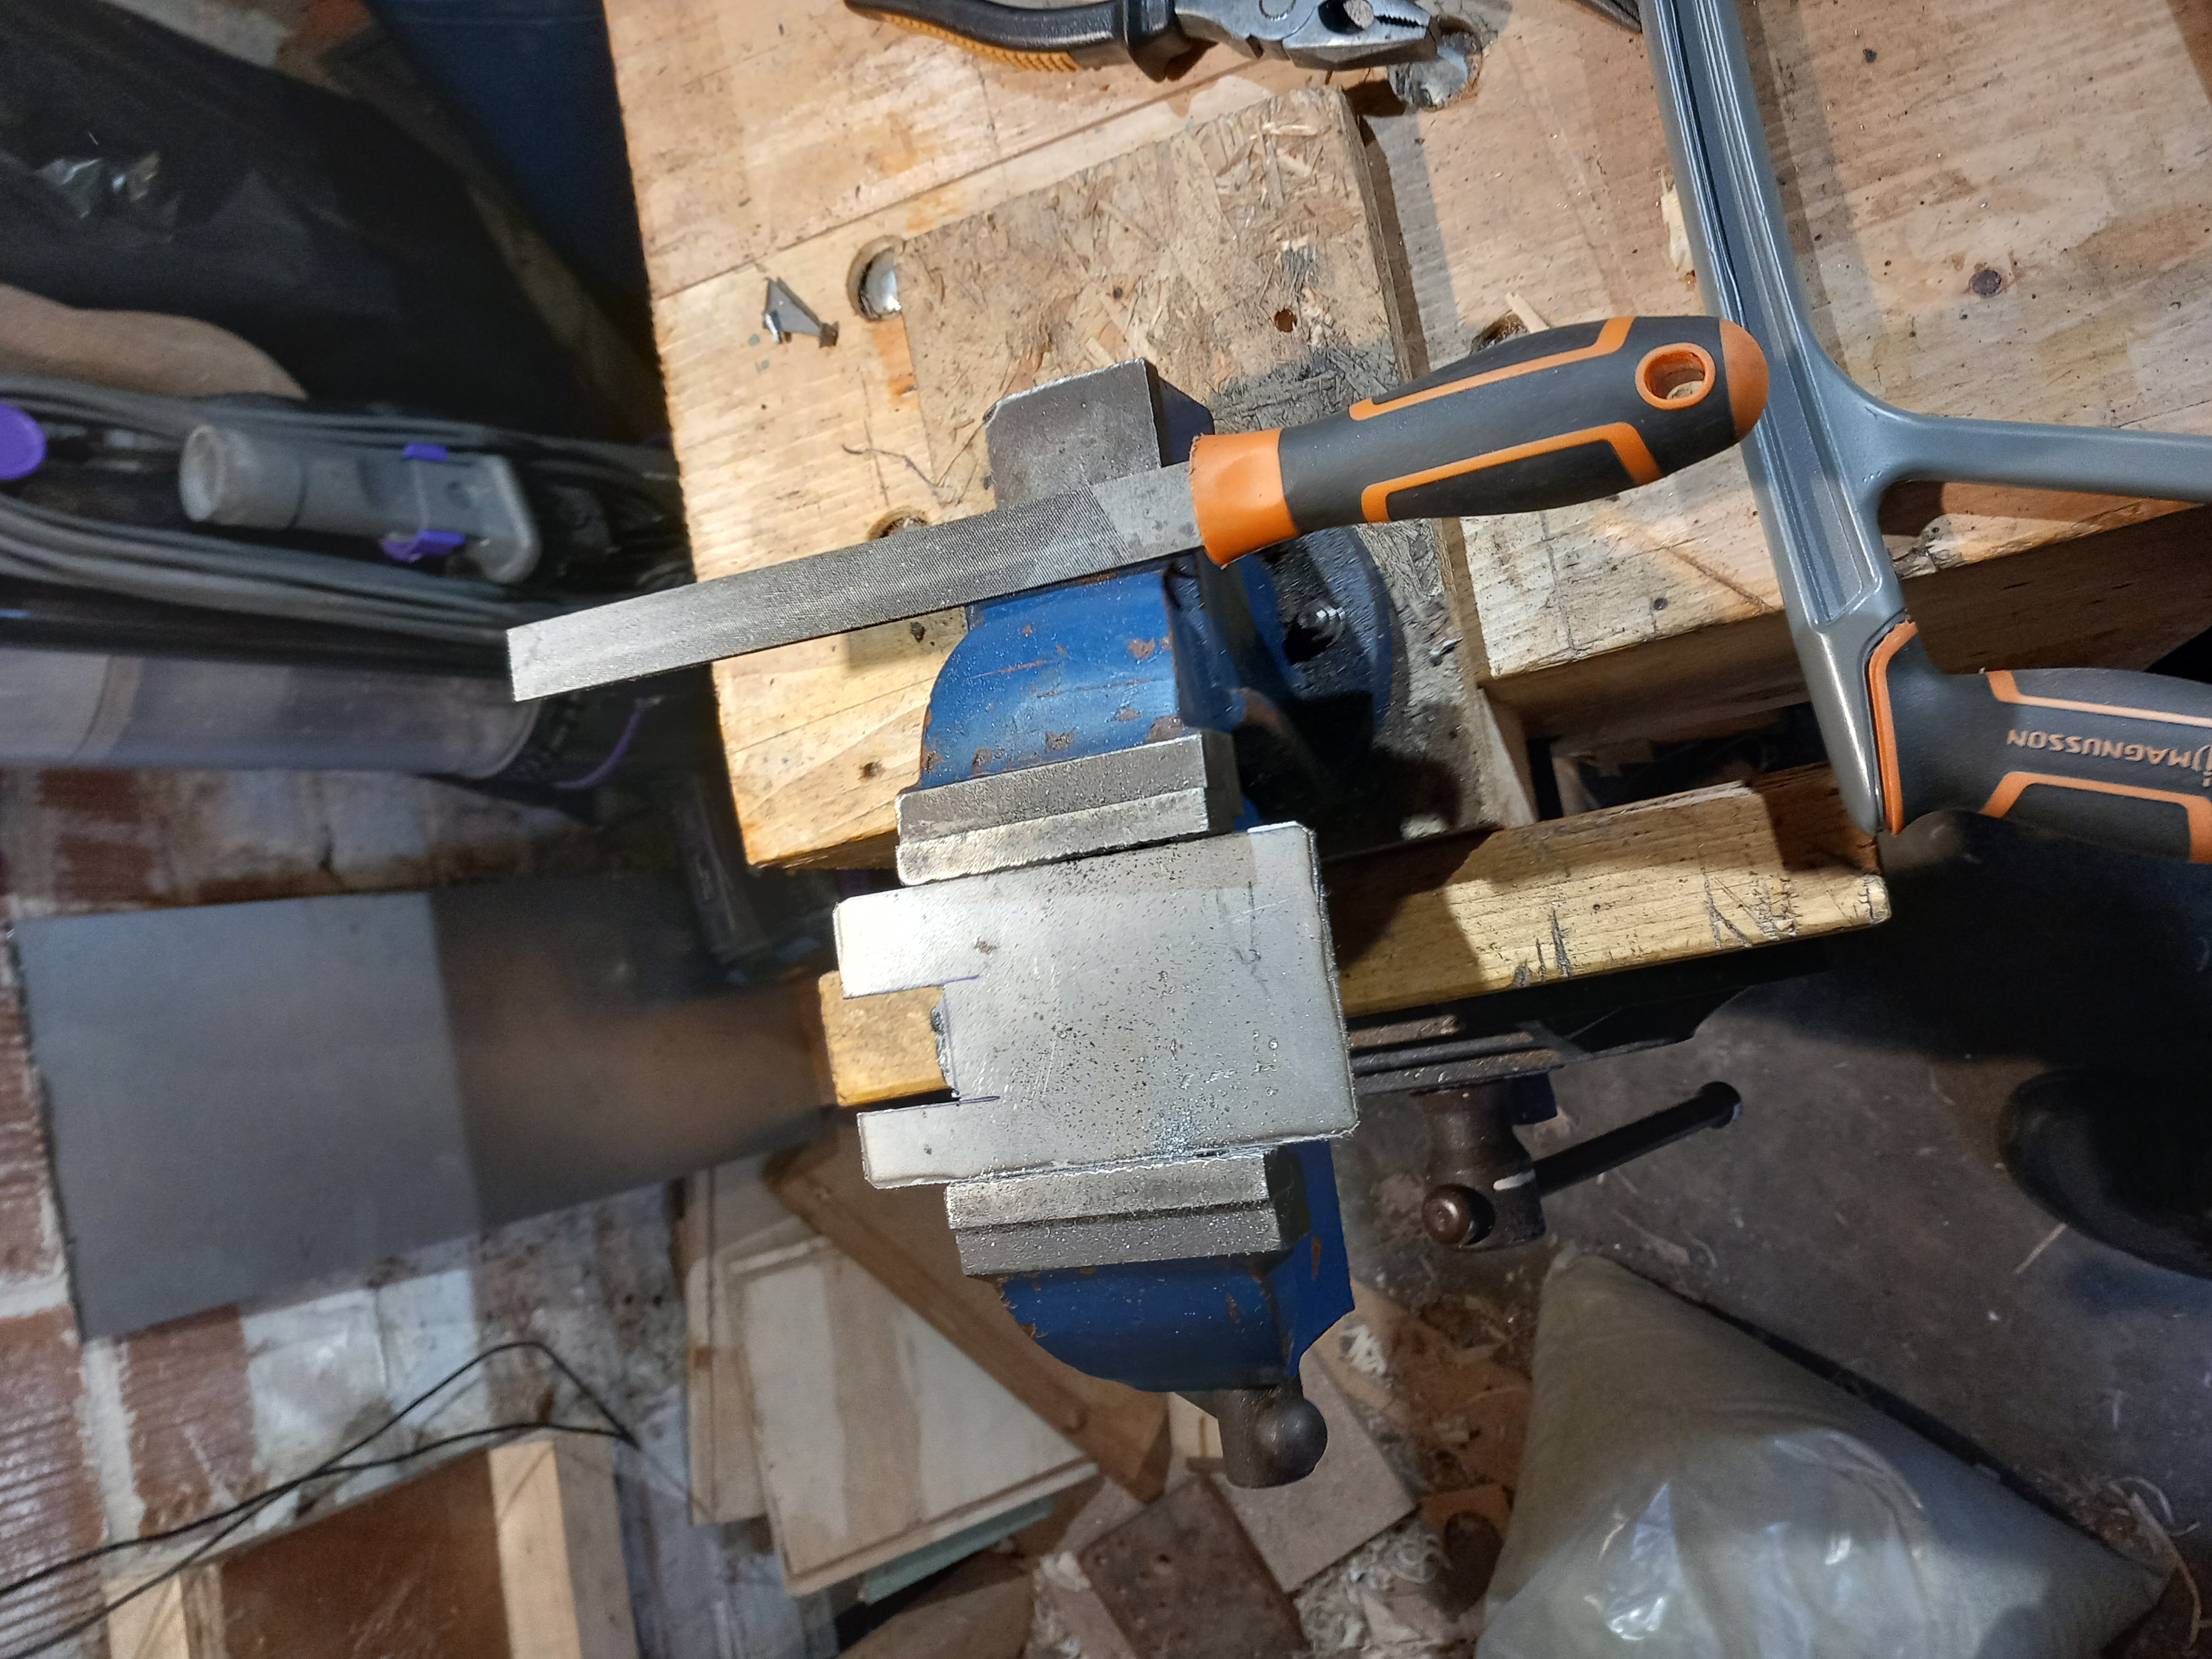
After all this the front wheel was back on and I could ride it—inside, because it was blowing a gale outside. There was still far too much play in the front bearing and the wheel pointed a long way off straight. With the wiring connected up the only way I could get at the bearing preload was by lifting the main assembly and sliding in a thin spanner. I don’t have an 36mm spanners anyhow, so time to make one. If this was one of those youtube channels where they repair old tools with only a 4-axis computer controlled milling machine, lathe, TIG setup and welding bench and three walls full of hand tools I would now precede to make something resembling a spanner. Unfortunately all I had was a hacksaw and a cheapy file, so this is what you get:
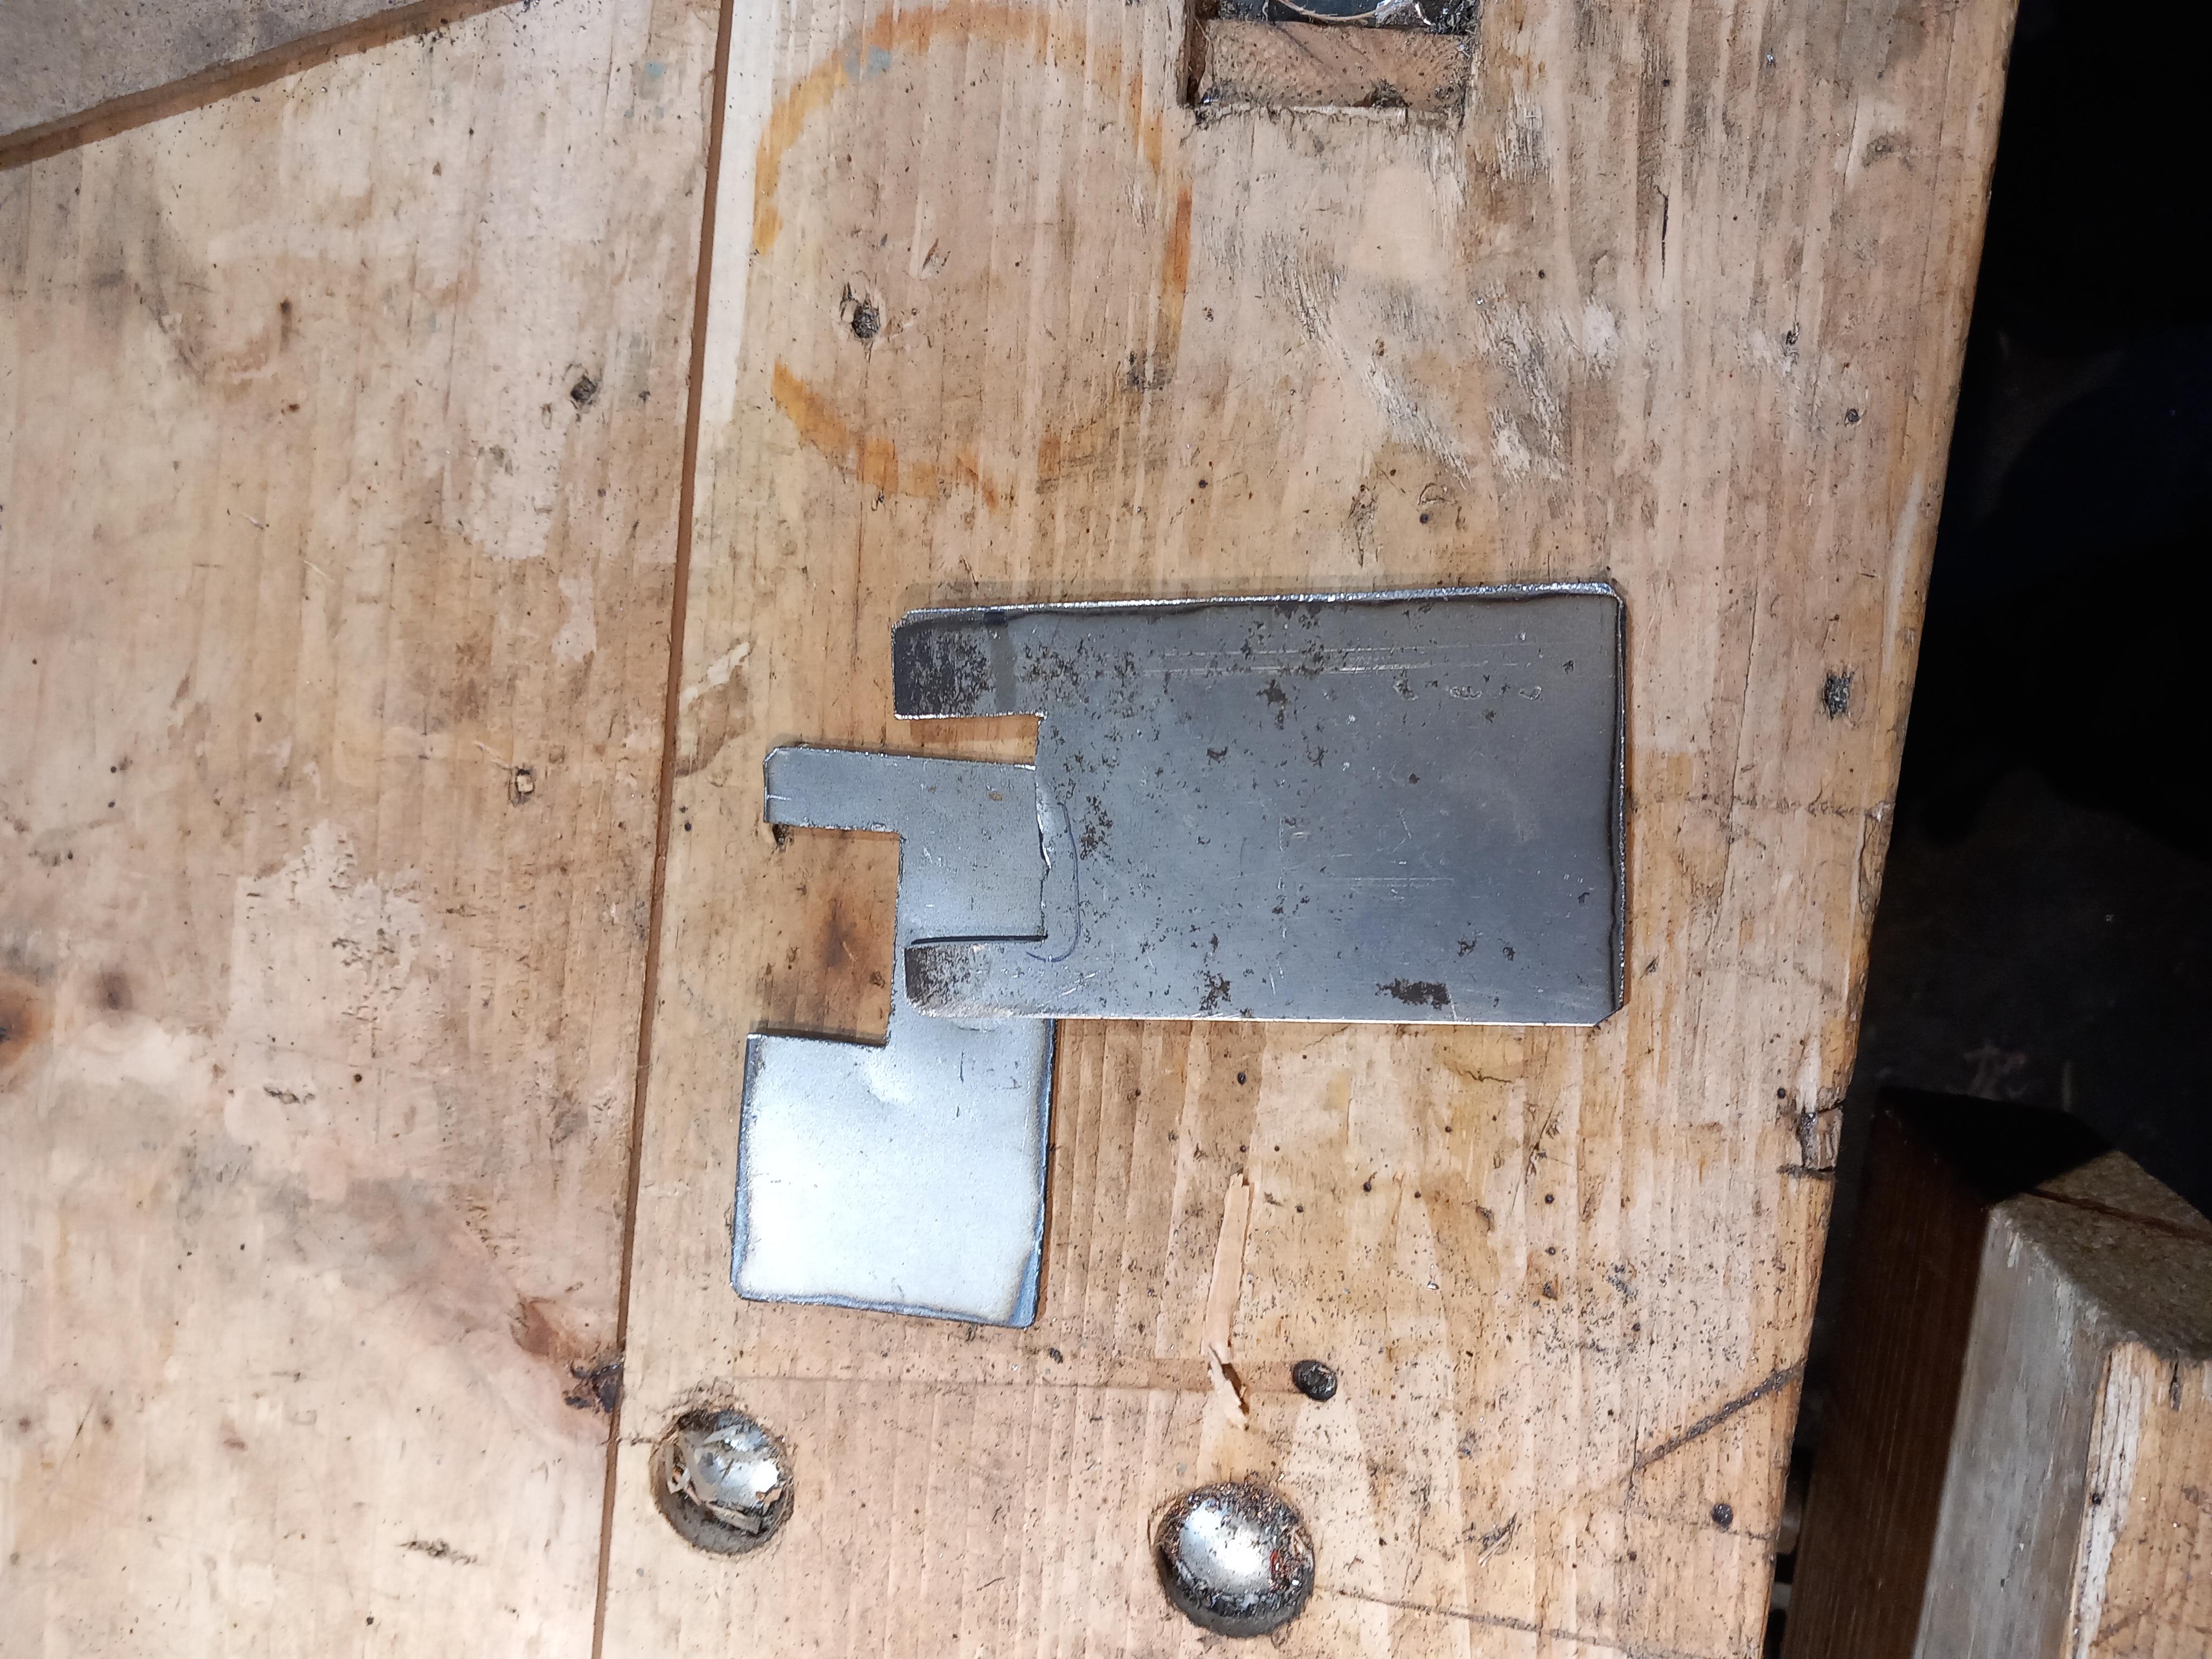
Not pretty but it worked. Until the owner sends me a better picture, here is proof that it at least exists in the right number of pieces:
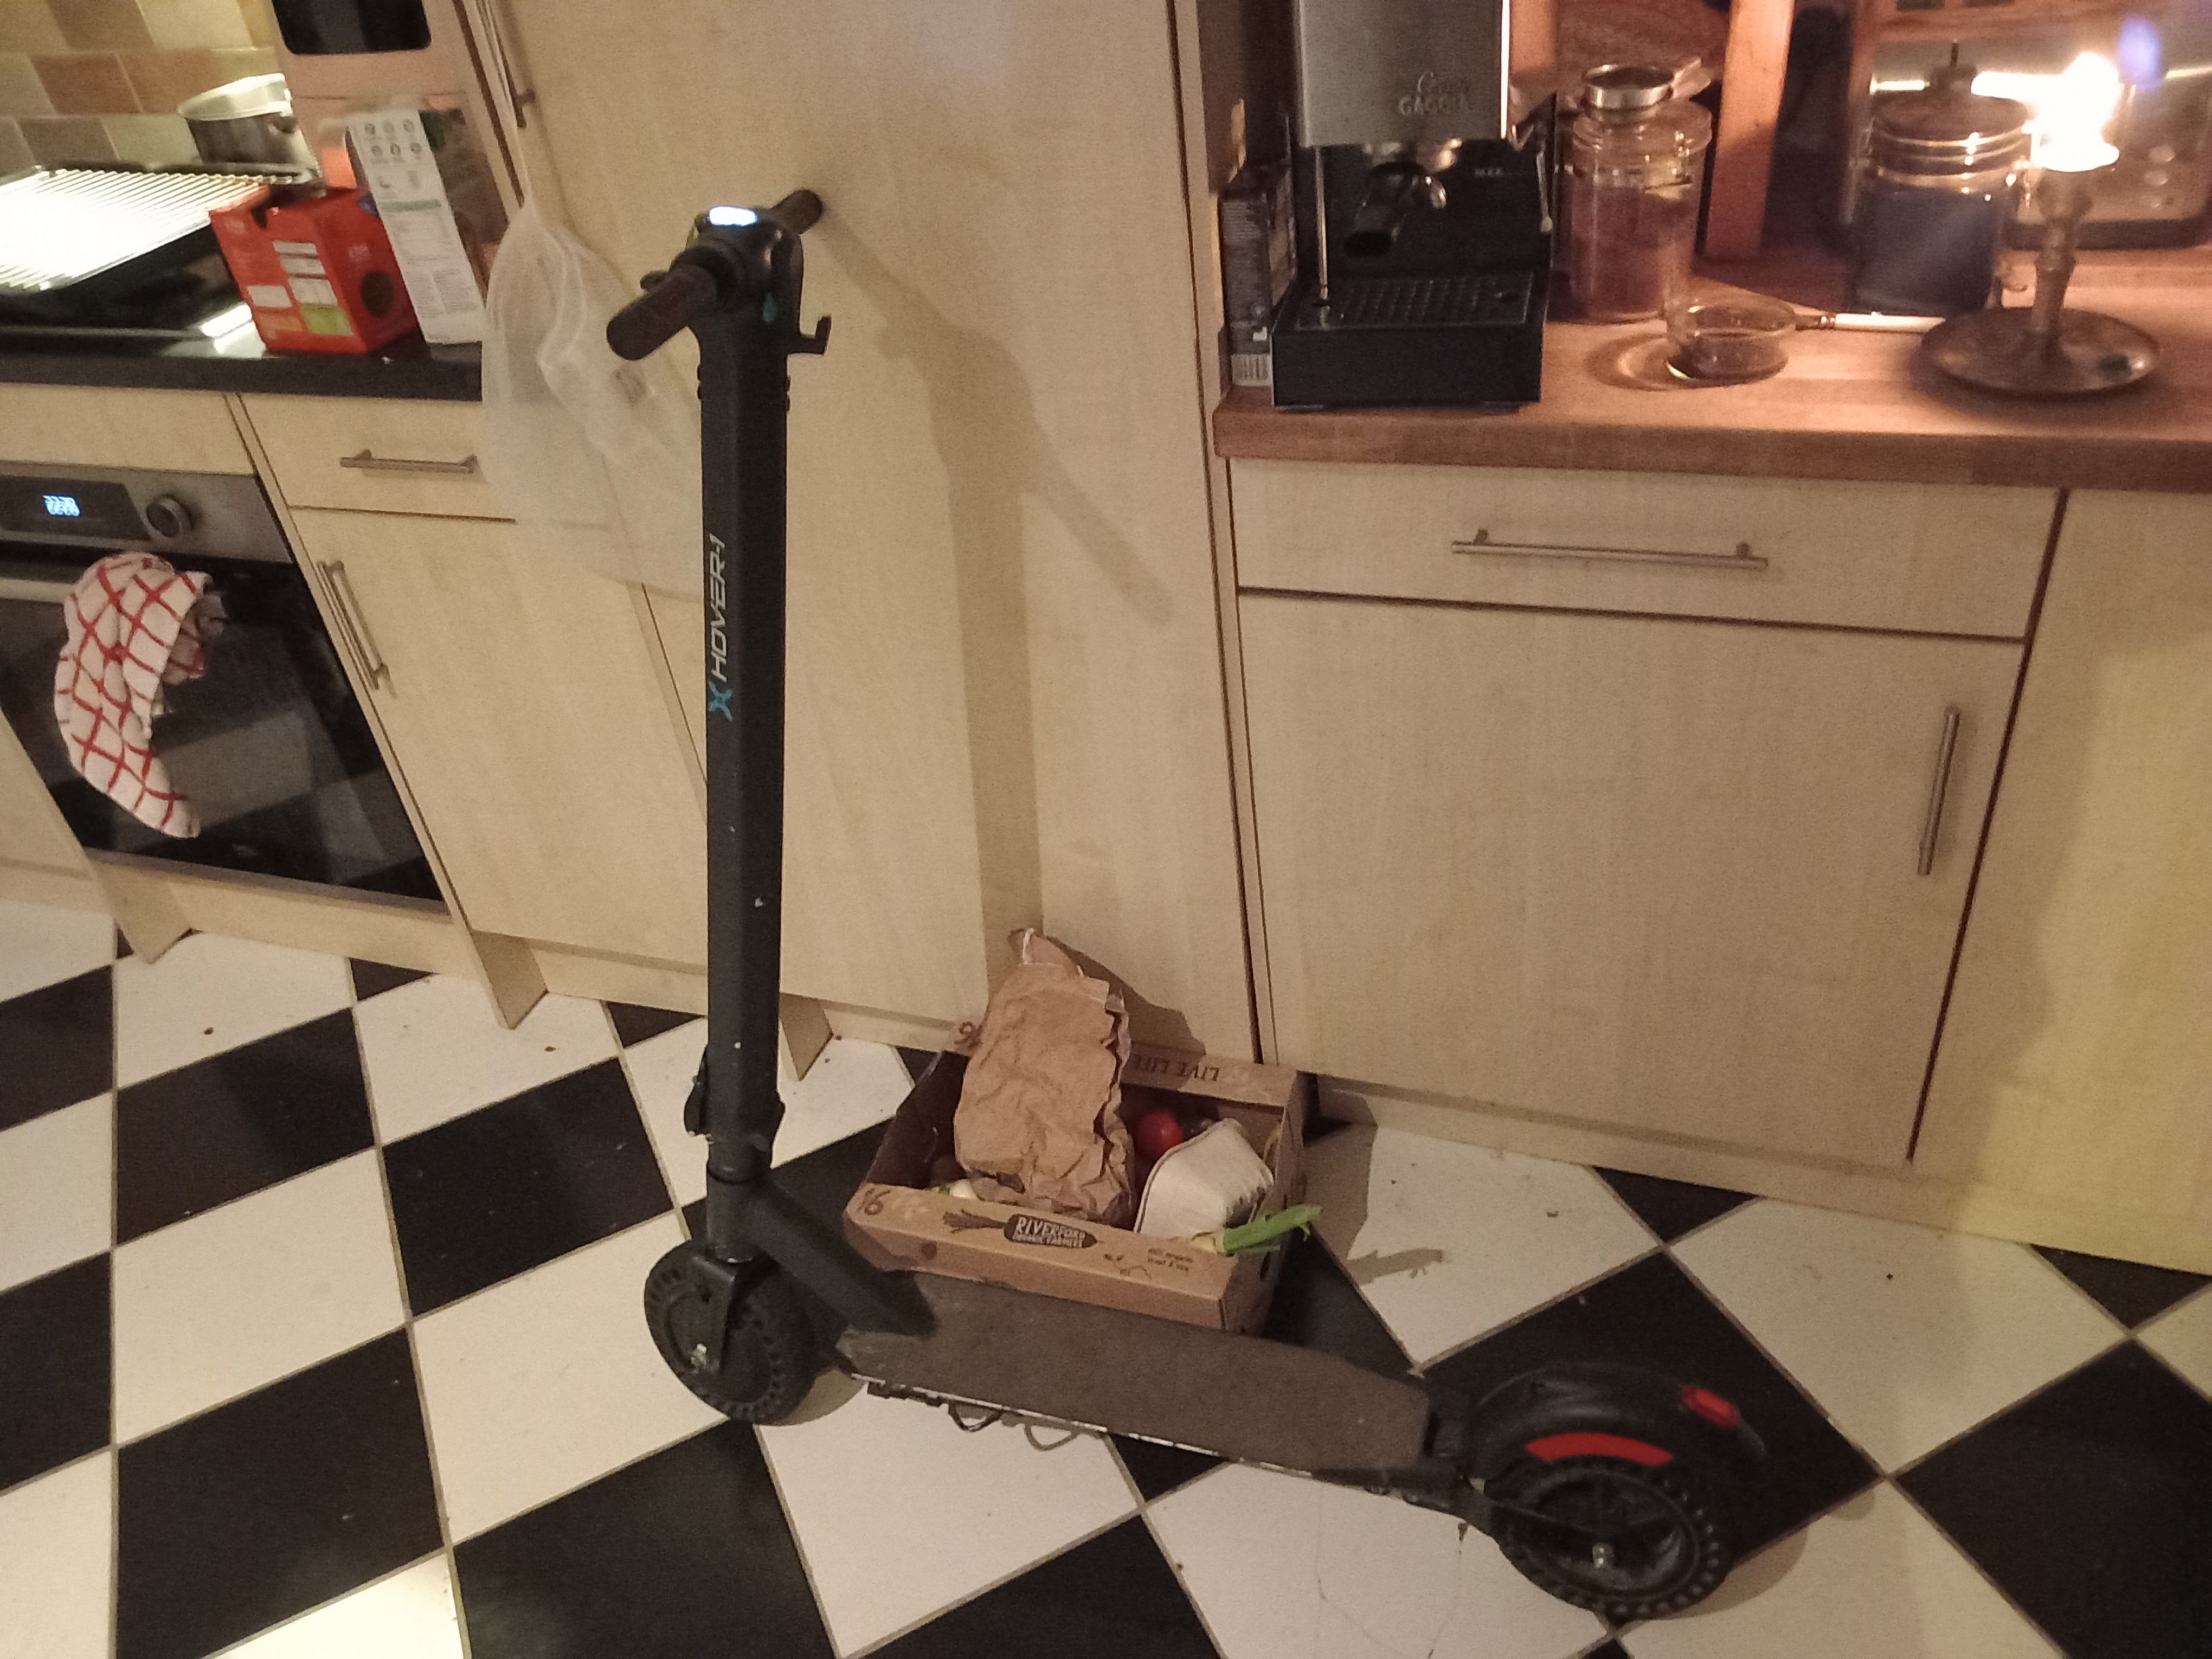
Yes, there is a box with vegetables in on the floor, a candle on the worksurface for some reason, and a grainy shot of a scooter. This is entirely unstaged. It is so unstaged I have no idea why there is a candle on the counter. There isn’t usually: it’s on the dinner table, where candles belong. But here is a scooter, and it works again. Now watch out for curbs.